
Sanding your wood sign is imperative for a good finished look. It is important to know how to correctly sand and saves you time and money. During my research, I have discovered there are many points to achieve the finish you desire as you apply your staining or polyurethane.
Sanding wood is not hard or difficult but extremely important to get a smooth finished look on your wood sign. Depending on your desired outcome it involves getting the wood sign sanded down smooth with 40 Grit to 80 Grit sandpaper and applying your polyurethane in coats.
Purpose – Why Do We Sand Our Wood Signs?
Depending on the wood sign you are wanting, the technique and outcome of the wood sign depend heavily on your sanding and preparation to receive paint, stain, and/or sealer. There are many techniques, tools, and options to consider. Why we sand our wood signs is to remove marks made by mills, dents in the wood, or uneven spots.
Types of Sand Paper – Purpose
I was able to gather a lot of information during my research on sanding wood signs. I thought I would break it down in an easy chart for anyone to understand.
| Grit | Application |
| P40-P60 | Dents, Gouges, Bumps Old Paints Rough Lumber |
| P80 | Grit For Hardwoods Shallow Scratches Saw Blade Marks |
| P120 | Grit for Softwoods Prep For Polyurethane & Paints |
| P180 | Raised Wood Grain Fibers Prep For Latex & Acrylics |
| P220 | 2nd & 3rd Level Sanding Surface Finishing Prep For Stain |
| P320 | Sanding Between Coats 3rd & 4th Level Sanding |
| P400 | Final Surface Finishing Grit Smoothing Coats Prep For Finishing Oils |
| P600+ | Prep For Polishing |
The chart above provides invaluable information regarding the purpose of sand paper in relation to wood signs. I would always go to the local hardware store and wonder what grit of sandpaper I would need. Searching for sandpaper for the most part was an experiment and didn’t have the specific knowledge.
If you would like to see what products I’m using and purchase you can see my recommended products here – “Recommended Products“
Techniques To Sanding Wood Signs
There are many techniques for sanding. It really comes down to the purpose of the wood sign and the type of wood you are sanding. In this post, I go through the basics for wood signs.
I have been sanding for years, actually since I was a kid on various projects. It is interesting to know I was doing it wrong. When I started my wood sign business I did some heavy research to ensure the best finish for my customers.
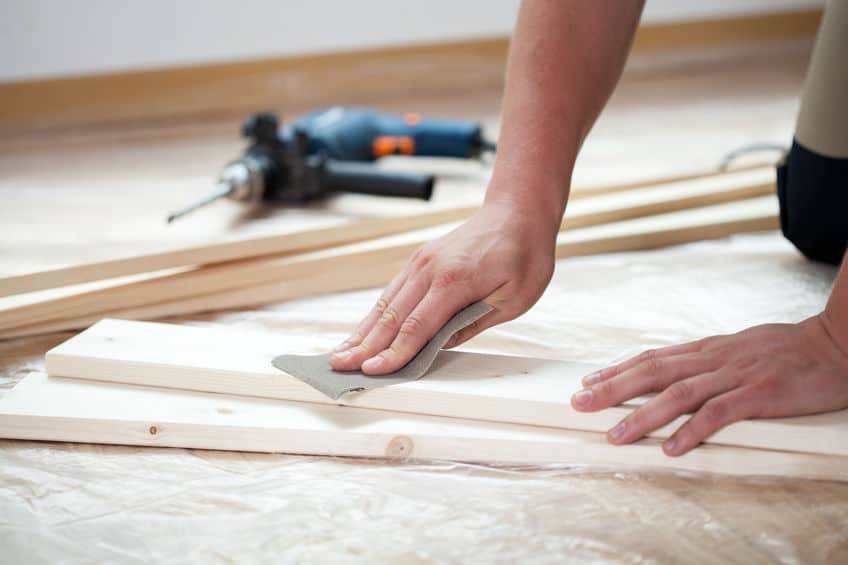
Sanding Wood Signs By Hand
Sanding by hand is an art and really takes patience and practice. Knowing a few tips on what the basics are will really help you avoid mistakes, especially if you are just starting out.
- Sand with the grain of the wood
- Use the correct grit of sandpaper
- Use a Paddock block with your sandpaper
- Sanding complex shapes
- Folding sandpaper
I have included a video from The Family Handyman which explains sanding by hand extremely well.
Sanding Wood Signs With A Tool
Using a tool to sand with can be intimidating. Which tool do I use, for what purpose, and what will be the end result. You don’t want to make a mistake on your finish job at the last minute and have to re-accomplish your wood sign from the start.
I have included a video below from the Woodworkers Guild of America which does an excellent job of explaining the different sanding tools and their purpose.
Sanding correctly is using the grit of sandpaper which is the best for the piece of wood you have to start with. Is it rough? Is it smooth? What are the finish and final products you will be going for?
Whether hand sanding or using a tool such as an orbital or palm sander you want to let the tool do the work for you. This involves not pressing too hard and typically going with the grain of the wood. If hand sanding moves the sandpaper back and forth in an even motion slowly.
If you are using a tool you will want to go slow and vary your back and forth motion. If concentrating on paint or a specific spot like paint or rough spot ensure you when you move back and forth you exceed the edge of the spot around the edges to flare it out.
Considerations For Sanding With Wood Signs
Below I have picked out the top items for consideration when sanding your wood signs. It ranges from a rough piece of wood to a smooth finished wood piece. Additionally, how do you prepare your wood signs for the rustic or distressed appearance?
Two Boards Glued Together – Often you will have a wood sign project where you will need to glue two or three boards together. Despite your best efforts, the board is never completely level when complete.
Take a scraper and remove any excess glue you may find. Using a sanding tool such as a belt sander, use a 40 or 60 Grit sandpaper and sand across the boards at a 45-degree angle in both directions to remove any layer which may be sticking up.
With an 80 Grit sandpaper on your tool go against the grain on one good sanding to remove the rest of the layer sticking up to flatten the two boards to one seamless board.
Edges – There are many ways to create edges with routers and saws. With regard to sanding, you can hand sand and/or use a tool such as an orbital or palm sander. The most common edge with sanding is a beveled edge. This reduces the sharp edge which can reduce the appeal and appearance of your wood sign.
The best way to sand a beveled edge is to use a sanding block. They are available at your local hardware store. There are two types of the sanding blocks. One is a sanding block with grit and the other you can add sandpaper by folding around the sanding block.
Using an 80 Grit sandpaper slowly go down the edge of the wood sign following the length and evenly sanding back and forth. The key to beveling the edge is even sanding. Follow up with a 120 Grit sandpaper to finish. This allows the edge to better receive stain or paint.
Distressed Appearance – Distressing a sign is a favorite for the rustic or farmhouse type of wood signs. From a sanding perspective, you can distress your wood sign in using the technique of hand sanding or tool sanding.
Hand sanding your distressed wood sign must be done prior to any sealer being applied. Once you have completed your paint and/or stain depending on your sign you can take 120 grit sandpaper with or without a block and lightly go over your sign taking small amounts of paint off the sign. This gives it the distressed look.
Using a tool to sand your wood sign for distressing it is very similar to the hand sanding technique except you would use an orbital or palm sander. Like the hand sanding, you would use a 120 grit sandpaper to lightly go across the wood sign typically with the grain, however, depending on the appearance you are going for you can go against the grain as well.
Common Mistakes Made With Sanding Your Wood Sign
Sanding this can be challenging. If the boards are rough of course you can refer to the above chart and decide the sandpaper grit you would use. The technique would be to sand with heavy grit sandpaper (Preferably 40-60 Grit) slowly across the higher board and back and forth. Be careful to not over sand, meaning your purpose is the level not create a low spot.
When sanding a common mistake is to be overly aggressive. This doesn’t work well as it creates an uneven surface or marks in the final product. You want to let the sandpaper do the work for you and take your time.
However, if you would like a more rustic look you can be more aggressive to create the worn or aged look by being aggressive with your sanding. Please be aware that being aggressive with a tool may cause a safety issue, please ensure you take precautions prior to being overly aggressive.
Sanding against the grain is another common mistake by woodworkers. Unless you are wanting to level uneven boards, as mentioned above, you don’t want to sand against the grain and if done beware of the marking on the wood which will be in the final product. If you have marks left on the wood you will want to progress to a more fine sandpaper grit to eliminate your marks.
If you like the information provided please ensure you Pin the below for this article to Pinterest and also follow me on Pinterest