Have you ever wanted to add a personalized touch to your home decor or create unique gifts? If so, why not try painting letters on wood? It’s a simple and fun DIY project that allows you to transform plain wooden letters into eye-catching works of art.
But where do you start? What are the best techniques for painting wooden letters? And what materials do you need? In this easy beginner’s tutorial, we’ll guide you through the step-by-step process of painting letters on wood. By the end, you’ll be equipped with the knowledge and skills to create beautiful painted letters that will impress everyone who sees them.
Key Takeaways:
- Learn how to paint letters on wood in a simple and mess-free way
- Choose the right paint and tools for your project
- Explore different lettering styles and techniques
- Discover creative ideas for embellishing your painted letters
- Showcase your artistic skills and style with personalized painted wood letters
Painting Letters on Wood: A Fun DIY Project
Have you ever wanted to add a personalized touch to your home decor or create unique gifts? Try painting letters on wood for a simple and enjoyable DIY project. Transform plain wooden letters into eye-catching works of art with these steps:
- Preparing the wood
- Sanding the wood
- Cleaning the wood
- Applying a primer
- Letter design
Why Paint Letters on Wood?
Painting letters on wood is more than just a creative hobby—it offers a wide range of benefits that can enhance your home decor and DIY projects. Whether you’re looking to add a personalized touch to your space or create unique signs and gifts, painting wooden letters allows you to unleash your creativity and express yourself in a truly unique way.
Here are some key reasons why painting letters on wood is a popular choice:
- Personalized Home Decor: By painting wooden letters, you can create customized pieces that perfectly match your style and preferences. Whether you want to spell out your family name, display inspiring quotes, or showcase your favorite words, personalized lettering on wood adds a warm and inviting touch to any room.
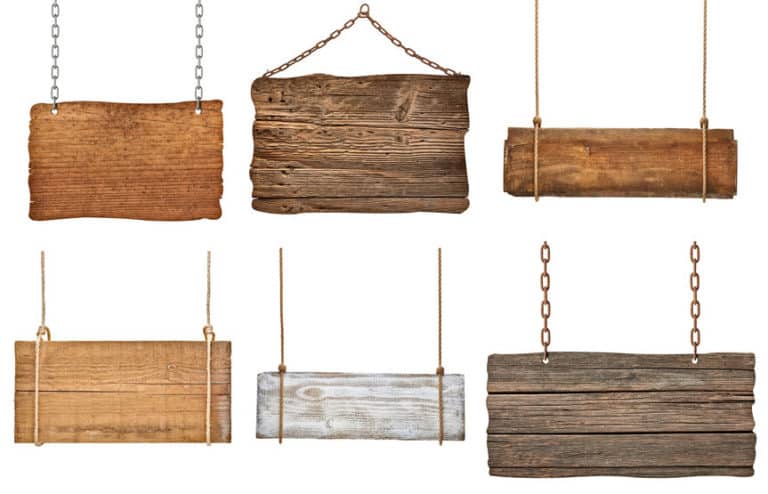
- Unique Signs: Wooden signs are a timeless and versatile way to convey your message. Whether it’s a welcoming sign for your front porch, a directional sign for a special event, or a charming wall decor piece, painting letters on wood allows you to create eye-catching and distinctive signs that make a lasting impression.
- DIY Projects: Painting letters on wood is a popular choice for DIY enthusiasts. From creating decorative wall art and home accents to designing custom gifts for loved ones, the possibilities are endless. With the right tools and techniques, you can turn simple wooden letters into beautiful and meaningful creations.
- Creative Expression: Painting letters on wood allows you to unleash your artistic side and explore different styles, colors, and techniques. Whether you prefer bold and vibrant designs or subtle and elegant lettering, this craft offers a canvas for your creative expression and allows you to bring your ideas to life.
With its versatility, charm, and endless creative possibilities, painting letters on wood is a rewarding and enjoyable activity for both beginners and experienced artists. It’s a chance to add a personal touch to your home decor, create one-of-a-kind gifts, and experience the joy of bringing your artistic visions to life.
Preparing the Wood
Before you can start painting letters on wood, it’s essential to properly prepare the surface. This involves sanding the wood, cleaning it, and applying a primer to ensure optimal paint adhesion and longevity of your artwork.
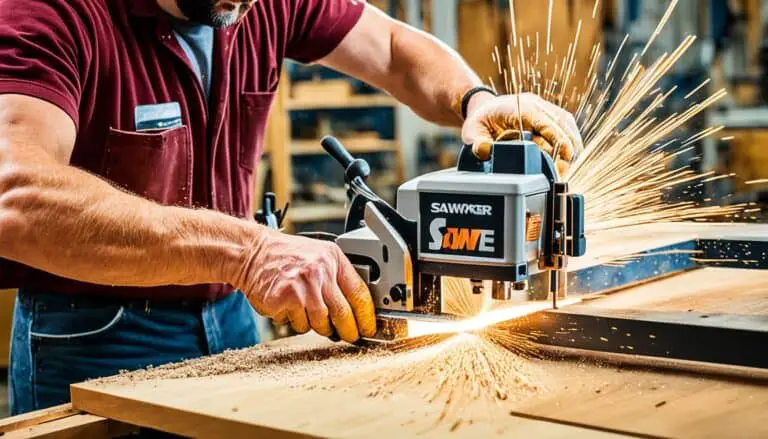
Sanding the Wood
Begin by sanding the wood to create a smooth and even surface for painting. Sanding helps remove any existing finish, roughness, or imperfections on the wood, allowing the paint to adhere better and ensuring a professional-looking result. Use sandpaper with a medium grit or fine-grit for best results. Gently sand the surface in the direction of the wood grain, ensuring you cover all areas.
Cleaning the Wood
Once you’ve finished sanding, it’s crucial to clean the wood thoroughly. Use a soft cloth or a tack cloth to remove any dust, debris, or residue left from the sanding process. Cleaning the wood ensures that the surface is free from any particles that could interfere with the paint’s adhesion.
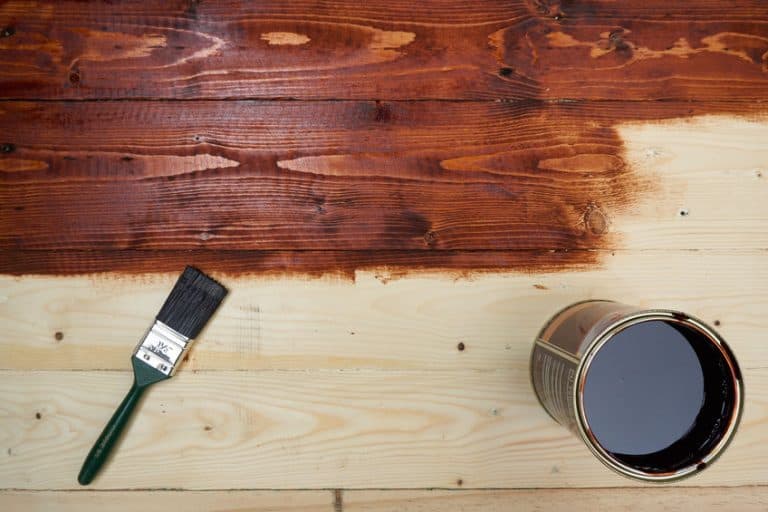
Applying a Primer
After sanding and cleaning the wood, it’s time to apply a primer. Priming the wood creates a smooth base for the paint to adhere to, enhances color vibrancy, and improves the longevity of your painted letters. Choose a primer suitable for the type of paint you’ll be using, such as a wood primer. Apply the primer evenly using a brush or roller, following the instructions on the primer’s packaging. Allow the primer to dry completely before proceeding to the next step.

| Step | Task |
|---|---|
| 1 | Sand the wood using medium to fine-grit sandpaper in the direction of the wood grain. |
| 2 | Clean the wood surface using a soft cloth or tack cloth to remove any dust or debris. |
| 3 | Apply a suitable wood primer evenly onto the prepared surface and allow it to dry completely. |
By properly preparing the wood through sanding, cleaning, and priming, you’ll ensure a smooth and durable foundation for your painted letters. This preparation process sets the stage for successfully bringing your creative vision to life on wood surfaces.
Creating the Lettering Design
Before you start painting the letters on wood, it’s important to plan and design the lettering. The design process will determine the overall look and feel of your project. There are various methods you can choose from to create the design, depending on your artistic skills and desired outcome.
Using Stencils
If you’re looking for a precise and consistent result, using stencils is a great option. Stencils provide you with pre-designed lettering templates that you can easily trace onto the wood. This method is perfect for beginners or anyone who wants to achieve a clean and professional look without the need for freehand drawing.
Tracing the Design
An alternative method is to trace the design onto the wood. This involves printing or drawing your desired lettering onto a piece of paper, placing it on the wood, and using a pencil to trace over the letters. Tracing allows for accurate placement of the letters and gives you more control over the design. It’s a popular choice for those who want to ensure precise alignment and proportions.
Freehand Lettering
If you’re confident in your artistic skills and want to add a personal touch to your project, you can try freehand lettering. This technique involves drawing the letters directly onto the wood using a pencil or a fine-tip brush. Freehand lettering allows for more artistic expression and creativity, but it does require practice and a steady hand. It’s a great option for those who want to showcase their unique handwriting or artistic style.
When choosing the method for creating the lettering design, consider your skill level, desired outcome, and the overall aesthetic you want to achieve. Don’t be afraid to experiment and mix different techniques to create a design that reflects your personal style. Remember, practice makes perfect, so don’t hesitate to try different approaches until you find the one that works best for you.
Painting the Letters
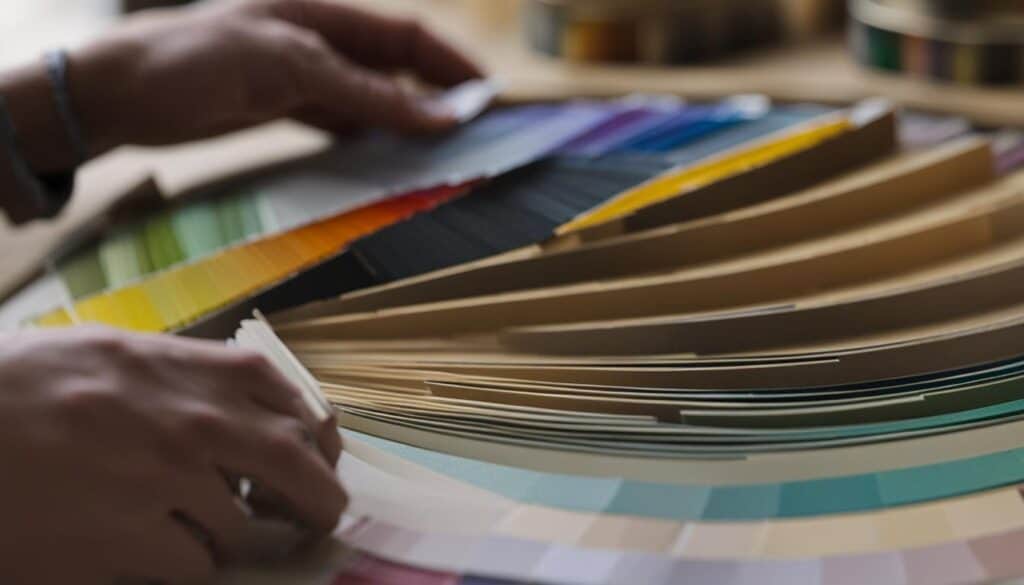
Once the design is ready, it’s time to paint the letters. Choosing the right paint is crucial for achieving the desired result. Acrylic paint is a popular choice for painting wood letters due to its versatility, wide range of colors, and ease of use.
When painting the letters, use light coats of paint to avoid drips and achieve a smooth finish. Start with a small brush with firm bristles for creating crisp lines and filling in the letters. Taking your time and applying multiple coats will help achieve better color depth and opacity.
Here are some key points to remember when painting the letters on wood:
- Choose acrylic paint for its versatility and wide range of colors.
- Use light coats of paint to avoid drips and achieve a smooth finish.
- Select a small brush with firm bristles for creating crisp lines and filling in the letters.
- Apply multiple coats for better color depth and opacity.
By following these tips, you can ensure that your painted letters on wood turn out beautifully. Don’t be afraid to experiment with different painting techniques and colors to create unique and personalized designs.
| Painting Tips | Benefits |
|---|---|
| Use light coats of paint | Prevents drips and provides a smooth finish |
| Choose a small brush with firm bristles | Creates crisp lines and fills in the letters accurately |
| Apply multiple coats | Enhances color depth and opacity |
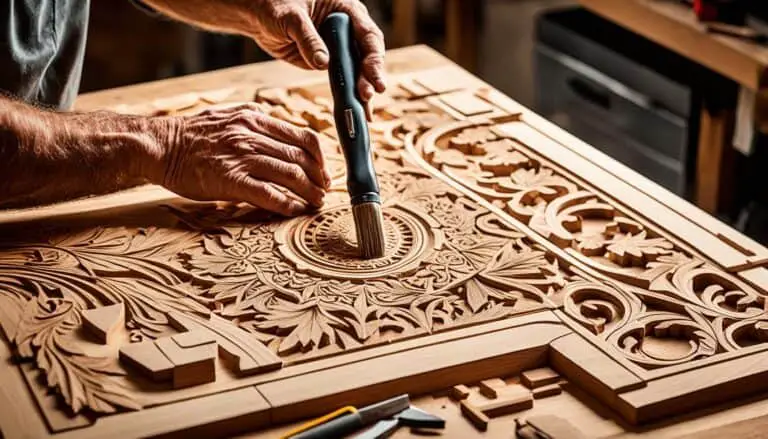
Adding Finishing Touches
To protect the painted letters and enhance their durability, it is recommended to apply a clear coat or sealant. Applying a clear coat creates a protective barrier that seals the paint and prevents chipping or fading. This step is essential for preserving the vibrant colors of your painted letters on wood and ensuring their longevity.
One popular option for a clear coat is a clear acrylic polyurethane finish. This type of finish provides excellent protection and durability. It forms a tough, transparent layer that safeguards the paint from daily wear and tear, moisture, and UV rays. Applying a clear coat not only protects the surface but also gives the letters a smooth, polished look.
When applying the clear coat, it’s important to do so in thin, even layers. This ensures that the coat is evenly distributed and doesn’t create any uneven spots or drips. Allow sufficient drying time between each coat to achieve optimal results.
Step-by-Step Guide: Applying a Clear Coat
- Start by ensuring that the painted letters are clean and free from any dust or debris. Wipe them gently with a clean cloth or microfiber cloth.
- Choose a well-ventilated area for applying the clear coat. It’s recommended to work outdoors or in a well-ventilated space to avoid inhaling any fumes.
- Shake the can of clear coat well to ensure that the mixture is thoroughly mixed.
- Hold the can of clear coat approximately 8-12 inches away from the surface of the painted letters.
- Spray a light, even layer of clear coat over the entire surface of the letters. Keep the can in constant motion to avoid overspraying in one area.
- Allow the clear coat to dry completely before applying subsequent coats. Refer to the manufacturer’s instructions for drying time.
- Repeat the process, applying additional thin coats of clear coat as desired. Each coat will further enhance the protection and durability of the paint.
- Let the final coat of clear coat dry completely before handling or displaying the painted letters.
By applying a clear coat to your painted letters on wood, you will not only protect them from damage but also enhance their overall appearance. The clear coat acts as a shield, safeguarding your hard work and ensuring that your painted letters remain vibrant and beautiful for years to come.
Displaying the Painted Letters
Once your beautifully painted letters have dried and are fully protected, it’s time to find the perfect way to display them. There are various mounting and hanging options available, depending on the size and design of your letters. Consider the overall aesthetic of your space and choose a display option that complements the style and theme.
If you have individual letters that you want to hang on a wall, you can use mounting hardware such as hooks or screws. Ensure that the hardware is appropriate for the weight of your letters and securely attach them to the wall. This will give a clean and professional look to your display.
Another option is to use adhesive strips, such as Command Strips, which offer a non-damaging and easy-to-use solution. Simply attach the adhesive strips to the back of your letters and press them onto the wall. This is especially useful if you want to avoid drilling holes or if you’re renting a space.
If you prefer a more casual and versatile display, you can prop up your painted letters on shelves or mantels. This allows you to easily change the arrangement or move the letters to different areas of your home. It’s a great option for seasonal displays or when you want to add a personal touch to a particular room.
Pro Tip: For a truly eye-catching and personalized display, consider creating a gallery wall with multiple painted letters. Choose different sizes, colors, and fonts to create visual interest. You can arrange them symmetrically or in a more eclectic manner, depending on your style and preference.
Creating a gallery wall with your painted letters can transform any wall into a unique and captivating focal point. Whether you’re showcasing family initials, inspirational words, or a personalized quote, a gallery wall adds personality and charm to your space.
Remember, the goal is to showcase your beautifully painted letters in a way that enhances their impact and complements your home decor. Get creative, experiment with different hanging options, and create a display that reflects your personal style.
Tips and Tricks for Painting Letters on Wood
Painting letters on wood can be a straightforward process, but incorporating some pro tips and expert advice can help you achieve the best results. By following these tried and tested techniques, you can avoid common mistakes and troubleshoot any issues that may arise.
1. Use Light Coats of Paint
When painting letters on wood, it’s best to apply light coats of paint rather than heavy layers. This prevents the paint from dripping or creating uneven surfaces. Allow each coat to dry thoroughly before applying the next one to achieve a smooth and professional finish.
2. Practice Proper Brush Techniques
Choosing the right brush and using proper techniques are crucial for achieving clean and crisp lines. Select a brush with firm bristles that match the size of the letters you are painting. Utilize controlled and steady strokes to avoid smudging or smearing the paint.
3. Allow Sufficient Drying Time
Patience is key when painting letters on wood. Make sure to allow each coat of paint to dry completely before applying the next one. Rushing the drying process can lead to color blending and uneven surfaces. Follow the paint manufacturer’s instructions for drying time to ensure the best results.
4. Avoid Common Mistakes
To achieve professional-looking results, it’s important to avoid common mistakes that can compromise the quality of your painted letters. Some common errors include:
- Applying too much pressure, which can cause the paint to smudge or bleed.
- Using the wrong type of paint for wood surfaces, resulting in poor adhesion or peeling.
- Skipping the surface preparation steps, such as sanding and priming, which can affect the paint’s durability.
By being aware of these common mistakes, you can take the necessary precautions to ensure a successful letter painting project.
“Remember, the key to painting letters on wood is taking your time and practicing proper techniques. Don’t rush the process and enjoy the creative journey.”
| Pro Tips | Expert Advice |
|---|---|
| Use light coats of paint to avoid drips and achieve a smooth finish. | “Choose the right brush for the size of the letters and practice controlled brush strokes for clean lines.” – Emily Johnson, Professional Artist |
| Allow sufficient drying time between coats to prevent color blending or smudging. | “Invest in high-quality brushes and paints for the best results. It’s worth the extra cost.” – Mark Thompson, Experienced Woodworker |
| Avoid applying too much pressure when painting to prevent smudging or bleeding of the paint. | “Sanding the wood properly before painting ensures a smooth surface and enhances the paint’s adhesion.” – Sarah Brown, DIY Enthusiast |
| Take the time to properly prepare the wood surface through sanding and priming. | “Experiment with different lettering styles and techniques to add a unique touch to your painted letters.” – Lisa Anderson, Lettering Artist |
Exploring Creative Ideas for Letter Painting
Painting letters on wood opens up a world of creative possibilities. Beyond traditional lettering, you can explore various decorative techniques and embellishments to add a unique touch to your painted letters. Let your imagination run wild with these letter painting ideas:
1. Decorative Techniques
Add interest and depth to your painted letters by experimenting with decorative techniques. Consider using brush strokes, splatter effects, or gradient color transitions to create visually stunning designs. You can also try distressing or antiquing techniques to give your letters a vintage look. The possibilities are endless!
2. Embellishments
Take your painted letters to the next level by incorporating embellishments. From beads and sequins to ribbons and fabric, there are countless ways to add texture and dimension to your letters. Consider attaching small objects that represent your theme, such as seashells for a beach-inspired design or miniatures for a whimsical touch.
3. Lettering Styles
Explore different lettering styles to give your painted letters a distinct personality. From elegant script fonts to bold block letters, there are plenty of options to choose from. You can also mix and match different lettering styles within a single design for a unique and eye-catching result.
Remember to experiment and have fun with your letter painting projects. The key is to let your creativity shine and express your unique style. So grab your brushes, choose your colors, and start painting your way to lettering perfection!
Painting Wood Letters for Different Projects
Painting wood letters offers endless possibilities for a variety of projects and applications. Whether you are decorating a nursery, creating personalized home signage, searching for unique gift ideas, or planning holiday decorations, painted wood letters can add a personal touch to any space or occasion.
When embarking on a wood letter painting project, consider the theme and purpose you have in mind. Choose colors, designs, and lettering styles that align with your vision and complement the overall aesthetic of the project. With the versatility and charm of painted wood letters, you can transform ordinary objects into extraordinary pieces of art.
For nursery decor, painting wood letters allows you to create customized name signs, charming wall art, or playful accents that reflect the personality of the child. Choose soothing pastel colors or vibrant hues to match the nursery theme, and incorporate whimsical designs or patterns to make the letters visually appealing and engaging.
Home signage becomes truly personalized with painted wood letters. Whether you want to display your family name, welcome guests with a warm greeting, or label different areas of your home, painted wood letters can add a touch of elegance and uniqueness to your space. Choose sophisticated colors, elegant fonts, and decorative elements that enhance your home’s style and create a lasting impression.
| Project | Ideas |
|---|---|
| Nursery Decor | Customized name signs Charming wall art Playful accents |
| Home Signage | Family name displays Warm greetings Area labeling |
| Gift Ideas | Personalized monograms Meaningful quotes Memorable dates |
| Holiday Decorations | Festive phrases Themed designs Ornament embellishments |
When it comes to gift ideas, painting wood letters allows you to create truly meaningful and unique presents. Personalized monograms, heartfelt quotes, or memorable dates can be beautifully showcased on wooden letters. Consider the recipient’s taste, interests, or life events to create a gift that is truly special and heartfelt.
Holiday decorations become more inviting and festive with painted wood letters. Elevate your seasonal decor by incorporating festive phrases, themed designs, and ornament embellishments. You can create charming holiday signs, wreaths, or table centerpieces that add a personalized and whimsical touch to your home during special occasions.
With each project, let your creativity shine by exploring different decorative techniques, adding embellishments, or experimenting with various lettering styles. The only limit is your imagination, and the possibilities are endless when it comes to painting wood letters. Embrace the charm and versatility of this craft and let it inspire you to create beautiful and personalized pieces of art.
Troubleshooting and FAQs
While painting letters on wood is a relatively straightforward process, you may encounter some common issues or have questions along the way. This section provides troubleshooting tips and answers to frequently asked questions to help you navigate any challenges you may face. From addressing paint smudges or bleeding to tips for fixing uneven lines or achieving better adhesion, these insights will assist you in achieving the best possible results.
Common Painting Issues
When painting letters on wood, it’s not uncommon to encounter a few hiccups along the way. Here are some common painting issues and how to troubleshoot them:
- Paint smudges: If you accidentally smudge the paint on your wooden letters, wait for it to dry completely and gently sand the affected area. Then, repaint the smudged section using light coats of paint.
- Paint bleeding: To prevent paint from bleeding under the edges of your stencil, ensure that your stencil is securely pressed against the wood surface. You can also use painter’s tape to mask the areas around the stencil.
- Uneven lines: If your painted letters have uneven lines, try using a smaller brush for more control or consider using a stencil to achieve consistent lines.
- Poor adhesion: If the paint is not adhering well to the wood surface, make sure the wood is properly cleaned and sanded before painting. Applying a primer can also improve adhesion.
Frequently Asked Questions
Here are answers to some frequently asked questions about painting letters on wood:
- Can I use watercolor paint on wood letters? – Watercolor paint is not suitable for painting on wood as it tends to absorb and warp the wood surface. Acrylic paint is the recommended choice.
- How do I clean my paintbrushes after painting? – Rinse your paintbrushes thoroughly with warm water and mild soap immediately after painting. Gently massage the bristles to remove any paint residue, then rinse and reshape the bristles before allowing them to air dry.
- Should I seal the painted letters with varnish? – It is recommended to apply a clear coat or sealant, such as varnish or clear acrylic polyurethane, to protect the painted letters and enhance their durability.
- How long does it take for the paint to dry? – The drying time can vary depending on the type of paint used and environmental conditions. Acrylic paint usually dries within a few hours, but it’s best to allow at least 24 hours of drying time before handling or sealing the painted letters.
Troubleshooting Tips
Tip #1: Use light coats of paint to avoid drips and ensure a smooth finish.
Tip #2: Let each coat of paint dry completely before applying the next one to prevent smudging or lifting of the previous layers.
Tip #3: Practice proper brush techniques, such as using thin strokes and maintaining consistent pressure, for better control and smoother lines.
Tip #4: If you’re experiencing paint bleeding, use a stencil adhesive or painter’s tape to secure the stencil in place and prevent paint from seeping underneath.
By following these troubleshooting tips and addressing common painting issues, you’ll be able to overcome any challenges that may arise while painting letters on wood. Remember to take your time, experiment, and have fun with the process!
Best Practice Resources
When discussing best practices for sealing painted letters, alternative paint options, or advanced decorative techniques here are some authoritative sources:
- U.S. Environmental Protection Agency (EPA):
- Source: The EPA provides information on environmentally friendly sealants and paints, ensuring safety and compliance with regulations.
- Link: EPA’s Guide to Choosing Low-VOC Paints and Sealants
- Harvard University – Environmental Health & Safety:
- Source: Harvard University’s Environmental Health & Safety department offers guidelines on selecting low-toxicity paints and sealants for indoor projects.
- Link: Harvard University EHS – Paints and Coatings
- U.S. Environmental Protection Agency (EPA) – Indoor Air Quality (IAQ):
- Source: EPA’s IAQ program offers tips for reducing indoor air pollution from paint and sealant products, promoting healthier indoor environments.
- Link:EPA’s IAQ – Paints, Stains, and Sealants
- National Institute of Standards and Technology (NIST):
- Source: NIST offers standards and guidelines for quality control and performance testing of sealants and paints.
- Link: NIST’s Standards for Paints and Coatings
Conclusion
Congratulations on completing the painting process for letters on wood! By following the step-by-step guide provided in this article, you now have the knowledge and skills to create beautiful and personalized painted letters. Remember to recap the various stages: preparation of the wood surface, designing the lettering, selecting the right paint and painting techniques, applying finishing touches, and displaying your completed letters.
As you continue on your letter painting journey, don’t be afraid to explore your creativity and try new ideas. Use different lettering styles, experiment with decorative techniques and embellishments to make your painted letters truly unique. Express yourself through this craft and add a personal touch to your home decor or create thoughtful gifts for your loved ones.
So, gather your painting supplies, choose your favorite colors, and start letter painting on wood. The possibilities are endless, and the results will surely bring joy and satisfaction. Happy painting!
FAQ
What are the benefits of painting letters on wood?
Painting letters on wood allows for creative expression, customization, and the ability to create unique signs or add a personal touch to home decor.
How do I prepare the wood for painting?
Start by sanding the wood to create a smooth surface, then clean it to remove any dust or dirt. Finally, apply a primer to ensure the paint adheres properly.
What methods can I use to create the lettering design?
You can use stencils for precise results, trace the design onto the wood for accuracy, or try freehand lettering for more artistic expression.
What type of paint should I use for painting letters on wood?
Acrylic paint is a popular choice due to its versatility, wide range of colors, and ease of use.
How do I protect the painted letters on wood?
Apply a clear coat or sealant, such as clear acrylic polyurethane finish, to create a protective barrier and prevent chipping or fading of the paint.
How should I display the painted letters?
You can mount them using hardware or adhesive strips, or simply prop them up on a shelf. Consider the overall aesthetic of your space and choose a display option that complements the style and theme.
What tips can help me achieve the best results when painting letters on wood?
Use light coats of paint, practice proper brush techniques, and allow sufficient drying time between coats. Avoid applying too much pressure or using the wrong type of paint.
How can I explore creative ideas for letter painting on wood?
Try different decorative techniques, incorporate textures, colors, or patterns, add hand-drawn elements or embellishments like beads or glitter to make your painted letters unique.
What projects can I use painting wood letters for?
Painting letters on wood is suitable for creating nursery decor, personalized home signage, unique gifts, and holiday decorations.
What are some common troubleshooting tips and FAQs for painting letters on wood?
Troubleshooting tips include addressing paint smudges, bleeding, fixing uneven lines, and achieving better adhesion. Frequently asked questions cover common issues and concerns throughout the painting process.
How can I conclude my wood letter painting journey?
Recap the painting process, offer final thoughts, and encourage readers to embark on their own letter painting projects to express their creativity.