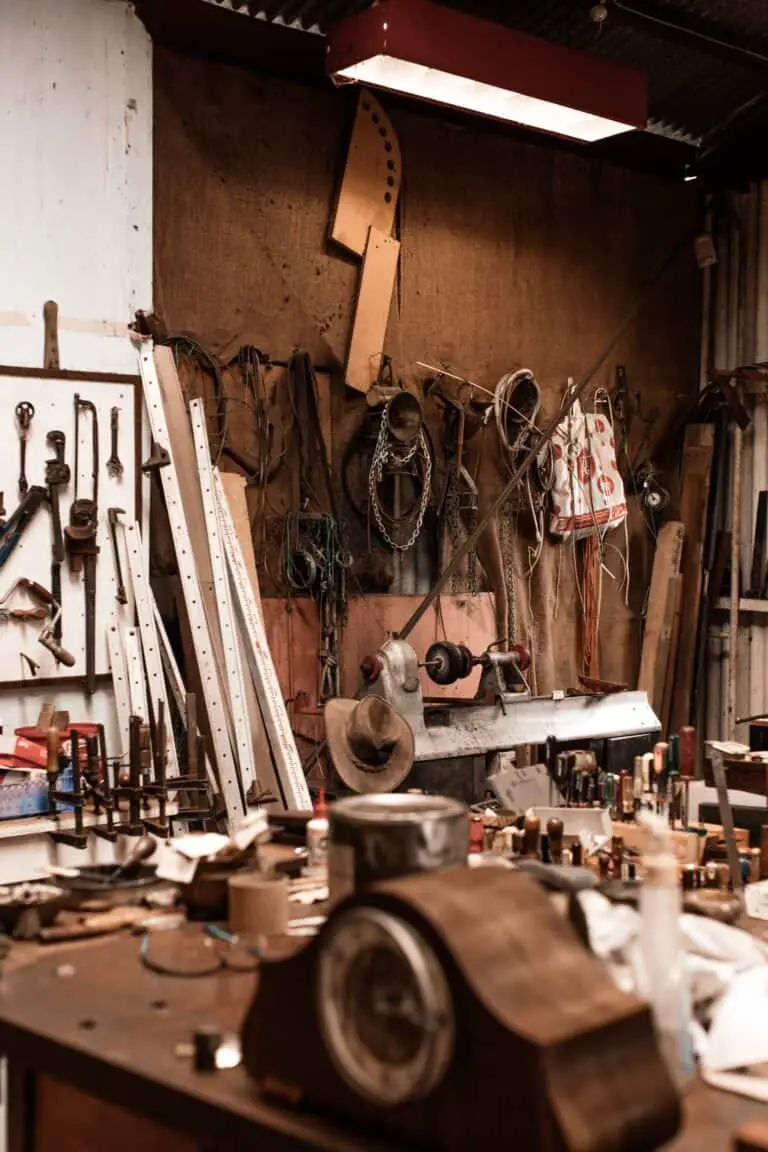
As wood sign makers we encounter many scenarios in our woodshop that we can consider challenges. Some of them we anticipate and some we don’t. I thought I would address the most prevalent ones which would impact the majority of the woodshops for wood sign design and creation.
A good woodshop layout can be complicated to simple. You need to approach your woodshop from mainly a purpose perspective, such as what type of wood signs are you creating and what do you basically need. Due to limited space and budget, you may need to grow slowly, look at your woodshop the same way.
Where do you start when you approach the challenges with your wood sign-making woodshop layout. My wood sign business woodshop started with a small bench and grew from there. You will always need to evaluate the space, tools, and budget which will work for you.
1. Limited Shop Space Or Awkward Shop Space

Not everyone has a woodshop for making wood signs which is extremely large. Of course, that would be a dream for most of us due to the space available and the possibilities of what you can create. Then you have the opposite which is where most of us are and common, with limited space such as a basement, garage, or even a small shed.
The importance here is to acknowledge the limited space and what you can do to make wood signs. You have your tools and supplies where do you put them? What is the best from a safety perspective? You don’t want to be so squeezed that you can’t turn around or you are constantly stepping over things.
The solution to a great small workshop layout for making wood signs is to organize your woodshop with compact tools and supplies which will fold up and/or be placed in an organized fashion on the wall. This allows you to utilize the space for dual purposes and also forces you to clean up after your wood sign carvings and finish work.
Mobile carts, tools, and workbenches also are a great idea for being able to compact your woodshop and your wood sign creation tools. The key is to identify your space and make the most of it even if you are bringing out each tool as you step through your wood sign creation process.
Flow in a woodshop is very important and also the ability to work safely. The video below provides great ideas for your small space woodshop.
2. Lighting – What is the best lighting for a woodworking shop?

When working in a woodshop for making wood signs or any woodshop lighting is crucial. The reason it is crucial is from a safety perspective, eye strain, and overall operation of your woodshop tools.
Safety of course is critical due to all of the possible hazards in your woodshop. Tools, walking between your tools such as saws, hoses from dust collection on the floor, and also the safe operation of your tools.
It is also key from the perspective of eye strain. A well-lit woodshop will allow you to see the saw blades more clearly as well a measure marks and how your wood sign product looks during the process of making them.
In recent years the fluorescent light has taken a back seat to the new LED lighting. LED is more efficient from a power perspective and provides a better range of lighting. Additionally, LED lighting has decreased in price to make them more affordable.
Depending on the environment your woodshop is in a garage, shed or even a basement lighting is very important. LED provides many configurations which will benefit you. The options include chaining many of them together for one circuit as well as direct hardware or plug options.
What kind of light is best for your woodshop? Not getting into the great detail of the light spectrum, the best answer is a combination of natural light and LED. When looking at your LED lighting options look for around 5000 kelvin. This is a happy medium that allows for a bright enough light to see the details but not enough to be really bright and annoy you.
You may also look for the placement of the lights to benefit you. Two considerations are paramount, Shop layout and Shop Dimensions. The perfect combination.
If you are looking for a good calculator for the number of lumens here is a free calculator – LUMENS/WATT CALCULATOR
To see a great example of what to consider and what to do for re-configuring your woodshop lighting I provided the below video.
If you are looking for in-depth information for lighting your woodshop take a look at our post “Avoid Mistakes – The Best Wood Shop Lighting Ideas“
3. Dust Collection – What’s the best dust collector for a small shop?
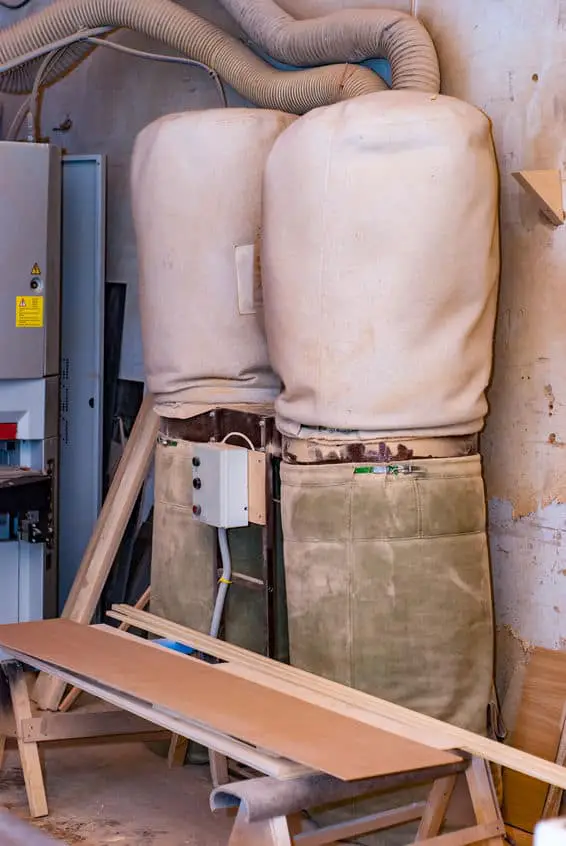
If you have a woodshop you will eventually need a dust collection system. Why do you ask? A dust collection system is an air quality system to remove dust particles from the air when you are sanding, cutting, and producing wood signs.
Wood Dust collection systems can be categorized into several large and fine particles. The biggest volume of dust is the large particles. This is reflected by the dust from routing edges, CNC, and saws for example. A good dust collection system connects by way of a duct or hose system connected to your tools removes the dust to a dust collector which you can dispose of by way of airflow.
There are many types of dust collection systems on the market and choosing the best one for your woodshop can be a challenging effort. To help with the choice of a dust collection system we need to consider your requirements.
First, consider what tools you have in your woodshop which you will want to connect to the dust collection system. What CFM (Cubic Feet Per Minute) will you need to remove dust. Each tool has a specific CFM and you will need to have enough CFM in the dust collection system to totally remove the dust to the collector.
Next, you need to be aware of static pressure (SP) which can be created in the dust collection system by friction. Static pressure can greatly impact the ability of your dust collection system. A good way to relieve the static pressure is to not incorporate a lot of elbows or 90 degree turns in your duct system.
Diagram your wood sign shop and floor space. This diagram will show each of your tools, workspace, and size of your woodworking tools. This will help you design and plan your dust collection system, ductwork, and size. It will be the main focus of your dust collection system design to help you design your system with the least about 90 degree turns and bends in your ductwork.
*Note: you may also want to look at expansion, keep in mind you may need to upgrade but if you plan ahead of time it will save time and money.
Woodworking dust for wood sign creation will need 4500 (Velocity in Branches ) FPM in the ducts typically. This is important to note as you will need to determine the size of your ducts.
You will need also to identify your primary wood tools. Typically these woodworking tools work or are operating at the same time. It is important to know this when designing your dust collection duct size.
Lastly, you will need to consider maintenance. Where you place your ductwork and dust collection system needs to be accessible so you can clean and change out your collection bags.
If you would like to know a little more about a dust collection system for a small woodshop take a look at the below video.
If you are looking for in-depth information for dust collection in your woodshop take a look at our post “What’s The Best Dust Collector For A Small Shop“
If you would like to see what products I’m using and purchase you can see my recommended products here – “Recommended Products“
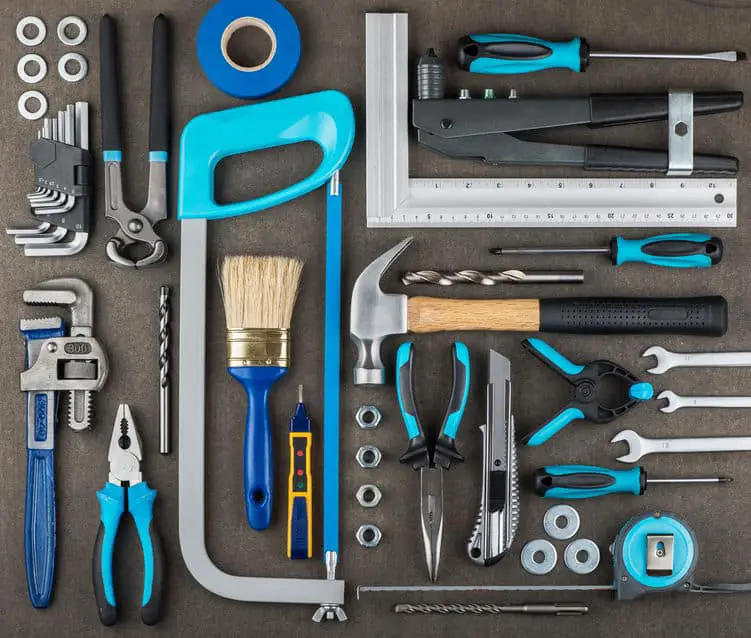
4. Woodworking Tools Maintenance And Organization
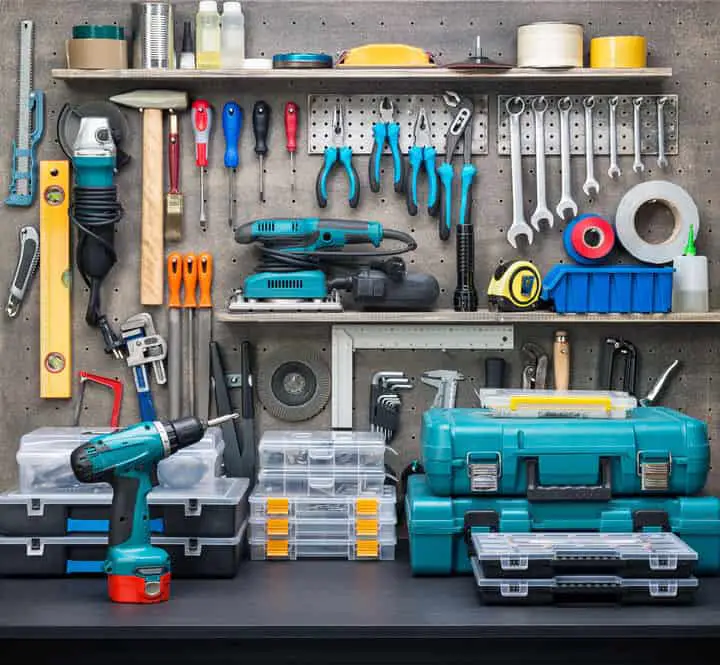
Tools, tools, and more tools, each woodworking shop includes lots of tools. These include hand tools, machines, and specialized tools. How you perform maintenance, clean, and organize your woodshop layout is crucial to them lasting long and perform optimally for you.
The old phrase holds true – “You take of them, they will take care of you”. Tools are crucial to your woodworking and woodshop success and you need to ensure they are clean, organized, and maintained.
Each woodshop tool such as saws, jointers, planers, and table routers require their own maintenance. You will need to occasionally clean, lubricate and possibly replace parts, belts, and moving items as time goes by.
The key to this process is to create a schedule or checklist and place it in a good spot, such as by the door or on a board, which reminds you to perform this maintenance. This can be done on a monthly, weekly, or daily basis depending on the use of the tool or manufactures recommendations.
Another consideration is the organization of your tools. We all have wood shops that can get cluttered due to the projects we are working on. The key is to develop a good organizational plan for ease of use and most importantly finding your tools.
This includes everything from the placement of your main saws to the placement of your hand woodworking tools. We will get into the organization of your woodshop tools more below.
Looking for the best Shoes or Boots for your Wood Shop? – Check out our article – “What Shoes To Wear For Woodworking”
5. Scrap Wood – What To Do With Scrap Wood

A common side effect of having and working in a woodshop is scrap wood. They come in all different sizes and shapes, species of wood, and seem to just collect around the woodshop.
What do you do with the scrap wood which seems to take over your woodshop? Additionally, look at the money sitting there in that wood which you don’t want to get rid of. There are a couple of options you have with regard to scrapping wood.
Store away – You can build a storage area for your scrap wood which separates by size, species, and types of scrap wood. This cart can be fixed to a wall or on caster wheels for mobility. This option makes the scrap wood more manageable and easy to use for smaller projects.
Small Projects – The scrap wood in your woodshop is an excellent opportunity for small wood projects. The wood is more or less free and can be an extra money maker.
Either way, it goes your scrap wood although irritating can be a great money maker if you look at it differently. Saving your scrap wood can be a great way to have that extra piece to add to a bigger project or to create smaller projects.
6. Big Wood Shop Tool Organization and Placement

Woodshop tool organization and placement can be challenging. Typically these are the woodshop tools you use the most and also cost you the most. It is important to know with the space you have in your woodshop where to place it.
Typical questions asked for woodshop tool placement are how do I organize my woodshop and what is the ideal size for a woodworking shop which impacts the woodshop tool placement.
Important things to consider for woodshop tool placement are the use of the tools, power, and safety.
Use of the woodshop tools – With bigger woodworking tools such as table saws you need a lot of space. Many woodworkers place this in the center of the room to allow for large wood sawing. If you are limited on space you can also create a make-shift cover for your table saw to multipurpose your table saw as a workbench.
If the woodshop tool is smaller you can place it next to a wall or incorporate it into a woodworking bench such as the miter saw. Since miter saws crosscut lumber it is an excellent candidate for incorporation into a workbench saving space.
Power – Power is a huge consideration for your woodshop tools. Does your woodshop have enough power to support the woodshop tools you have and also can you run multiple woodshop tools at the same time? If your wood shop has the power then you need to ensure you are placing the power connections next to the woodshop tools. The main concern is not having a bunch of cables running across the floor which is a tripping and safety hazard.
Safety – The placement of the tools in your woodshop is critical to safety. You don’t want to create small passageways between saws and other woodshop tools. Additionally, you will want to consider in your planning the ability to exit quickly in the event you need to get out of the woodshop.
7. Wood Shop – Shelf Organization

Woodshop space is premium. Another great idea is to install woodshop shelving. Woodshop shelving allows you to store tools, accessories, and other woodshop items in an organized fashion.
The key to shelving in your woodshop is to get them close to your work area so you have quick access to the tools and accessories. A great suggestion is to group tools and accessories beside the workstation. If you have a sanding station for example you will need to store all of your sanding supplies on the shelf which would be close to that station.
There are many shelves for your woodshop organization. Another suggestion is if you use many small pieces you may want to create a framework for accepting plastic buckets. More specifically for screws, nails, and fasteners which are very small and irritating to store. These can be incorporated in the wall or on the wall for ease of access.
Below is a great video on small woodshop shelving ideas.
Shelves don’t have to be fancy to work, but they do have to be functional. Be creative and look at the ease of use in your woodshop, create and place woodshop shelving that works for your workflow in your woodshop.
8. Wood Shop – Storage of Equipment
Interestingly enough when I researched the storage of the woodshop equipment I didn’t find a lot of information. As I looked at my woodworking woodshop I noticed a lot of my woodworking equipment did not have a place to be stored. And when I did store them, I didn’t remember where I put them due to the fact I don’t use them very often.
Although these woodworking tools are important, I found if I didn’t use as much and just stowed them away. If you are looking to resolve this issue, where you forget about those tools and equipment, store them in an open shelf or cabinet.
Another suggestion is to label them with bright tape and write on that tape what category or specific name of the woodworking tool and equipment. This helps immensely, not only does it remind you of the tool or equipment, but helps you organize to make the space more efficient.
Mobile cabinets are key here also. If you are short on space in your woodshop mobile carts are the best way to go for storing your woodshop tools and equipment. This allows you to store your woodshop tools and equipment and use the wood tabletop as your workbench.
Looking for info on How To Store Sealer? – Check out our article – “How To Store Wood Sealer”
9. Wood Shop Air Filtration

Woodshop air filtration is a crucial consideration for your woodshop. Most folks think if I have a dust collection system I am good to go. Although dust collection is very important in removing most of your sawdust and particles it most likely will not filter fine particles.
Dust that is 10 microns or smaller is not seen by the human eye and can cause the most concerns. You need to look at the whole spectrum of dust particles to completely alleviate any concerns with dust in your woodshop.
So a complete system would include your dust collection system and an air filtration system. What is an air filtration system? They typically hang from the ceiling so it is not in your way and provides cleaner breathing air in your woodshop.
How do I calculate a good air filtration system for your woodshop? Here is a great formula so your air filtration system is capable to filter the air in your woodshop 6 to 8 times an hour.
Wood Shop Air Filtration Formula – volume = length x width x height – then multiply the volume by the number of cycles (start with 6 cycles for one person). Lastly divide by 60. Most air filtration systems are rated by CFM (Cubic feet Per Minute). Dividing by 60 converts to minutes.
Looking for information on how to maintain your Air Compressor? – Check out our article – “Wood Shop Air Compressor – How To Maintain”
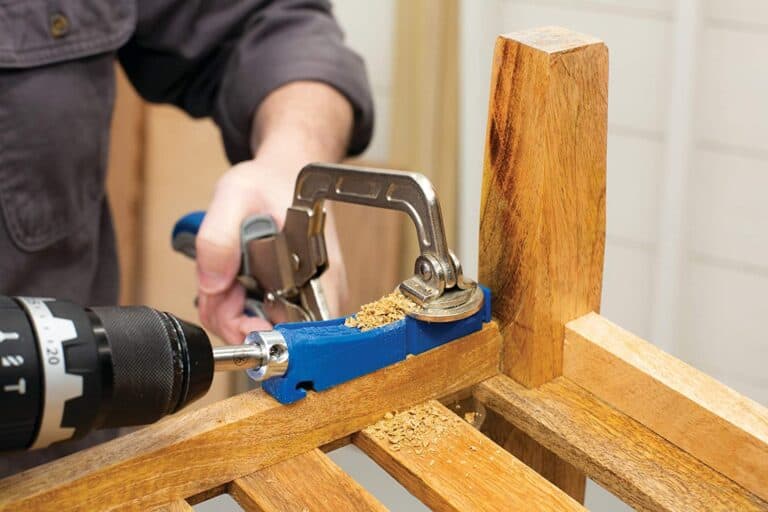
10. Wood Shop Grips/Clamps
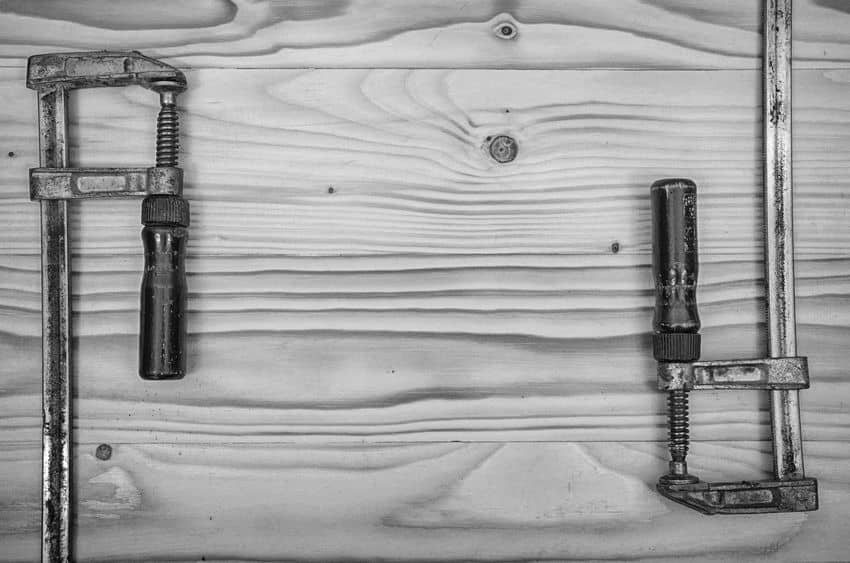
Grips and clamps are crucial to a woodworker’s woodshop. They hold and stabilize your pieces of wood for sanding, sawing, and carving for example. There are many different types of grips and clamps for all kinds of purposes, what type is the best for you.
Let’s look at some of the basic types.
- Parallel Clamps
- Pipe Clamps
- Bar Clamps
- F-Style Clamps
- Quick Action Clamps
- Corner Clamps
- Handscrew Clamps
- Spring Clamps
- Specialty Clamps
Each one of these grips or clamps allows you to hold your wood sign projects very well. Which one would you need to start out? The basic grips or clamps such as quick actions clamps are the best to start out with. They are very flexible and can be used in many ways. Additionally, they are very available at your local hardware or big box stores. Lastly, they are very inexpensive and can be purchased with little money.
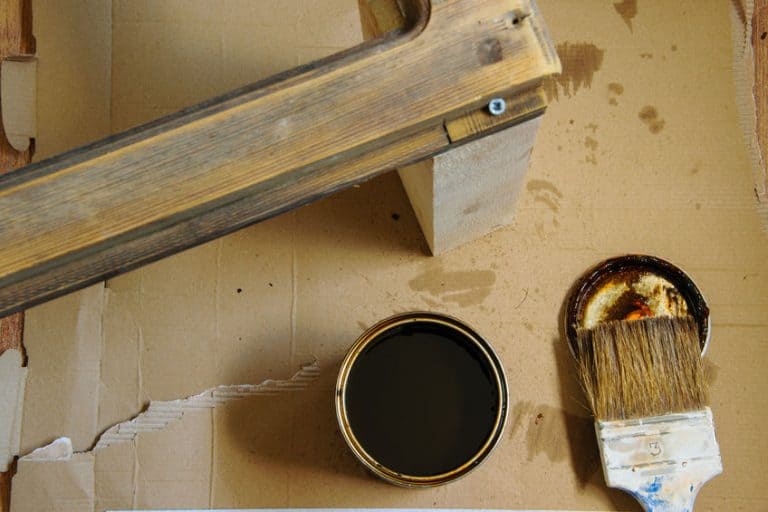
11. Woodworking And Wood Sealers

Wood sealers are typically applied over a wood stain to seal the pores of the wood. They provide protection and enhance the look of your wood sign. There are many different types of sealers and they have different purposes, such as will you be displaying your wood sign indoors or outdoors.
What are the basics of wood sealers? Here is a list of the basic wood sealers on the market.
- Oil – Linseed, Varnish and Tung Oils
- Oil Based Varnish – Polyurethane, Spar and Gel Varnish
- Water Based – Finish which will clean up with water
- Shellac
- Laquer
Deciding on the use, storage, and type of appearance you want on your wood sign projects can be a difficult choice. For more information on wood sealers specifically from a wood, sign perspective checks out our post below.
All you need to know about wood sign sealing – “How Do You Seal Your Wood Sign?”
12. Wood Shop – Workbenches

Woodshop workbenches are an important part of our woodshop configuration. We do take them for granted and abuse them, but they provide a one-stop-shop for all of your woodworking and preparation.
What is a workbench? For most woodworkers, it is a basic frame with a flat surface using plywood or MDF. Some woodworkers add a vise and other basic capabilities. As our skills grow or our list of woodshop projects grow we want to add capabilities to our woodworking workbench.
Workbenches come in all shapes and sizes as well as for many purposes. From a wood sign perspective, the workbench is crucial. The concern is with workbenches and wood shops in the space you have available. If you want a larger workbench workspace you need to make them mobile or with the ability to break down.
What wood is good for a workbench? If you are just starting out you can make to your purpose and whatever material you have around the woodshop. The best wood is opinion-based, however, if you are going to be doing a lot of painting, sanding, and routing I would recommend your basic MDF or plywood for the workbench top and a pine frame.
Consider what you use the workbench primarily for. How much workbench space do you need for the main projects you are going to do. These are the biggest concerns for woodshop workbenches.
13. Wood Shop – Heating And Cooling

Heating and cooling your woodshop is very important. In the summertime, you will be sweating and hot and in the wintertime, you will be seriously cold. Also, the extreme heat and cold impacts your wood, paint, sealer, and other woodworking tools. This is the main concern and you need to consider heating and cooling for your woodshop.
Heating Your Wood Shop
How do you heat a woodworking shop? The first consideration is insulation. Do you have any insulation in your woodshop? Keeping any heat in the woodshop space would be solved by installing insulation.
Another consideration is heating your woodshop what do you heat your woodshop with. There are a lot of solutions on the market. Additionally, you have the consideration of safety, cost, and how much space you are attempting to heat.
Electric heaters are a great source of heat, as well as jet space heaters. If you want a great source of heat that works very efficiently, radiant heat is the way to go. I have provided a video below for more information.
Cooling Your Wood Shop
In the summertime cooling your woodshop is key to success. It alleviates the stress on your wood, tools, and yourself. There are many options as well on the market for cooling your woodshop and they are very effective. What considerations do you need to think about when looking at cooling your woodshop.
The main considerations for cooling your woodshop are power, space, and dust filtration, and control. The power is option is a consideration due to the power requirements of your cooling solution. Do you need a 220v outlet and what will it do to your power bill.
Space is a consideration as most of your cooling solutions will need to be able to overcome the humidity in that space. Is your cooling solution, such as a window air conditioner able to handle the space of your woodshop? Otherwise, it will attempt to remove the humidity but will be overcome and you will really just be paying a high electric bill for not a lot of cooling your woodshop.
Dust is a big concern for air conditioning units. I found it interesting that this is not discussed as much in my research. If you don’t have a good dust collection system and/or air filtration system you will be continually cleaning your air conditioner filter or clogging up your air conditioner making it not work as efficiently.
Below I have provided a great video that provides a simple solution.
14. Electrical Planning And Requirements

Electrical power and their requirements in your woodshop are critical to your success. Whether you have a new woodshop or are re-configuring an existing space you need to look at your power requirements.
What do you need to consider when looking at your electrical requirements for your woodshop.
- Lighting
- Compressor
- Dust Collection
- Heating and Cooling
- Wood Shop Tools
The above is a basic list of the support you will need to consider when determining the amperage in your main power box. Let’s look at a few of the most common power requirements for woodshop tools. How many amps do I need for a workshop?
| Tool | Typical Required AMPs |
|---|---|
| Small Hand Tools | 2-4 |
| Large Tools | 6-16 |
| Miter Saw | 12-16 |
| Air Compressor | 8-18 |
| Dust Collection | 10-18 |
| Planer | 12-16 |
| Band Saw | 10-14 |
| Table Saw | 6-16 |
| Drill Press | 10-14 |
Typically a 100 amp service will do the trick when you are considering power requirements for your woodshop. A great suggestion is to completely separate your woodshop to a separate sub-panel so you can control the power requirements and isolate your woodshop.
Additionally, you will need to consider do your tools require specifically 240 volts. Or do your tools require a dedicated breaker? For example, will you be running multiple tools at the same time from the same circuit to a single breaker?
Below I have provided a great video explaining the basic considerations you will need to look at when reviewing the power requirements for your woodshop.
Ensure you consult a professional electrician when considering your woodshop electrical requirements. They will tell you specifically what you will need to match the above list and your specific woodshop requirements to ensure a safe and code-compliant woodshop.
15. Wood Shop Waste Material
Woodworkers generate a lot of woodshop waste material. Most of us woodworkers are frugal and attempt to use the wood for anything despite how small because we don’t like to waste any species of wood.
What do we do with the waste or also know as our scrape pile? There are many things that can be used from scrap wood. We can make them purposeful. Below is a small list of ideas you can use the scrap wood for.
- Cutting Boards
- Wall Art
- Spoons
- Coasters
- Jigs
- Shop Storage
- Shelving
- Clamping protection
If you are not able to make any smaller projects from your woodshop waste what do you do with it? You can put the wood on a burn pile. However, be careful of treated wood and glued wood such as plywood and MDF. The glue in these woods can sometimes be toxic.
Woodshop waste depending on the size can also be used for mulch, small animal bedding, and glue to fill holes on woodshop projects which warrant a fix.