You complete your wood sign project and like the way it looks. How do you seal the wood sign? As I continue my research to make myself better I thought I would continue to share my research and how-to’s as I go so you can benefit and create your perfect wood sign as well.
Sealing your wood sign is extremely important for longevity, durability, and keeping the original appearance. It is important to seal your wood sign based on where you will keep the sign. If outdoors, an epoxy resin is the best answer. If indoors, a good polyurethane coat is a great way to seal your wood sign.
Purpose of Wood Sign Sealer
The most important question I asked is should I seal the wood sign or why is it important to seal my wood sign? Being an analytical thinker I always try to get as much information as I can to see what are my options and what will make the wood sign appearance the best. Additionally, what option will protect it the most.
Before I get into a few of the types of sealers that are available I want to do my best to explain the purpose of sealers. Knowing the purpose of sealers helps you understand why you need to spend that extra expense while making wood signs.
Protection in my opinion is the biggest reason you would seal a wood sign. Secondarily would be appearance. If you are putting your wood sign in an environment where there is a lot of moisture indoors or outdoors sealing your sign is optimal.
Types Of Wood Sign Sealer
There are many types of wood sealer for different applications. I looked at the most popular and most available at your local hardware store.
Polyurethane – It is a highly resistant varnish formulated so chains of resin molecules bond with each other while it dries. It makes it resistant to weather elements, scratching, and impacts.
Oil Based Polyurethane – They come in different types such as oil-based and water-based. Most oil-based polyurethane provides an amber appearance. Oil-based polyurethane also takes 24 hours to start to dry and up to 72 hours to completely cure.
Water-Based Polyurethane – If you are wanting to preserve the original look of your wood sign (Without the amber color), water-based polyurethane is the best way to go. When I opened the can it had a milky look to it and more so when I stirred the polyurethane with a stick. It cleans up with water and dries very quickly.
Water-Based Oil Modified Polyurethane – Still has the milky appearance when you open the can, however still provides the amber appearance when dry. Fast drying and cleans up with water.
Clear-Coat – You can get a clear coat in a spray applicator or can use it with a brush. It is very resistant to weather and UV rays which makes it a very viable sealer for outdoor wood signs. It does take several coats when you use it, however, it does dry very fast.
Lacquer – Lacquer is a solvent-based sealer that provides a high sheen finish. It can be used on wood sign application, however is not recommended for outdoor use due to it deteriorating over time from UV damage.
Epoxy Resin – Surprisingly you can use Epoxy Resin on wood signs for a high sheen finish. The typical epoxy resin is clear and is a great way to totally seal your wood sign and excellent for outdoor signs. Additionally, epoxy resin can be used with a wide range of colors to create totally different and unique designs.
If you would like to see what products I’m using and purchase you can see my recommended products here – “Recommended Products“
Sealer – Types Of Sheen
There are types of sheen which you will find when purchasing your sealer. Each of them provides a different appearance and when you have a specific look you are looking for you need to know what the finished appearance will be.
Satin – Satin is a low sheen finish that is not reflective compared to gloss. Its benefits are it hides many blemishes and imperfects in the wood sign. However, if you are going for rustic appearance imperfections may be something you want to show.
Semi-Gloss – Semi-Gloss is often compared to Satin, but Semi-Gloss has a lot more sheen and reflection. Some of the Semi-Gloss sealers I have used with a couple of coats have almost a glass finish. When I create wood signs and use a sealer this is my preferred sealer.
Methods Of Applying Wood Sign Sealer
Sealing a wood sign is not as hard as you may think, but is just as important as the rest of the process. Considering the product types and sheen’s mentioned above, what is the best way to apply the sealer?
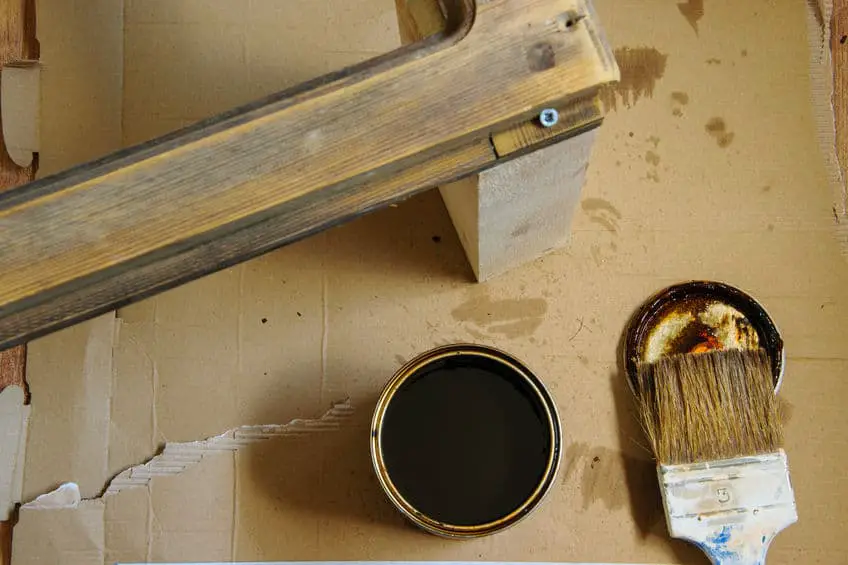
Applying the sealer is much like painting. You can apply the sealer to the wood sign by way of a brush, spray can, or if you have an air compressor by way of a critter (Spray attachment with a mason jar – My method of applying sealer).
Brushing – If you are wanting to use a brush there are several factors to keep in mind. Depending on the sealer you use you would need the proper brush. Will you be using an oil-based sealer or a water-based sealer. As the video below mentioned, there are brushes for oil-based sealers. Ensure when you go to your local hardware store you pick the appropriate brush.
Ensure your surface is clean from dust and debris by cleaning with a cloth or microfiber cloth. If you have an aerosol sprayer for cleaning your computer keyboard that would work as well. The best-case scenario would be an air compressor, blowing the dust off, and cleaning with your cloth.
Once you know the surface is clean of dust or debris ensure you are in a well-ventilated area if you are using an oil-based sealer, as the fumes can be harmful. If you are using a water-based sealer not as much but still recommended you use a well-ventilated area.
Start by dipping your brush into the sealer and wiping it on the edge of the can to ensure an even amount of sealer is applied to the brush about a half-inch into the brush. Then with even strokes from one end holding the brush at a 45-degree angle brush at an even speed all the way across the wood sign. Repeat the process until complete.
Once the sealer has dried, depending on whether or not you are using an oil or water-based sealer, repeat the process for a minimum of two coats. The two coats are important to ensure complete coverage as well as the best appearance.
When complete and dry, repeat the process for the back of the wood sign. This is important if you are going to be placing the wood sign outdoors.
Spraying – You can use an aerosol spray can which many of the sealers offer in their product line or you can use a compressor-related tool – (As mentioned above I use a Critter spray attachment – See Below Video).
As with the brushing technique you want to ensure your wood sign surface is as clean as possible from debris and dust. This ensures a clean adherence of the sealer to the wood.
Using the corner as a reference I typically spray about 6 inches from the wood sign and evenly spray along the long side of the wood sign. After completing the first coat I hold the wood sign up to the light to ensure complete and even coverage.
Wait for the sealer to completely dry. Depending on whether or not you use the oil-based sealer or water-based sealer your time will vary. Ensure you complete at least two coats on the surface of the wood sign for the best finish.
For the best technique for applying the sealer please see the video below. No matter what kind of sealer you use the video depicts the best process for applying your sealer.
Finishing For Best Sealer Appearance
After your application of the sealer, you will need to ensure the surface is smooth and free from any bumps. This takes a little patience and work but the results are extremely impressive.
Please ensure you take a look at the below video for an excellent method of completing your sealer appearance.
If you like the information provided please ensure you Pin the below for this article to Pinterest and also follow me on Pinterest