Choosing the right wood paint can make all the difference when it comes to achieving a lasting and stylish finish. Whether you’re working on an outdoor project, revamping your furniture, or diving into a DIY endeavor, finding the best wood paint is key. But which options are truly the best? Are there any eco-friendly choices? And what paints offer the durability you need for long-lasting results?
In this article, we will explore the top-rated wood paints available, both for interior and exterior use. We’ll also delve into eco-friendly options and highlight the best choices for your DIY projects. Get ready to discover the secrets to a flawless wood paint finish that stands the test of time!
Key Takeaways:
- Choosing the right wood paint is crucial for achieving a lasting and stylish finish.
- There are top-rated wood paints available for both indoor and outdoor use.
- Eco-friendly options provide environmentally-conscious alternatives for wood painting projects.
- Durable wood paints are essential for DIY enthusiasts looking for long-lasting results.
- Proper surface preparation is key to a successful wood paint project.
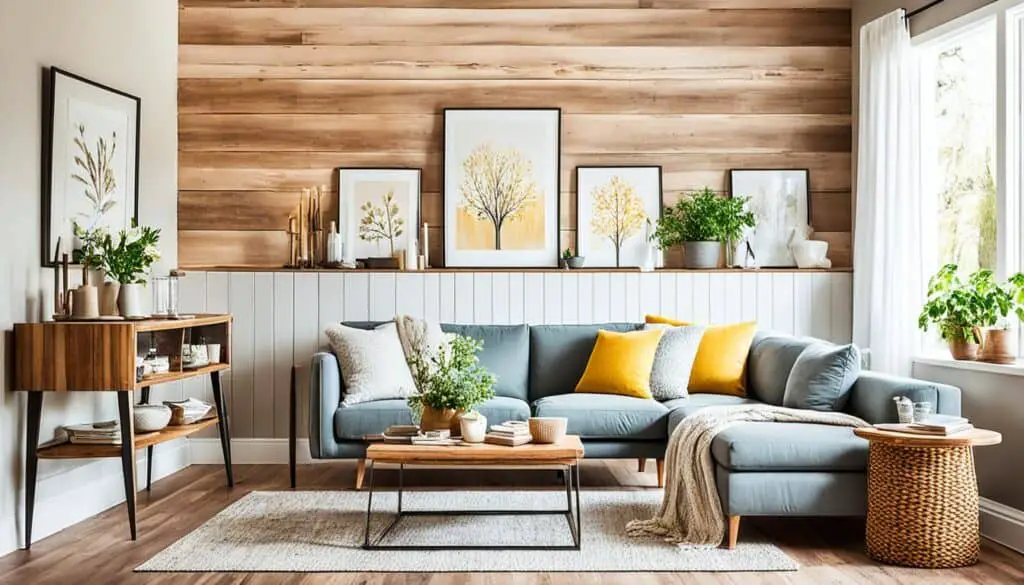
Enhance Your Home Decor with Wood Painting
Discover the joy of transforming your home decor with wood painting. Whether you’re adding a personalized touch or creating unique gifts, painting on wood in your room is a simple and enjoyable DIY project.
Key Tips for Wood Painting:
- Choose Quality Wood Paint: Selecting the right paint is essential for achieving a lasting and stylish finish.
- Explore Top-Rated Options: Find top-rated wood paints suitable for both indoor and outdoor use.
- Go Eco-Friendly: Consider environmentally-conscious alternatives with eco-friendly wood paint options.
- Prioritize Durability: Opt for durable wood paints to ensure your creations withstand the test of time.
- Prep Your Surface: Properly preparing the wood surface is crucial for a successful wood painting project.
What Is The Best Paints for Furniture?
When it comes to painting furniture, using the right paint is essential for achieving a beautiful and durable finish. Different types of furniture require different types of paint to ensure optimal adhesion, coverage, and longevity. Here are our top recommendations for the best paints for every type of furniture:
1. Chalk Paint
Chalk-based paint is a versatile and popular choice for furniture painting. It offers excellent adhesion, requires minimal preparation work, and has a low or no-VOC formula, making it an eco-friendly option. When it comes to chalk paint, our top recommendation is Amy Howard One-Step Paint. This paint provides a smooth and matte finish, and it is available in a wide range of colors to suit any furniture style.
2. Mineral Paint
Mineral paint, made with natural minerals, is known for its exceptional adhesion and durability. It provides a strong and long-lasting finish for furniture. Our favorite mineral paint is Fusion Mineral Paint. This paint offers a wide selection of colors and provides excellent coverage, making it ideal for both small and large furniture projects.
3. Acrylic Paint
Acrylic paint is a high-quality paint that is easy to apply and offers excellent adhesion. It is more durable than latex paint, making it a great choice for furniture that requires extra protection. Our recommended acrylic paint for furniture is General Finishes Milk Paint. This paint provides a smooth and durable finish, and it can be used on various furniture surfaces, including wood, laminate, and metal.
By using the right type of paint for your furniture, you can achieve a professional-looking finish that will stand the test of time. Whether you prefer the matte look of chalk paint, the durability of mineral paint, or the versatility of acrylic paint, these top-quality options will help you transform your furniture into stunning pieces that enhance your home’s style and charm.
What is Good Wood Paint for Exterior Surfaces?
When it comes to painting exterior wood surfaces, durability is key. You want a paint that can withstand the elements and provide long-lasting protection. Here are two top recommendations for outdoor wood paint:
Rust-Oleum Milk Paint Finish
Rust-Oleum’s Milk Paint Finish is a water-based paint that offers excellent coverage and durability. It is specifically designed for outdoor use, making it a reliable choice for painting outdoor furniture and structures. Whether you’re refreshing an old wooden bench or reviving your patio deck, this paint provides a smooth and vibrant finish that will withstand the test of time. With its easy application and long-lasting formula, Rust-Oleum Milk Paint Finish is one of the best exterior wood paints available.
Wolman Outdoor Furniture Paint
For a paint that provides deep color and solid coverage, Wolman Outdoor Furniture Paint is a top choice. This paint is specifically formulated for outdoor use, offering enhanced durability and protection against the elements. It adheres well to wood surfaces, ensuring a long-lasting finish that won’t fade or peel. Whether you’re painting a fence, decking, or any other exterior wood surface, Wolman Outdoor Furniture Paint delivers a vibrant and lasting result. With its weather-resistant formula, this paint is designed to withstand the harshest outdoor conditions.
| Paint Brand | Features | Recommended Use |
|---|---|---|
| Rust-Oleum Milk Paint Finish | Water-based, excellent coverage and durability | Outdoor furniture and structures |
| Wolman Outdoor Furniture Paint | Deep color, solid coverage, weather-resistant | Fences, decks, and other exterior wood surfaces |
What Is Good Wood Paint for Interior Surfaces?
When it comes to painting interior wood surfaces, you want a paint that not only provides durability but also enhances the beauty of your space. We recommend two top-notch options that are perfect for cabinets, furniture, and trim:
- Fusion Mineral Paint: This versatile paint offers excellent coverage and durability, making it ideal for a wide range of interior wood applications. With Fusion Mineral Paint, you’ll get a smooth and flawless finish that lasts. Plus, it has a built-in top coat, providing added protection for your surfaces.
- General Finishes Milk Paint: If you prefer a low-sheen finish, General Finishes Milk Paint is the go-to choice. Not only does it provide exceptional adhesion to your wood surfaces, but it also offers a timeless, classic look. Whether you’re painting cabinets or furniture, this paint will leave you with a beautiful, long-lasting finish.
Both Fusion Mineral Paint and General Finishes Milk Paint are highly regarded for their quality and performance. Their durability ensures that your painted surfaces will withstand everyday wear and tear and retain their beauty for years to come.
Remember, when painting interior wood surfaces such as cabinets and trim, it’s crucial to choose a paint that not only looks great but also stands up to the test of time.
Comparison of Fusion Mineral Paint and General Finishes Milk Paint
| Features | Fusion Mineral Paint | General Finishes Milk Paint |
|---|---|---|
| Finish | Smooth and flawless | Low sheen |
| Adhesion | Excellent | Exceptional |
| Top Coat | Built-in | N/A |
| Applications | Cabinets, furniture, trim | Cabinets, furniture |
| Durability | High | High |
As seen in the table above, both paints offer excellent qualities, but they differ in terms of finish and the presence of a built-in top coat. Ultimately, the choice between Fusion Mineral Paint and General Finishes Milk Paint depends on your personal preference and the desired look for your interior wood surfaces.
Are There Any Eco-Friendly Wood Paint Options?
If you’re looking for environmentally-friendly wood paint options, consider the following:
- Chalk Paint: Chalk-based paint is low or no-VOC, making it a safe choice for indoor DIY projects.
- Fusion Mineral Paint: This paint is non-toxic, lead-free, and virtually odorless. It contains no ammonia or formaldehyde, making it a great eco-friendly option.
When it comes to preserving both the environment and the well-being of your household, these eco-friendly wood paints provide a sustainable solution. Chalk paint offers a low or no-VOC formula, ensuring that harmful chemicals are not released into the air during application or in the long term. Fusion Mineral Paint, another excellent option, is non-toxic, free of lead, and virtually odorless. By choosing these eco-friendly wood paints, you can create a beautiful finish while contributing to a healthier environment.
| Wood Paint | Eco-Friendly Features |
|---|---|
| Chalk Paint | Low or no-VOC formula |
| Fusion Mineral Paint | Non-toxic, lead-free, and virtually odorless |
What Are The Top-Rated Wood Paint Brands?
When it comes to wood paint, there are several top-rated brands that consistently deliver high-quality products. These trusted wood paint brands have earned their reputation through their commitment to excellence and innovation in the industry. Whether you’re a professional or a DIY enthusiast, choosing the right brand is essential for achieving a durable and beautiful finish for your wood projects.
Amy Howard at Home
Amy Howard at Home is a renowned brand known for its top-rated wood paints, including the popular One Step Paint. Their wide range of high-quality products offers exceptional coverage, adhesion, and durability. Whether you’re looking to revive an old piece of furniture or add a fresh coat of paint to a new project, Amy Howard at Home provides trusted solutions that meet the highest standards.
Fusion Mineral Paint
Fusion Mineral Paint has gained a strong following among both DIYers and professionals for its outstanding coverage and long-lasting durability. Their paints are formulated with the highest quality ingredients, ensuring excellent adhesion and a smooth finish. Whether you’re painting furniture, cabinets, or other wood surfaces, Fusion Mineral Paint provides a reliable and top-rated choice.
General Finishes
General Finishes is a highly regarded brand when it comes to wood paint. Their Milk Paint line, in particular, is favored for its exceptional durability and versatility. Whether you’re painting interior or exterior wood surfaces, General Finishes offers a wide range of colors and finishes to suit any project. Their paints provide excellent coverage, allowing you to achieve a professional-looking result every time.
When selecting the best wood paint for your next project, consider these top-rated brands that consistently deliver exceptional quality and performance. Not only will you achieve a lasting finish and style, but you can also trust in the reliability and reputation of these trusted wood paint brands.
What Is Best For Wood Paint for DIY Projects?
If you enjoy taking on DIY projects, choosing the right wood paint is essential. Not only do you want a paint that is easy to work with, but you also want one that provides a durable and long-lasting finish. Here are some of the best wood paints for DIY enthusiasts:
1. Chalk Paint
Chalk-based paint is a popular choice among DIYers due to its ease of application, versatility, and durability. It provides a smooth and matte finish that can easily transform any piece of wooden furniture or décor. With a wide range of color options available, you can let your creativity shine.
2. General Finishes Milk Paint
If you’re looking for a wood paint that offers excellent adhesion and self-leveling properties, General Finishes Milk Paint is a top choice. This paint is great for DIY furniture makeovers, providing a professional-looking finish. Its water-based formula makes it easy to clean up, while its exceptional durability ensures your projects stand the test of time.
3. Fusion Mineral Paint
Fusion Mineral Paint is renowned for its versatility and durability, making it a favorite among DIY enthusiasts. It is self-sealing, so there’s no need for a finishing top coat, saving you time and effort. This paint is perfect for a variety of wood surfaces, including furniture, cabinetry, and decorative crafts.
With these top wood paint options, you can confidently tackle your DIY projects and achieve professional-looking results that will make you proud.
What Are The Best Tips for Preparing Wood Surfaces Before Painting?
Properly preparing the wood surface before painting is essential for a successful paint job. By following these tips, you can ensure that your wood surfaces are well-prepared and ready for a flawless paint application.
- Clean First: Always start by cleaning the wood surface thoroughly before painting. Use a gentle wood cleaner or a mixture of mild dish soap and water to remove any dirt, dust, or grease that may be present. Make sure to rinse off the cleaning solution and allow the surface to dry completely before proceeding.
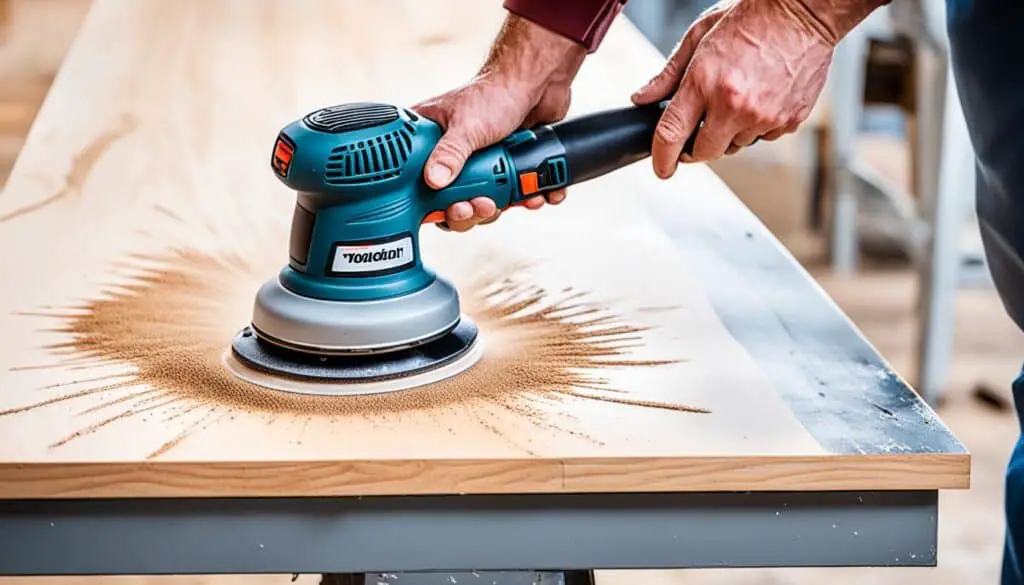
- Sand if Necessary: If the wood surface is smooth or shiny, it may require light sanding to improve adhesion. Use a fine-grit sandpaper or sanding block to lightly roughen the surface. Sand in the direction of the wood grain to avoid creating scratches. After sanding, wipe away any dust with a tack cloth or a damp cloth.
- Use a Primer: In some cases, using a primer is necessary to seal the wood and create a smooth base for paint application. Priming is especially important for bare or stained wood, as it helps to prevent tannin bleed-through and enhances paint adhesion. Choose a primer specifically designed for wood surfaces and follow the manufacturer’s instructions for application.
By following these steps, you’ll ensure that your wood surfaces are well-prepared and ready for a flawless paint application, resulting in a beautiful and long-lasting finish.
| Preparation Steps | Key Points |
|---|---|
| Clean First | Thoroughly clean the wood surface to remove dirt and grease. |
| Sand if Necessary | Lightly sand the surface to improve adhesion. |
| Use a Primer | Apply a primer to create a smooth base for paint application. |
What The Types of Paint to Avoid When Painting Furniture?
When it comes to painting furniture, not all paints are created equal. Some types of paint are not suitable for furniture and can lead to disappointing results. To ensure a successful and long-lasting paint job, it’s important to avoid the following types of paint:
- Latex Paint: While latex paint is commonly used for walls and other surfaces, it is not ideal for furniture. Latex paint lacks the strong adhesion necessary for furniture and can easily chip, peel, or wear off over time.
- Spray Paint: While spray paint may seem convenient for quick and easy application, it is not recommended for high-quality furniture paint jobs. Spray paint often provides a thin and uneven coat, leading to an inconsistent finish and decreased durability.
When painting furniture, it’s best to choose paints specifically formulated for the task. These paints are designed to adhere well to wood surfaces, provide a durable finish, and resist chipping and peeling. By avoiding latex paint and spray paint, you can ensure that your furniture painting project achieves the desired results and stands the test of time.
Types of Paint to Avoid When Painting Furniture
| Type of Paint | Reason to Avoid |
|---|---|
| Latex Paint | Weak adhesion, prone to chipping and peeling |
| Spray Paint | Inconsistent finish, decreased durability |
Is It Important To Choose The Right Wood Paint?
Choosing the right wood paint is crucial for achieving a lasting finish and ensuring the durability of your painted surfaces. The paint you select can have a significant impact on the overall result and longevity of the project. When deciding on a wood paint, it’s important to consider the following factors:
- Durability: Look for a wood paint that is specifically designed to withstand the wear and tear of your desired application. Whether it’s interior furniture or an outdoor deck, choosing a durable paint will help it withstand daily use and stay looking great for years to come.
- Adhesion: Opt for a paint that has excellent adhesion properties, ensuring it adheres well to the wood surface and minimizes the risk of peeling or chipping. Good paint adhesion is especially important for high-touch areas or surfaces that are exposed to varying weather conditions.
- Coverage: Consider the coverage capabilities of the wood paint. A paint with good coverage will require fewer coats and provide a more even and professional-looking finish. This can save you time and effort during the painting process.
- VOC Content: Volatile Organic Compounds (VOCs) are chemicals emitted by some paints that can be harmful to human health and the environment. To ensure a safer and more eco-friendly choice, look for low VOC or VOC-free wood paint options.
- Desired Finish: Think about the desired appearance and finish of your project. Different wood paints offer various finishes, including matte, satin, glossy, and textured. Consider the overall aesthetic you want to achieve and choose a paint that matches your vision.
By carefully considering these factors when choosing your wood paint, you can ensure a successful painting project with a durable finish that withstands the test of time. Take your time to research and select the most suitable wood paint for your specific needs and enjoy the beauty and longevity it brings to your wood surfaces.
What Are The Common Mistakes to Avoid When Painting Wood?
To ensure a successful wood painting project, it’s important to be aware of and avoid common mistakes. By understanding the pitfalls to avoid, you can achieve a high-quality, long-lasting finish on your wood surfaces.
Skip Surface Preparation
One of the most common mistakes when painting wood is skipping the surface preparation. It’s crucial to properly clean and prepare the wood before applying any paint. Failure to do so can result in poor adhesion, uneven coverage, and premature peeling or chipping.
Use the Wrong Type of Paint
Using the wrong type of paint for your wood surface can lead to unsatisfactory results. Different types of wood require different types of paint. It’s essential to choose a paint that is specifically formulated for wood surfaces to ensure optimal adhesion, durability, and a professional-looking finish.
Neglect Priming
Priming is a critical step in the wood painting process, especially when dealing with bare or unpainted wood. Primer helps seal the wood, promotes proper adhesion of the paint, and provides an even base for the topcoat. Neglecting to prime the wood can result in poor coverage, uneven color, and reduced durability.
Apply Inadequate Coats
Insufficient paint coverage is another common mistake to avoid. Applying inadequate coats of paint can result in an uneven finish, visible brush marks, and a lack of durability. Always follow the manufacturer’s recommendations regarding the number of coats needed for optimal coverage and durability.
Rush the Drying Process
Patience is key when it comes to drying the paint on wood surfaces. Rushing the drying process can lead to smudging, smearing, and a compromised finish. Allow ample time for each coat of paint to dry before applying subsequent coats or handling the painted surface.
Remember, taking the time to avoid these common mistakes will help you achieve professional-looking results and a long-lasting finish on your wood surfaces.
Common Mistakes and How to Avoid Them
| Mistake | Pitfalls | Avoidance |
|---|---|---|
| Skip Surface Preparation | Poor adhesion, uneven coverage, peeling or chipping | Thoroughly clean and prepare the wood surface before painting |
| Use the Wrong Type of Paint | Unsatisfactory results, poor adhesion, lack of durability | Choose a paint specifically formulated for wood surfaces |
| Neglect Priming | Poor coverage, uneven color, reduced durability | Prime the wood surface before applying the paint |
| Apply Inadequate Coats | Uneven finish, visible brush marks, lack of durability | Follow the recommended number of coats for optimal coverage |
| Rush the Drying Process | Smudging, smearing, compromised finish | Allow sufficient drying time between coats and handling |
Best Practice Resources
When discussing best practices for sealing painted letters, alternative paint options, or advanced decorative techniques here are some authoritative sources:
- U.S. Environmental Protection Agency (EPA):
- Source: The EPA provides information on environmentally friendly sealants and paints, ensuring safety and compliance with regulations.
- Link: EPA’s Guide to Choosing Low-VOC Paints and Sealants
- Harvard University – Environmental Health & Safety:
- Source: Harvard University’s Environmental Health & Safety department offers guidelines on selecting low-toxicity paints and sealants for indoor projects.
- Link: Harvard University EHS – Paints and Coatings
- U.S. Environmental Protection Agency (EPA) – Indoor Air Quality (IAQ):
- Source: EPA’s IAQ program offers tips for reducing indoor air pollution from paint and sealant products, promoting healthier indoor environments.
- Link:EPA’s IAQ – Paints, Stains, and Sealants
- National Institute of Standards and Technology (NIST):
- Source: NIST offers standards and guidelines for quality control and performance testing of sealants and paints.
- Link: NIST’s Standards for Paints and Coatings
Conclusion
When it comes to achieving a lasting finish and style for your wood projects, choosing the best wood paint is of utmost importance. Consider factors such as durability, adhesion, coverage, VOC content, and desired finish when making your selection. These considerations will ensure that your painted surfaces not only look great but also stand the test of time.
Avoiding common mistakes and properly preparing the wood surface before painting are crucial steps for achieving the best results. Taking the time to clean the surface, sand if necessary, and use a primer when needed will create a solid foundation for your paint application.
Whether you’re painting indoor or outdoor wood surfaces or embarking on exciting DIY projects, there are top-rated wood paint brands and eco-friendly options available. Brands like Amy Howard at Home, Fusion Mineral Paint, and General Finishes consistently deliver high-quality and durable paints.
So, remember to choose the right wood paint for your needs, follow proper preparation techniques, and explore the wide range of options available. With careful consideration and attention to detail, you can achieve a beautiful and long-lasting result for all your wood painting projects.
FAQ
What are the best paints for different types of furniture?
Some of the best paints for different types of furniture include chalk paint, mineral paint, and acrylic paint. Chalk paint offers excellent adhesion and requires minimal prep work. Mineral paint is made with natural minerals and offers great durability. Acrylic paint is easy to apply and more durable than latex paint.
What are the recommended wood paints for outdoor use?
For outdoor wood surfaces, we recommend Rust-Oleum Milk Paint Finish and Wolman Outdoor Furniture Paint. Rust-Oleum Milk Paint Finish is water-based and provides great coverage for outdoor furniture and structures. Wolman Outdoor Furniture Paint is formulated specifically for outdoor use, offering deep color and solid coverage for a vibrant and long-lasting finish.
What are the recommended wood paints for interior surfaces?
Fusion Mineral Paint and General Finishes Milk Paint are our top recommendations for interior wood surfaces. Fusion Mineral Paint is perfect for cabinets, furniture, and trim, providing excellent coverage and durability. General Finishes Milk Paint has a low sheen finish and exceptional adhesion, making it ideal for cabinets and furniture.
Are there any eco-friendly wood paint options available?
Yes, there are eco-friendly wood paint options available. Chalk paint is low or no-VOC and is a safe choice for indoor DIY projects. Fusion Mineral Paint is non-toxic, lead-free, and virtually odorless, containing no ammonia or formaldehyde.
What are some top-rated wood paint brands?
Amy Howard at Home, Fusion Mineral Paint, and General Finishes are some of the top-rated wood paint brands. Amy Howard at Home offers a range of high-quality and durable wood paints. Fusion Mineral Paint is known for its excellent coverage and durability, while General Finishes is highly regarded for its Milk Paint.
What are the best wood paints for DIY projects?
Chalk paint, General Finishes Milk Paint, and Fusion Mineral Paint are some of the best wood paints for DIY projects. Chalk paint is popular among DIYers for its ease of application and durability. General Finishes Milk Paint has excellent adhesion and self-leveling properties. Fusion Mineral Paint is versatile and known for its durability.
What are some tips for preparing wood surfaces before painting?
When preparing wood surfaces before painting, it’s important to clean the wood thoroughly to remove any dirt or dust. If the surface is smooth or shiny, it may require light sanding for better adhesion. In some cases, using a primer can help seal the wood and create a smooth base for paint application.
Which types of paint should be avoided when painting furniture?
Latex paint, typically used for walls, should be avoided for painting furniture as it doesn’t have strong adhesion and may chip or peel off. Spray paint, while convenient, is also not recommended for high-quality furniture paint jobs.
How important is it to choose the right wood paint?
Choosing the right wood paint is crucial as it can significantly impact the final result and the longevity of the painted surface. Factors to consider include durability, adhesion, coverage, VOC content, and desired finish.
What are some common mistakes to avoid when painting wood?
Common mistakes to avoid when painting wood include skipping surface preparation, using the wrong type of paint, neglecting priming, applying inadequate coats, and rushing the drying process.