Think about making your DIY or painting projects amazing with precision-cut letter stencils. These quality stencils make every detail perfect, making your work stand out. Using letter stencils for painting can add clear depth to your art, creating a powerful experience, not just a message.
People who love craft swear by these top-rated highly-rated stencils. They’re great for DIY home decor, professional signs, or unique posters. Discover how the best quality stencils can be crucial for your painting projects.
Key Takeaways
- Precision-cut letter stencils offer unmatched clarity and crispness in your painted designs.
- Investing in quality stencils is pivotal for achieving professional and visually engaging results.
- Letter stencils for painting are versatile tools ideal for a variety of projects, from home decor to signage.
- User reviews often highlight the ease of use and adaptability of top-quality stencils.
- Selecting the right stencils can significantly enhance the visual appeal and readability of your work.
Transform Your DIY and Painting Projects with Precision-cut Letter Stencils
- Elevate your DIY and painting projects to new heights with precision-cut letter stencils that ensure perfection in every detail.
- Experience unparalleled clarity and crispness in your designs, courtesy of the superior quality of these stencils.
- Professional-grade results become achievable as you invest in top-quality stencils for your creative endeavors.
- From home decor to signage, unleash the versatility and adaptability of letter stencils for painting across various projects.
- Users rave about the ease of use and adaptability of these top-quality stencils, making them a favorite among artists and craftsmen alike.
- Choose the right stencils to significantly enhance the visual appeal and readability of your work, making your creations truly stand out.
Discover the Variety of Letter Stencils for Painting
Starting a painting project is exciting but can also feel overwhelming. The wide range of stencil letters makes it easy to bring any idea to life. You can easily personalize your space or create signs with the variety of letter stencils available.
Stenciling opens up a world of creativity and customization. It helps to know about the different stencil letters types. This knowledge is key when picking the perfect set for your project.
The Importance of Choosing the Right Stencil Letters
Choosing the correct stencil letters is vital for your project’s success. The right ones make the job easier and ensure your design looks great and lasts long. You must consider font style, legibility, and the surface. Pick stencil letters that match your project’s mood, whether fun or bold.
Differences Between Alphabet Stencils and Numbers
Alphabet stencils and numbers are not the same in use or design. Alphabet stencils spell out words and add artistry. Number stencils are more for practical tasks, like labeling. Numbers are simpler, while letters need attention due to their varied shapes.
Understanding Stencil Sizes and Materials
The size of your project guides your stencil sizes choice. Big stencils work well for statements on walls. Small ones are great for details on smaller pieces. Material matters too. Plastic stencils are flexible and easy to clean, while metal stencils last longer for tough uses. Think about your project’s needs now and in the future when choosing.
How to Choose the Perfect Size with Large Letter Stencils
When working with large letter stencils, picking the right size is crucial. It makes your message stand out. This guide will help you pick the best stencil size for your space.
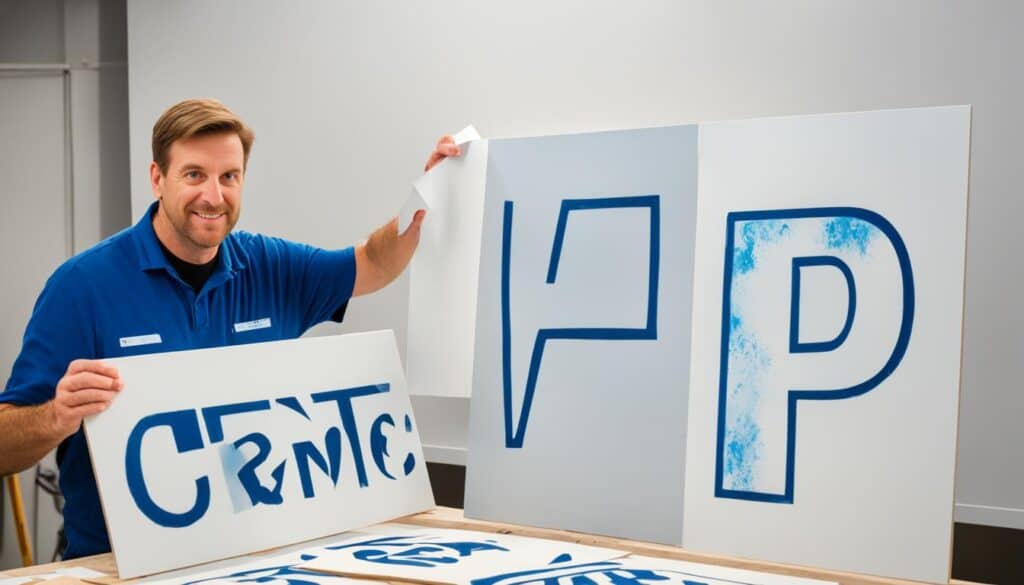
Start by thinking about how far away people will be when they see your message. Big stencils are good for being seen from far. Yet, they shouldn’t be too big up close. Finding the right balance is important.
Pro Tip: A standard practice in sign creation is to add an inch of letter height for every 10 feet of viewing distance. This ensures that your stenciled letters are legible and impactful.
- Avoid clutter by ensuring sufficient spacing between letters. This enhances readability and maintains a clean aesthetic.
- Match the mood and tone of the space. Larger stencils can be bold and striking, making them ideal for statements or branding that requires emphasis.
- Remember the surrounding elements. If your stencils are part of a more extensive design, ensure they correlate well with other visual components.
| Stencil Size (inches) | Optimal Viewing Distance (feet) | Suggested Use |
|---|---|---|
| 2-4 | 10-20 | Small rooms & personal projects |
| 5-10 | 20-50 | Medium spaces & signage |
| 11-30 | 50-150 | Large areas & outdoor visuals |
| 31+ | 150+ | Billboards & public messages |
In conclusion, choosing stencils is about looks and use. Always check your space size first. Imagine how your large letter stencils will fit. If unsure, make a small model to see the final look. This way, you’ll be sure to pick the right size for your stencils. And, you’ll get the effect you want for your project.
Custom Letter Stencils: Personalize Your Project
Ready to make your painting project stand out? Custom letter stencils are what you need. They fit perfectly into any project, like home decor, signs, or events. They help show off your own style or your brand’s unique message.
Benefits of Customized Letter Stencils
Personalized projects are now more popular than ever. The benefits of customized stencils are huge. They let you accurately recreate logos, fonts, and signatures. This makes sure everything looks consistent, which is key for brands. Plus, custom stencils can tackle special designs that premade ones can’t.
- Bespoke Design Options
- Consistent Brand Identity
- Unique Personalization Possibilities
Custom stencils bring your creative ideas to life. They perfectly fit your space or brand’s story.
How to Order Custom Letter Stencils Online
Ordering online is smooth and easy. Start by looking at different suppliers and their customizable features. You need to pick the font, size, and material that match your project’s needs. Think about where you’ll use the stencil—like outside signs or inside art.
| Design Aspect | Options | Considerations |
|---|---|---|
| Font Style | Serif, Sans-Serif, Script, etc. | Readability, Space, Branding |
| Size | Varied (from small craft size to large wall imprints) | Project Scale, Viewing Distance |
| Material | Plastic, Metal, Mylar, etc. | Durability, Flexibility, Reusability |
After you choose your design online, the stencil is made and sent to you. Dive into the custom letter stencils world. See your personalized projects shine with unmatched precision and creativity.
Letter Stencils for Painting
If you love DIY projects, using letter stencils for painting can really make your work stand out. They make it easy to add precision and personality to your projects. Whether you’re making a sign for your kitchen, wall art, or gifts, stencils help you achieve uniform, beautiful results.
Letter stencils for painting are simple to use and work on many surfaces. They’re perfect for everything from painting fabric to upcycling furniture. This means you can customize your space and items in unique ways.
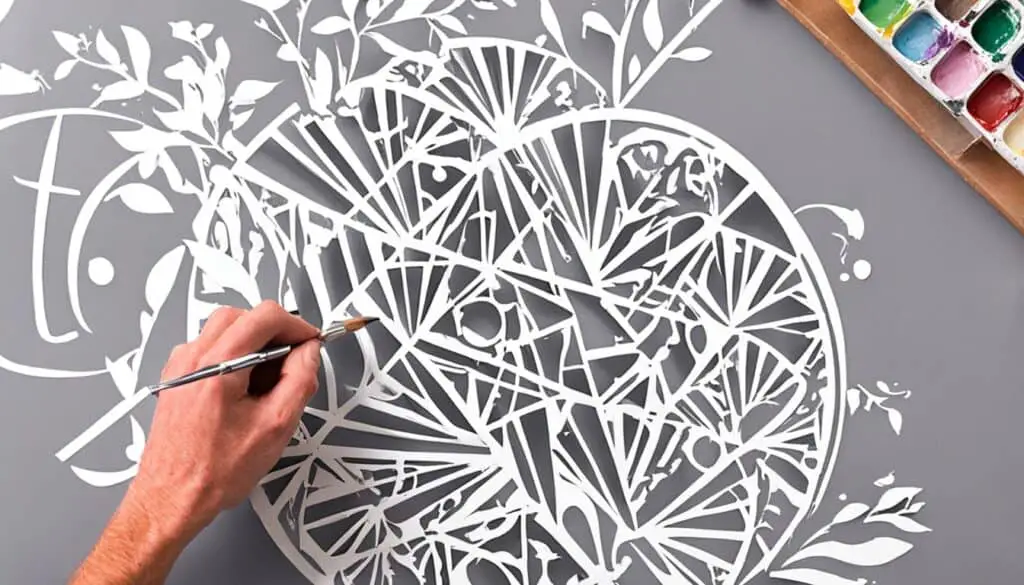
Stencils are great for home décor, events, or making special merchandise. They bring a high level of detail and a professional touch to your projects. Let’s explore how letter stencils can be used in your next project:
- Branding and Advertising: Make eye-catching signs for your business or event.
- Home Décor: Add personalized touches with quotes and monograms.
- Educational Purposes: Create appealing learning materials for students.
- Artistic Expression: Use them in mixed-media art for a unique effect.
When starting a painting project, choosing the right tools is key. Here are some popular stencil types for DIY projects:
| Stencil Type | Best for | Material |
|---|---|---|
| Vinyl | Curved Surfaces | Flexible & Reusable |
| Plastic | General Use | Durable |
| Wood | Rustic Projects | Eco-Friendly |
| Mylar | Precision Detailing | Transparent & Versatile |
Using letter stencils for painting brings craftsmanship to your work. They help with consistency and encourage you to be creative. Consider how a stencil can transform your next project.
Differences Between Stencil Materials:
- Plastic Stencils:
- Suitability: Plastic stencils are versatile and suitable for a wide range of surfaces, including walls, wood, fabric, and paper.
- Flexibility: They are flexible, making them easy to use on curved surfaces or irregular shapes.
- Durability: Plastic stencils are durable and can withstand multiple uses without losing shape or integrity.
- Cleaning: They are easy to clean with water or mild soap, allowing for reuse and longevity.
- Metal Stencils:
- Suitability: Metal stencils are ideal for rugged or industrial projects where durability is crucial, such as marking equipment or machinery.
- Precision: They offer precise cutting and sharp edges, resulting in clean and accurate stencil designs.
- Longevity: Metal stencils are long-lasting and resistant to wear and tear, making them suitable for repeated use in harsh environments.
- Maintenance: While metal stencils are durable, they may require special cleaning techniques to prevent rusting or corrosion.
- Vinyl Stencils:
- Suitability: Vinyl stencils are best suited for smooth surfaces like glass, plastic, or metal, where adhesion is essential for clean lines.
- Adhesive Properties: They often come with adhesive backing, which helps to keep the stencil in place during painting and reduces the risk of paint bleeding.
- Removability: Vinyl stencils are easy to remove without leaving residue, making them suitable for temporary or one-time use applications.
- Detail: They can achieve intricate designs and fine details due to their thin and pliable nature.
Tips for Common Issues:
- Preventing Paint Bleeding:
- Stencil Adhesion: Ensure the stencil is firmly adhered to the surface to prevent paint from seeping underneath. Use painter’s tape or stencil adhesive spray if necessary.
- Dry Brushing Technique: Apply paint using a dry brushing technique, where you lightly dab the brush or sponge with minimal paint to avoid overloading and causing bleeding.
- Stencil Material Selection: Choose stencils with tight edges and minimal spacing between letters or design elements to minimize the risk of bleeding.
- Addressing Stencil Slippage:
- Securing the Stencil: Use masking tape or stencil adhesive spray to secure the stencil firmly in place before painting to prevent it from shifting during application.
- Stencil Registration Marks: Create registration marks on the surface and the stencil to ensure proper alignment when repositioning the stencil for multiple layers or colors.
- Stencil Size Consideration: Choose an appropriate stencil size relative to the project area to minimize the need for repositioning and reduce the risk of slippage.
By addressing these differences between stencil materials and providing actionable tips for common issues, users can select the most suitable stencils for their projects and achieve professional-quality results with minimal frustration.
Decorative Letter Stencils: Add Flair to Your Designs
Decorative letter stencils are a top choice for crafts and home decor. They bring personality and style to your projects. With many fonts and designs, you can make something ordinary look amazing. These stencils make it easy to copy beautiful writing and patterns on different surfaces.
Exploring Decorative Fonts and Patterns
The world of decorative stencils offers a wide range of options. You’ll find everything from fancy writing to cool shapes. Each style brings out different feelings or themes. This helps you make your DIY projects match the vibe you want. Whether it’s old-school charm or a modern look, picking the right font is key.
Tips for Creating Eye-Catching Designs
There are some tips for using decorative stencils well. When picking a style, it’s also about knowing how to apply it perfectly. Here are a few pointers:
- Surface Preparation: Start with a surface that’s clean and smooth. This helps the paint stick right and stops it from smudging.
- Appropriate Adhesive: Hold your stencil still with temporary spray or tape. If it moves, the edges might blur.
- Right Paint Consistency: The paint’s thickness is important. If it’s too watery, it will run; if it’s too thick, it will not look smooth.
- Dabbing Technique: Dab the paint over the stencil. This keeps the paint from going under the edges.
- Patience is Paramount: Let each layer of paint dry completely before adding more. This keeps colors from blending and lines sharp.
As you explore crafting with stencils, remember they are more than tools. They bring excitement and elegance to your work. So, choose bold designs and see your projects light up.
The Advantage of Reusable Letter Stencils
When starting a new creative project, think about the big plus of reusable letter stencils. They are great for long-lasting use and fit well with sustainability goals. These stencils last through many uses without losing their shape or precision, making them essential for painters and crafters.
By choosing reusable stencils, you’ll cut down on waste and save money over time. They are a better choice than single-use stencils because they don’t add to waste. These durable stencils let you tackle different projects while keeping your environmental impact low. High-quality stencils are easy to clean and store for your next project.
Using these stencils helps promote sustainability in your art. It reduces the need for new materials and energy, aiding environmental conservation. Reusable stencils are good for the planet and provide you a reliable tool. They ensure consistency and accuracy every time.
- Durability and resilience for repeated applications
- Ease of cleaning and maintenance
- Consistency in your lettering results
- Reduction in waste, promoting a greener crafting experience
Adding reusable letter stencils to your art supplies is smart. It shows you care about good art and sustainability. You can feel proud of making quality art while protecting the environment.
Laser Cut Letter Stencils: Precision and Quality
Laser cut letter stencils are the top choice for both art and industrial work. Their precision quality showcases the advanced technology behind them. This technology provides professionals with the best tools, way better than old cutting ways.
These stencils are known for their detailed designs and long-lasting quality. How do they stay so good over time? It’s all about the high-tech way they’re made and how you take care of them.
Why Choose Laser Cut Over Traditional Methods
Laser cut stencils and traditional ones are very different. Laser tech creates stencils with amazing accuracy. This means every detail is perfectly copied. The precision quality isn’t just for looks. It also makes these stencils work better for painting or marking things.
Maintaining the Quality of Your Laser Cut Stencils
How long your laser cut letter stencils last depends on how you treat them. Taking care of these stencils means cleaning them right and storing them safely. Doing this helps keep their sharp cutting quality. This keeps them making clean lines and patterns every time.
| Care Aspect | Recommendation |
|---|---|
| Cleaning Method | Gentle wiping with a suitable solvent |
| Drying Process | Air-dry flat to avoid warping |
| Storage Protocol | Keep flat in a dry, dust-free environment |
| Avoidable Conditions | Extreme heat, moisture, and direct sunlight |
Following these care tips will keep your laser cut letter stencils in top shape. They will continue to be a go-to for quality work. Whether for making signs, decorating, or marking parts, these stencils are a wise choice. Take care of them, and they will always do the job right.
Step-by-Step Guide to Using Letter Stencils for Signs
Want to make a sign that looks professional? Using letter stencils is a great way to do that. For a successful project, take a step-by-step approach. Start by getting your work area ready and learn the best ways to apply paint. You’ll get that perfect, clean look you’re aiming for.
Preparation of Your Work Surface and Stencils
First, get your workspace and stencils ready. Make sure the area is clean, dry, and free from dust. This helps the paint stick better. Then, place your letter stencils just right and keep them still. This prep work is crucial for a neat result.
Applying Paint and Tips for a Clean Finish
Now it’s time to paint. Follow these tips for a spotless finish:
- Dab excess paint off your brush or roller to avoid drips.
- Apply paint in a stippling motion to reduce paint bleed under the stencil.
- Allow the paint to dry partially before gently removing the stencils. This helps avoid smears.
- Touch up any mistakes after the paint dries completely for a clean, professional look.
Using this guide will help you make signs that catch the eye and make a big impact.
| Preparation Tips | Application Tips |
|---|---|
| Clean work surface thoroughly | Use stippling paint motion |
| Fix stencils to avoid movement | Dab off excess paint |
| Measure for accurate alignment | Partially dry before stencil removal |
| Ensure adequate lighting | Perform touch-ups as needed |
Top-Rated Letter Stencils You Must Try
For all painting enthusiasts wanting to improve their projects, top-rated letter stencils are key. These stencils lead the pack because of their high quality and perfect finish. They suit various creative works, from wall art to business signs.
It’s important to choose stencils that match your project perfectly. Luckily, these must-try stencils offer a wide range of sizes and styles. They ensure your designs are accurately brought to life. Many users highly recommend them after extensive testing.
When looking for stencils that are both high quality and durable, these top-rated letter stencils are the answer. They guarantee sharp lines and endure through many uses. Choose these outstanding stencils for your next project to ensure it shines.
References for your review
- National Endowment for the Arts (NEA):
- Source: The NEA provides resources and guides for various art-related practices, including painting techniques.
- Link: NEA’s Art Works: Painting Techniques
- Harvard University Graduate School of Design:
- Source: Harvard GSD offers courses and research materials on art, design, and painting techniques.
- Link: Harvard GSD
- National Institute of Standards and Technology (NIST):
- Source: NIST provides research and standards for various industries, including painting and decorative techniques.
- Link: NIST’s Building and Fire Research Laboratory
FAQ
What are the benefits of using quality letter stencils for painting projects?
Quality letter stencils ensure clear and sharp edges. This makes your painting work look more professional and eye-catching. They are easy to use and versatile, too.
How do stencil letters differ from other types of stencils?
Stencil letters are made for painting consistent and uniform letters. Unlike number or pattern stencils, they’re great for signs, posters, and custom decorations.
Why is understanding alphabet stencils’ sizes and materials important?
Knowing about stencil sizes and materials helps you pick the right ones for your project. It helps your work look better and last longer. This ensures your project looks perfect and works well.
What should be considered when choosing large letter stencils?
When choosing large stencils, think about the design’s size and where it will be seen. The size should fit well with the space and the design should look good from a distance.
What are the advantages of custom letter stencils?
Custom stencils let you add a personal touch to your paintings. You can choose any font, size, and style, making your work unique. This helps match your project’s specific theme or look.
How can you order custom letter stencils online?
To order custom stencils online, find a trusted supplier. Give them your font, size, and style choices. They’ll make the stencils you want for your project.
How do decorative letter stencils enhance painting projects?
Decorative stencils add a special style with fancy fonts and patterns. They let you get creative and make standout designs. This adds an artistic touch to your work.
What tips can help in creating eye-catching designs with letter stencils?
To make designs pop, place stencils correctly and apply paint smoothly. Be sure to use the right paint consistency. Practice to avoid mistakes and get a neat, professional look.
Why are reusable letter stencils considered sustainable?
Reusable stencils last through many uses without wearing out. They cut down on waste and save materials, making them good for the environment. Great for those who paint often.
How do laser cut letter stencils differ from traditional methods?
Laser cut stencils are made with high-tech lasers. This gives them sharper edges and more accurate designs than old-school cuts. They lead to cleaner lines and a polished finish.
What are the steps for using letter stencils to create signs?
To use stencils for signs, prepare the surface, position the stencils carefully, and paint evenly. Paying attention to these steps helps achieve a clean and clear sign.
What makes top-rated letter stencils stand out?
Top-rated stencils are loved for their dependability, simple use, and consistent performance. They come in many sizes and styles, fitting various projects. They are a favorite for creating visually strong work.


