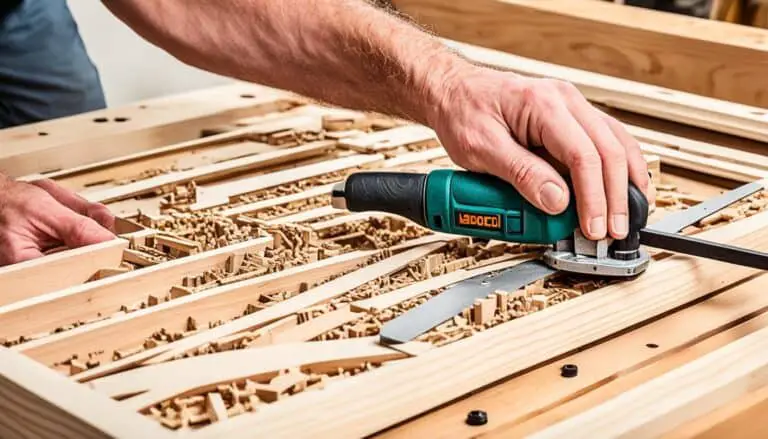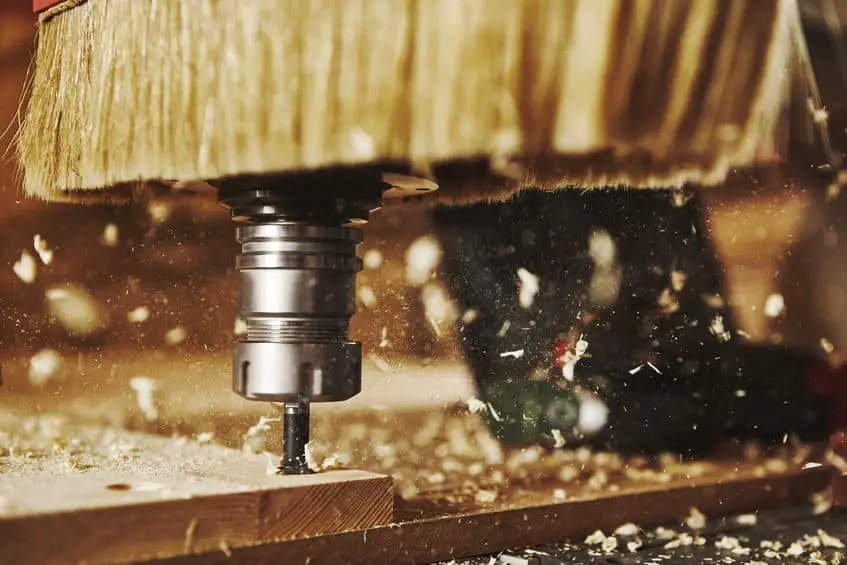
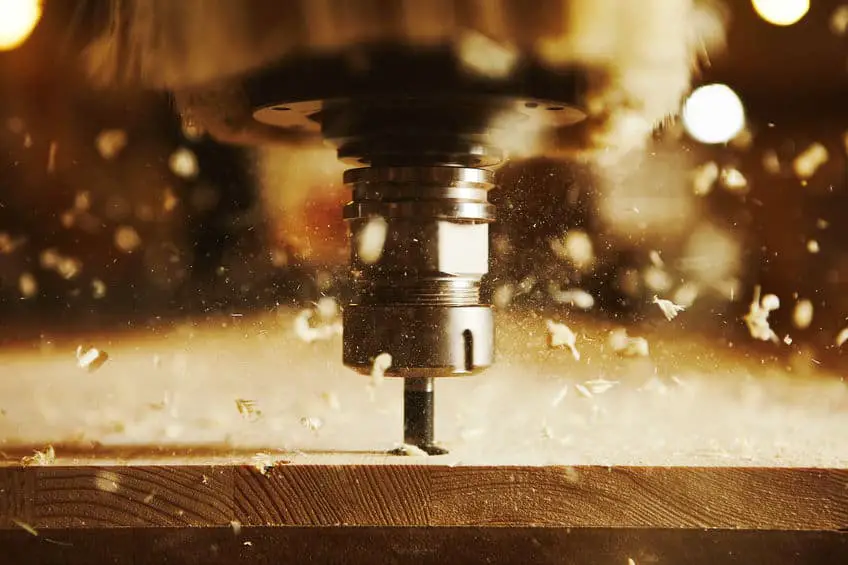
You are using your Computer Numerical Control (CNC) to carve your wood sign and you notice while the router bit is traveling along carving there is a black burnt edge on the wood sign. The router bit is burning your wood sign. This is frustrating as you believe you have done everything you can right.
CNC router bits burn the wood typically for four reasons. Too much speed, heavy passes, slow pace, and dull bits are major contributors to the CNC router bit burning your wood sign carving. Maintenance and adjusting your approach will alleviate all of your CNC router bit burnings.
CNC Router Bit Burning – Basics
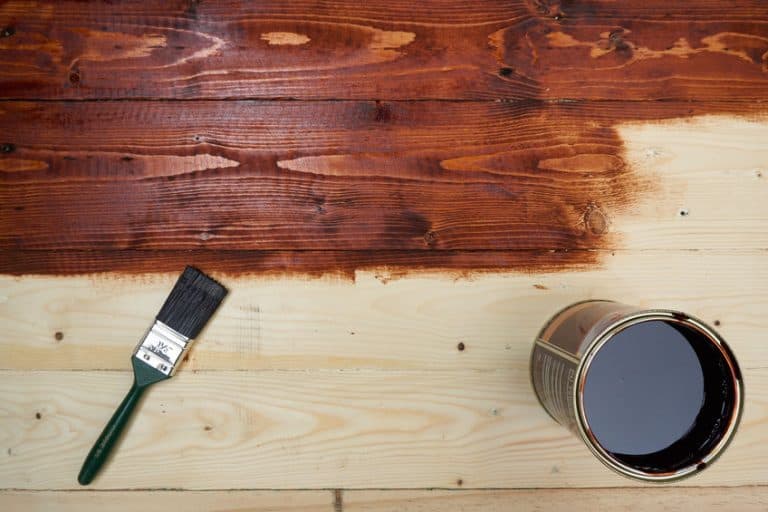
Sometimes we want to intentionally burn our wood signs, for example using a laser with your CNC. This would be to carve letters, images, and other creative designs for CNC home decor and wood signs designs. Or to create a specific wood burn sign appearance that was intentional. However, when using a router bit you anticipate it to carve the wood sign with a clean and defined path to ensure the best wood carving you can do.
CNC router bits can be fallible and it is generally due to the most generic and common reasons. You spent, I’m sure a lot of money on your first CNC and router bits to create more designs and help you produce more and better wood signs. Why are my wood sign carving edges, letters, and images turning out with burned edges?
CNC Router Bit burns are created by the friction of the router to the wood you are carving for the wood sign. It is due to a dull bit, speed of the bit, or even attempting to remove too much material. This is common if you are just starting out and has happened to the best of us.
I was surprised to see the many reasons as to why the CNC router bit burns occur in my research. Actually, after thinking about it, it makes sense. When we start our woodworking business or hobby we are excited and get in a hurry.
Believe it or not, being in a hurry and forcing our wood projects is a big reason for CNC router bit burns and other things such as safety issues. I hope my research and experience depicted below helps you in your continuing woodworking and wood sign creation helps in your efforts to be a better wood sign maker. Let’s look at the common reasons as to why CNC router bit burns occur.
Why Does My CNC Router Bit Create Burn Marks
Now we know the basics of the CNC router bit burn let’s answer the question as to why. There are many reasons as to why your CNC router bits burn the wood and I will go into the basics here to help you with resolving your CNC router bit burn concerns.
Too Much Speed: What speed should my wood router be? When it comes to CNC router bits, if you are new to the CNC I’m sure you thought what I thought which is more speed is better. It is a common misunderstanding with router bits and routers altogether but definitely not the solution.
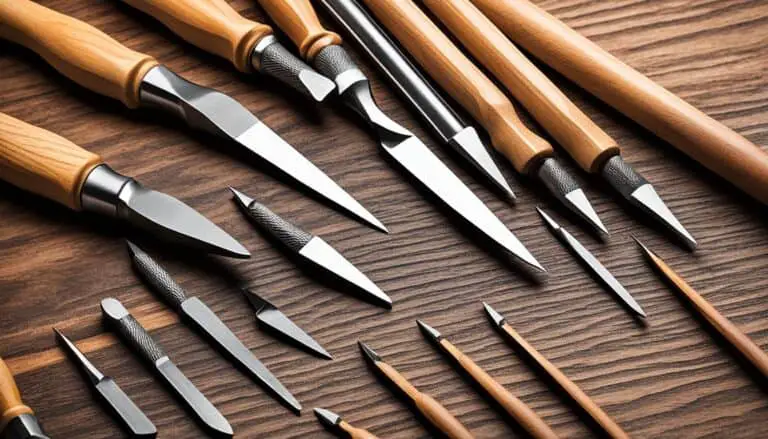
There are a vast amount of router bits that can be used with the CNC so I won’t go into the details of all the router bits but will address the general use. If you would like to know more about the basic wood sign router bits you can see my post – “Router Bit Different Types Wood Signs – Helpful Guide“
With each size of CNC router bit, you generally have a defined speed which you would use with them, whether they are End Mills or V-Carve router bits. Most routers today have a variable speed dial which will allow you to adjust to the manufactures defined speed. This is important to note when you purchase a router if it is capable of variable speed.
If the router you have doesn’t have a variable speed capability, you will want to look up the speed at which the router spins when you use a router bit. This is important to note because this is the main cause of CNC router bit burns.
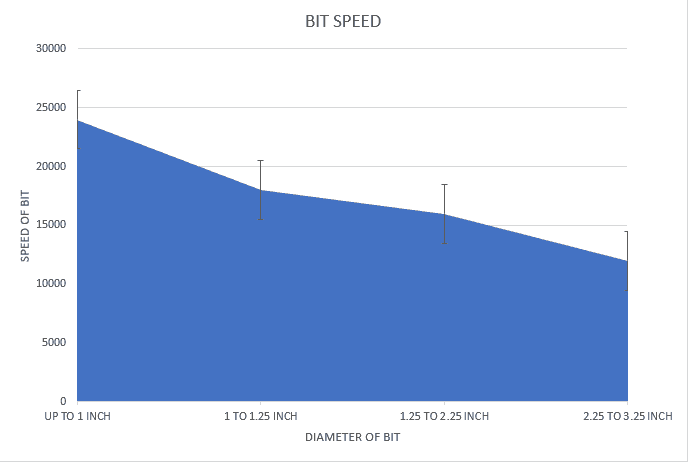
As you can see in the chart above depending on the diameter of the router bit group you have a defined speed. If you exceed the speed for the diameter of the router bit it will cause a burn effect on your wood sign carving.
Checking the manufacture of the CNC router bit prior to carving is a must to best determine the correct speed. This will avoid the friction and heat which will occur when using the router bit on your wood for your wood sign.
The feed rate of your CNC router is also crucial to not creating router bit burns. The feed rate is the speed at which the router bit is moving through the material when it cuts or carves. If you have large chips coming out of the carve from your router bit you may want to slow down the feed rate or risk damaging and dulling the router bit.
Removing To Much Material – (ChipLoad) – This is a common issue as well for your CNC router bit burn marks on your wood sign. Removing more material than your CNC router bit can handle will stress the router bit and cause it to dull quickly as well it will cause deflections and undesired edges on your wood for your wood sign.
When using CNC router bits a burn can occur in several cases. If you are plunging into the material, creating edges or trim, and removing the background. All of these scenarios will stress the CNC router bit. You will want to take small amounts of material in several passes vice all at once.
Typically about 1/4 of an inch of material is recommended for removal at one time depending on the router bit you are using. Of course, check with the manufacture’s recommendations on the router bit you are using.
Chip load per tooth (Cpt) – Defined is the amount of material, such as size which is removed with each flute per revolution. This is important to note as it is the key to understanding Feeds and Speeds.
Here is a formula you can use to help determine your ChipLoad.
ChipLoad = Feed Rate / (RPM x number of flutes).
For example: ChipLoad = 500 inches per mins / (15,000 RPM x 2 flutes) ChipLoad = . 017″.
Beyond the formula above I wanted to give a down-to-earth understanding of how this affects your CNC router bit. The more material you remove and the method of how you are using your CNC router bits will impact the sharpness of the router bit and cause it to dull.
Additionally, you can take away from this understanding. The bigger the CNC router bit the bigger chance that the above Chipload formula comes into play. Basically, be mindful of the size of the CNC router bit, how much material you are removing.
The best advice is to take small amounts per pass or plunge and take your time. This will reduce the stress on your CNC router bits saving you money and also provide a better router bit experience by producing a better and burn-free wood product.
Lastly, with regard to Chipload, I wanted to bring up the direction of the cut. There are a lot of theories out and there and also a lot of opinions when it comes to which direction you should be routing with your CNC router bit. Do you feed against the rotation direction of the CNC router bit or not.
My thoughts on this are to use common sense. In the wood sign business, I would suggest looking at the capability of your CNC router bit and the species of the wood you are carving. I have heard going against the rotation is better and going with the rotation is better.
I use a lot of softwoods such as pine and typically go against the rotation of the CNC router bit. Your situation may be different and the setup, environment, and species of wood may be different which will impact the carving direction of your CNC routing to produce the best product.
With regard to whether or not the direction of cut will cause your CNC router bit to burn your wood for your wood sign products is cause for a great conversation but the bottom line is it will dull your CNC router bit in the end and be a factor in the burning of the wood for your wood sign projects.
Feed Rate To Slow – This is one that is not talked about a lot. The feed rate is the speed at which the CNC router bit travels through the material as it cuts. If it is too fast for the CNC router bit, the router bit will not be able to eject the material quick enough, stress out the router bit, and cause it to heat up causing the CNC Router bit to burn.
There are many things that the feed rate depends on to operate correctly.
- Stability of the CNC machine
- Stability of the wood hold down clamps
- Horse power of the router
- How deep the cut by the router bit
- How wide the cut is by the router bit
- How sharp is the router bit
- Material being cut
The important thing to remember is visually you want to create chips and not dust. The above factors need also to be considered as well as consult the manufacture’s recommendations on your CNC router bit.
Dull Bits – How do I know my router bit is dull – (Your bit is dull when it is not effective in cutting, heats up creating smoke) Dull bits are by far is the greatest reason for CNC router bit burning when you are carving your wood for your wood sign. However, you also need to consider the above reasons as to why your CNC router bit will dull.
Improper use of your CNC routers bits without the consideration of the feed rate identified speed per CNC router bit and the removing of too much material at once stressing the CNC router bit will cause the CNC router bit to too dull and create CNC router bit burning of your wood for your wood signs.
Do you clean your bits when you are done? Most of us most likely will not do so. It is an important step to consider. Not cleaning your CNC router bits will allow the build-up of dust and other particulates on the router bits.
Why is this important? The build-up of these particulates will allow the CNC router bit to build up heat during your next carving job and so on. It sounds very simple, however, it is extremely important. Heat is not the friend of your CNC router bits and will cause it to dull and then leave burn marks on your wood for your wood signs.
Cleaning and sharpening your dull bits is quite easy and takes no time at all. How do you clean your bits?
- Brush – Grab a brush, such as a cleaning brush you can get at a local grocery store. You will want to look for the cheap ones which are used for cleaning floors or surfaces. Brush thoroughly across the CNC router bit removing all the dust and clutter in your router bit. This will remove all of the general dust and reveal all of the hidden dirt and particulates which will cause heat and friction on your CNC router bit.
- Clean – If you look closely you will see all of the stuff that remains on your router bits. Depending on what you use your CNC router bits on, such as different species of wood or wood which already has stain and resin on it, your CNC router bit collects that inside their flutes and edges.
A simple cleaner mixed with 1 part laundry detergent and 1 part water is a great solution. You can soak your router bits in the solution for approximately 10 minutes and then clean with an old tooth brush. Take a cloth and wipe dry prior to putting back in your drawer or storage. This is a very simple solution and works very well. - Sharpen – When I first started out I knew to sharpen my CNC router bits but truthfully didn’t think much about it until I started to experience problems such as my CNC bit burning the wood for my wood sign projects. So I would purchase a new CNC router bit and go on.
CNC router bits are expensive and it became a costly habit I needed to break. An inexpensive solution is to sharpen your CNC router bits with an inexpensive tool. Much like sharpening your knife with a stone you can sharpen your CNC router bits.
I use a hand held small tool which has a diamond part with different diamond stone grits (800 to 1200) and sharpen my bits. It makes a world of difference and my CNC router bits last much so much longer saving me money.
If you would like to see what products I’m using and purchase you can see my recommended products here – “Recommended Products“

Does The Wood I’m Routing With My CNC Matter For Router Bit Burns
The impact of the species of wood you are carving is great. As mentioned above you need to consider Feed Rate and Chipload also for example. Another consideration is the size of the router bit you are using. Using a larger CNC router bit you should use slower speeds.
Examples of hardwood species that greatly impact the CNC Router Bit burn chances:
- Oak
- Mahogany
- Walnut
- Ash
- Beech
- Maple
- Fibreboard
These species of wood have tighter grains and density. Using a CNC router bit to carve them will easily dull your router bit over time. You need to consider this when carving and the possibility of CNC router bit burn.
If you are using many different species of wood, hardwood, and softwood, and use the same CNC router bits you will also see the impact of the dull CNC router bit on the softwood carving.
This is the reason a habitual cleaning and sharpening process is important. It will save you time, wasteful material, and money with a simple cleaning and sharpening process. This is the key to avoiding CNC router bit burning on your end product which we will address how to fix and clean up in the next section.
How does the species of wood affect the dulling and router bit burns when you are carving a hardwood such as oak. The formula which you now know can be confusing. What do you do?
You need to consider the hardness of the species of wood you are carving. So harder wood equals the slower speed with your CNC router bit. Are there any general rules of thumb? The answer is very confusing. However, there may be a couple of answers which may help you.
Generally speaking, you should slow down your CNC router bit speed as the diameter of the CNC router bit increases. This will help the capability of the CNC router bit to cut the material you are carving without greatly impacting the heat level which will cause the burns. Additionally, it will make your CNC router bit last longer and save you money on purchasing a new one.
How To Fix CNC Router Bit Burns After I Have Carved My Wood Sign
Now that we have identified the potential causes of CNC router bit burn to your wood for your wood sign projects I would like to look at how do you fix the impact of the CNC router bit burns. I would like to provide basic techniques and methods which you can use to resolve the CNC router bit burn marks.
There are several methods to remove the CNC router bit burn marks on your wood for your wood sign projects. Some may be familiar to you and some may not.
- Hand Sanding – This is the most common method of attempting to remove CNC router bit burn marks. Using sandpaper or a block starting with an 80 grit you can work slowly with the grain. Then migrate down to a more fine 120 grit is the preferred method.
Slowly sand, not aggressive but enough to remove the burn mark. If you need a little extra and the dry method is not working, you can put a little moisture on the burn mark to assist. This will raise the grain and allow you to remove the burn mark. Repeat the process of lightly sanding with sandpaper or a sand block.
This is difficult if you are working on complicated CNC router bit burns on intricate carvings. Additionally this will take quite a bit of time if the mark is serious enough to cause a thick burn mark.
Lastly, you will run the risk of deforming the original shape you intended to carve with the CNC router bit. Hand sanding will solve a lot of the burn marks allowing you to go back to you CNC router bit and correct the initial problem as mentioned above. - Re-carve the CNC Router bit burn – If you have enough material to go back to the wood piece and re-carve the routed edge or design this would be recommended. It would be preferable to use a router not mounted on the CNC such as a hand router or table router.
This by far would be the easiest solution to removing the CNC router bit burn mark. However it is not always a reasonable method as the material is limited after you make your initial carving on the CNC. - Multiple Routed Passes – Another technique is to carve less material. If you are crunched for time on your wood sign carving project and know your CNC Router bit will leave a burn mark on the wood for your wood sign project, you can carve less material or make more than one pass on the wood. This provides a better scenario for you to make a better routed carve and cleaner routed carve without router burn marks.
- Remove From Flat Edges – If you have CNC router bit burn marks on the flat edge of the routed wood you can utilize the above sanding method or use another method. Using a planer you can slowly remove the burn mark by planing with a hand planer.
Going from the outside edge inward slowly remove very small amounts of the wood. You don’t want to use your planer inside to outside of the edge so you don’t chip the the corner causing irreparable damage to your wood sign project.
Lastly, you can use a table saw or circular saw. Placing the amount of material to be cut very minimal, as in just nudging the edge of the routed wood piece for your wood sign project. This is an effective and efficient way of removing the CNC router bit burn mark on the wood for your wood sign project.
CNC router bit burn marks are frustrating and can cause you to spend more money by having to buy more material and recreate the wood sign. Easy preventative maintenance such as habitual cleaning and maintenance can prevent the initial cause of CNC router bit burn marks which is friction and heat.
Lastly, ensuring your CNC Routing bits are sharp and utilizing the best feed rate and chip load will also help prevent CNC routing bit burns.