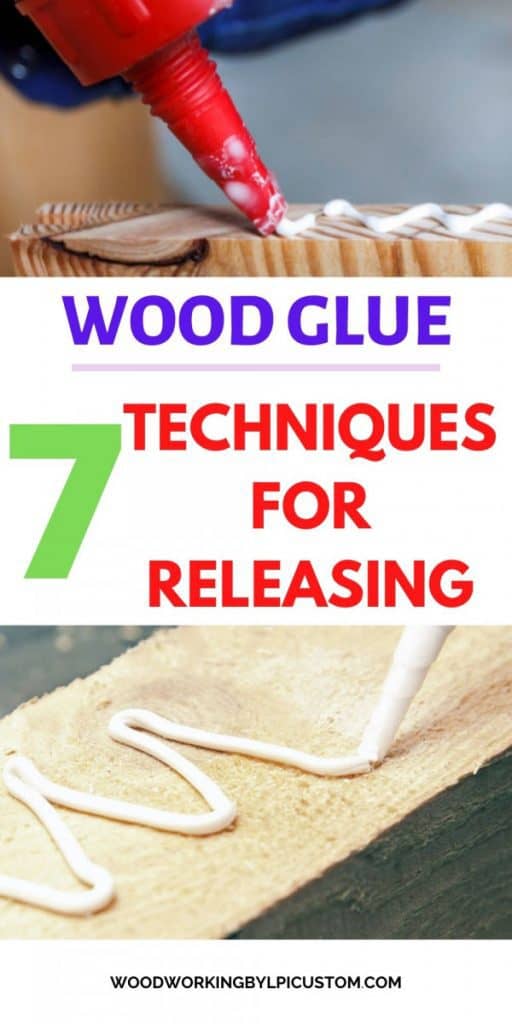
Many wood sign projects use different types of wood glue to permanently bond wood together. Attempting to release or loosen the wood glue is a bit more of a task than applying the glue. Here I provide the research and experience I have gained working to remove or release wood glue from its grip on your wood sign project.
Tackling the separation of glued wood projects can be daunting. You intended to glue them together and want to separate the wood due to a mistake or to modify. The best answer is to use a hairdryer and a warm cloth. Use a slow brushing technique with the heat and most glue will loosen and release.
When you glue wood pieces together for your wood sign projects it is intended to stay together. However, there are those moments when you need to separate them. This can be a challenge and when I encountered this I did lots of research to find a solution. During this post, I hope to save you the grief of researching and provide many options for you.
Different Types Of Glue

There are many types of wood glue on the market. I thought a good basic description would help you understand how to loosen or release wood glued wood signs by knowing more about what glue is used. Additionally, different species of wood and different types of projects will require different types of glue.
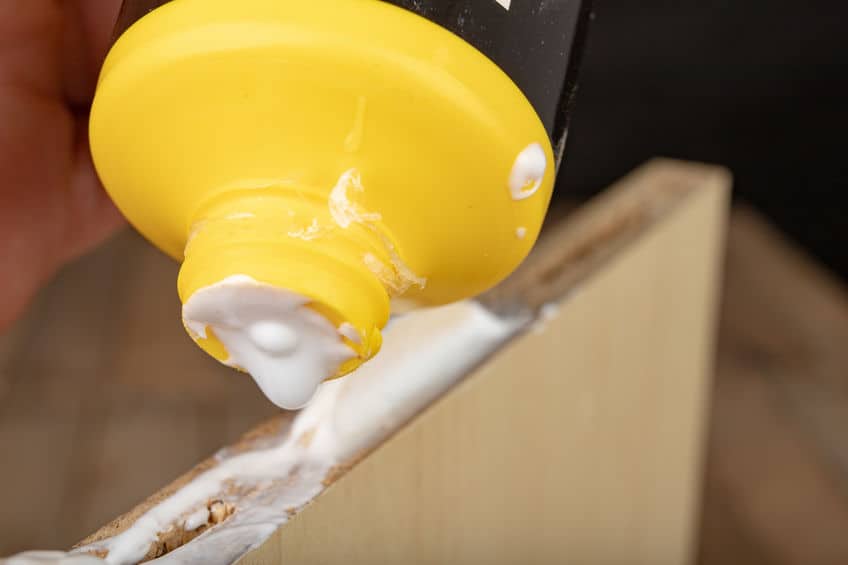
PVA – (Polyvinyl Acetate) – This type of glue you have seen quite a bit and if you have worked with wood you would recognize it. It is the typical yellow or white wood glue in products like Titebond III. This is commonly used for joining wood signs together.
Other points for PVA are:
- Odorless
- Highly Available
- Bonds Wood Very Well
- Works For Outdoor Wood Sign Applications
- Dries completely in 24 hours
- Little to no fumes
- Good for End Grain Applications
- Good for filling small cracks and splits
A big disadvantage of PVA is if you are staining your wood sign it will show up as a yellow color under your final stain. There is a brand (Elmers) that is stainable. If you are looking to use wood glue and stain, check the glue to ensure it is stainable.
If you are using wood glue for filling splits and cracks you can read more on my other post.
Polyurethane Glue – Also known as Gorilla Glue is a glue that foams during its curing period. Is very good for filling cracks and splits as it expands and fills the pores of the wood. It has become very popular and is not a new product but just fairly new to the woodworking industry.
Other points for Polyurethane Glue are:
- Highly Available
- Works okay with outdoor Wood Sign Applications
- Stronger than yellow glue
- Quick dry in 1 to 2 hours fully dry in 24 hours
- Has fumes
- Waterproof
- Fills cracks and splits in wood
- Stainable
- More Expensive
Polyurethane glue is an excellent glue that is thought to be a stronger adhesive. It really depends on the application you are using. There are many products for a specific purpose, where I believe polyurethane glue is more general purpose.
If you would like to see what products I’m using and purchase you can see my recommended products here – “Recommended Products“
Cyanoacrylate Glue – Also known as CA can be used to join wood together. You apply the gel and then use a spray to activate the glue. Although I have only used this to fill small cracks in knots. It is also known better as super glue. CA is better used with thinner woodworking applications versus wood sign joints.
If you use too much CA it will weaken the bond if you use too little it will not work as well. It is a judgment call on the use of a bonding agent. This is an excellent solution for filling small cracks in knots though.
Other points for Cyanoacrylate Glue are:
- Highly Available
- Advise adequate ventilation as CA has fumes
- Fills cracks and splits in wood
- More Expensive
- Drys in 8 to 24 hours
- Waterproof
- Bonds To Skin
- Does not soak into wood
- Has a shelf life of 12 months after opened
Hide Glue – There are two types of Hide Glue. Hot Glue and Liquid Glue. Hot glue is granules that are heated with water. It does go solid when it cools down. The benefit of this option is you can use it with a brush when hot. This typically is old school but a very viable option. The other option is Liquid glue. This comes in a liquid form and can be used without heating and applications with wood signs are close to the PVA glue.
Other points for Hide Glue are:
- Fair Availability
- Works okay with outdoor Wood Sign Applications
- Quick dry in 1 to 2 hours fully dry in 24 hours
- Has no fumes
- Waterproof – By adding 1/2 to 1% aluminum sulfate
- Fills cracks and splits in wood
- Stainable
- Not Expensive
If you would like to make your own hide glue you can view the below video
| Type Of Glue | Recommended | Availability | Affect Finish |
| PVA | X | X | Yes |
| Polyurethane | X | X | No |
| Cyanoacrylate Glue | – | X | No |
| Hide Glue | X | X | No |
7 Wood Glue Removal Methods That Work
When we glue we have glue spillage or we have the extra glue we wipe off. Or whether you have extra glue on your wood sign project or have a join or repair you need to remove the glue from sometimes we need to remove the glue. Unfortunately, it is inherent to woodworking.
When I first started making wood signs I would have to deal with the extra dried glue quite a bit. Usually, I would just sand off the extra. But the downside to just sanding the glue off is depending on the glue the residual glue in the cracks always shows up in my stain.
Additionally, if you have joined wood and need to take it back apart it can be a challenge to separate the wood after you have glued them.
I really needed an answer which worked for me. I thought I would share my 7 best methods of loosening, softening, releasing, and taking apart glued pieces of wood.
*Disclaimer – Some of the chemicals below are corrosive and have fumes. Please ensure you use respirators, gloves, and glasses when applicable
- Ammonia – Using the same process as vinegar (without the heat) you can dissolve wood glue with the exception of you will blot or dab with the cloth and not wipe. Please note ammonia is corrosive.
- Vinegar – It is an excellent way to dissolve wood glue. Non-diluted is the best way of using vinegar. The key to it dissolving glue is the acidity of the vinegar. Using a cloth apply to the glue on your wood sign. You don’t need put a lot on and it works.
If the glue is really relentless you can heat up the vinegar on the stove and reapply with a cloth. The glue will release. - De-Glue Goo – Created by Larry McNeil De-Glue Goo is an excellent choice for removing wood glue. Use a heavy coat on the glue on the wood sign and allow 15 to 30 minutes. Then clean off the excess. This is very clean and easy product to use.
- Rubbing Alcohol – Most folks have rubbing alcohol around the house. It is an inexpensive products and works very well. Using a cloth put some alcohol on the cloth and slowly rub back and forth until you see the glue start to dissolve. If the glue is relentless place cloth with rubbing alcohol on the glue and let sit for a couple of minutes. It may take a few times to release and loosen the glue but it will work well.
- Hair Dryer And Water – This is by far the easiest of the the techniques. Place towels around the glue on the wood sign and using a sprayer add to the wood glue. Additionally you can use a wet cloth with water that is not dripping. Place on the wood glue. Using a hair dryer or steam machine direct the heat from the hair dryer while spraying a little as you go. You should be able to get the wood glue to come loose.
- DeNatural Alcohol – Also known as Methylated Spirits is ethanol with additives. It is very poisonous and smells really bad. However, it works very well on releasing wood glue. The best way to apply is to use a small bottle with a small opening top. You will want to use very little but highly directed to where the glue is. Allow to sit for 5 minutes and start to wiggle the wood glue join. Continue to apply as you wiggle the joint so you don’t crack the wood glue join.
- Acetone – Also known as Propanone or Nail Polish remover is colorless and very flammable. It also has a lot of fumes which will require you to use a respirator and gloves. If you use Acetone on your wood sign glue joins ensure you use prior to adding stain or finish sealer as it will damage the wood.
Using a cloth apply to the glue join by dabbing or blotting. Let sit for 1 minute and watch the glue dissolve, release and loosen.
Clean Up Your Wood Sign From Wood Glue
I have discussed what glue is and the loosening, releasing and softening wood glue methods. Now that I have done that it wouldn’t be fair unless I mentioned how to clean up after you have broken the wood glue bond or completed your wood join and have excess.
Cleaning Wet Glue From Wood That Is Clamped
If you have just clamped together your wood and have excess you can clean your excess glue with a small bucket of water and a clean cloth. Dip the cloth into the water and ring out As the video below mentions, use an up swiping motion and move the c
Methods Of Cleaning Dried Glue After Separation Of Join
Cleaning your wood glue from your loosened wood glue effort from one of the removal methods above will leave a residue. There are several methods that will help remove the remaining wood glue.
- Acetone – As mentioned above Acetone is a corrosive chemical. Please use gloves, respirator and glasses to ensure your safety. Addtionally, Acetone will need to be used with wood which has not been stained. If it is stained it will definitely remove the stain. Using a cloth and dabbing Acetone used sparingly will clean any remaining wood glue.
- Use a Tool – You can use a putty knife to clean up the excess wood glue. Be careful not to press to hard and gouge the wood for your wood sign.
- Sand – Sanding is the most common method of cleaning up excess wood glue. I would suggest a couple types of sanding. Handing sanding with a 300 Grit sand paper. Use a Fine Grit sanding block. A the extreme and if space on the wood for the wood sign is available a sander with 220 Grit sand paper.
If you would like to know more about Sanding you can read my post – “Sanding 101 – For Wood Signs”
- Paint Scraper – Extreme excess wood glue on your wood sign will require an extreme method. Using a paint scraper remove wood glue chunks. This is also a great idea to remove excess wood glue which dripped onto other parts of the wood for your wood sign. Beware when you use a paint scraper. If too much pressure is used gouging can occur which will ruin the wood for your wood sign.
- Chisel – Another extreme technique is a wood chisel. You can use the wood chisel to scrape off any excess wood glue. Use the proper size for the space and amount of glue which will need to be removed. As mentioned in the above option beware of gouging your wood for your wood sign.
Below is a excellent video on how the removal of wood glue can be done using a scraper and sand paper.
Applying Wood Glue Properly To Wood
Applying wood glue properly will help avoid some of the techniques above. I know when I started out working with wood for wood signs I had quite the learning curve. Still, I am learning the best way to use different types of glue and different techniques to ensure the best bond, look and feel.
I thought would include a small section on the best things to consider and how much wood glue to use for your wood signs. Hopefully, it will help you avoid having to remove and release that wood you have glued and need to separate.
Considerations Prepping Wood For Wood Glue
Below is an excellent video on the basics of prepping and applying wood glue for your wood signs.
- Sand your wood – Wood glue adheres best to fresh sanded wood. If there is a sanding sealer or other finish on the wood wood glue will not bond at its best
- Crisp Edge – If you are wanting to join wood together for your wood sign you will want a crisp edge (Preferably 90 degree). This can be accomplished by a joiner, miter saw or planer. You will want the wood to be clean and level to glue together
- Applying Wood Glue – Apply a small even layer of wood glue to both surfaces. If you use to little wood glue it will not bond correctly and too much wood glue and you will have excessive clean up. If you provided the correct amount of glue a small bead will appear as your clamps pull the wood together. This is normal.
- Edge, Face And End Grain Gluing – There are differences to the wood glue being applied to the edge, face and end grain of the wood. Edge and Face gluing works well because it has a lot of surface of the wood for the wood glue to create a bond. If you want to use the end grain of the wood you will need to create a dovetail, finger, pocket or my suggestion a mortis and tenon joint.
Applying wood glue takes a little practice and just getting your hands a little dirty. Knowing the wood glue, properly putting wood glue on, and using the correct applications is key to success in using wood glue for your wood signs. I hope my research will help you in using wood glue in your wood sign projects.
If you like the information provided please ensure you Pin the below for this article to Pinterest and also follow me on Pinterest