A router bit, used on a router, is used for cutting through wood sideways to create an effect or design. When I started my wood sign business I didn’t really know a lot about router bits. I didn’t know the shape, type, depth, or capability of what router bits can perform. Being a novice I decided to research the many options router bits offer.
Router bits can create many different shapes for decorative or functional purposes. For wood sign making when used with a router they commonly are used for carving edges and hanger holes. They can also be used for carving shapes for joining wood together.
I was amazed at the number of router bits and the different options that router bits offer. They came in different sizes and shapes. I wondered, which one do I choose? How expensive are they? I have a router, but what bits work with the router that I have?
I’m sure if you are starting out in wood sign making and you are not familiar with routing bits you have asked yourself some of the same questions. Where to start my research was the final question I had.
Let’s start with a good description of router bits. According to the United States Patent US5323823A – “A router bit for laterally cutting through sheets of wood product, such as plywood and the like”.
Types Of Woodworking Router Bits
There are many types and uses for router bits in wood sign making. I will go through as many as I can here to provide you the best information for your wood sign-making project.
Quality Of Router Bits
Let’s talk about the quality of router bits. A good quality router bit is valuable from a perspective of longevity, performance, and sharpness. These are important because router bits can be expensive.
When looking at a router bit, besides the type or purpose of the bit you should be looking for the below:
- Well Balanced Bit – Create minimal vibration
- Chip Ejection Properties – Ability to eject material well
- Carbide Tipped – Carbide tipped router bits last longer and can be sharpened several times
Types Of Router Bits
| Type Of Router Bit | Use |
|---|---|
| Straight | Groove or Dado cut for inlays |
| Flush Trim | Making Material Flush |
| Chamfer | Creating Flat Angle Edges |
| Edge Forming | Decorative Edges |
| Rabbeting | Notch Edge For Joining |
| Molding | Decorative Profiles |
| Joinery | Dovetails for joints – Drawers |
This list above is by no means all-inclusive. There is a vast number of router bits for many applications. My purpose here was to mention the ones for wood sign making. If you would like to look at a more extensive list you can go here – “The Router Bit Glossary”. It is quite an extensive list with an easy-to-read chart defining the majority of router bits.
Difference Between Regular Router Bits and CNC Router Bits
The basic difference is purpose. Router bits for Computer Numerical Control (CNC) are longer and have more of an ability for ejecting material when you use the router bits on wood. Without getting into the details of flutes and dimensions of specific CNC bits the basic understanding is the ability to eject the material and length.
Can you use CNC router bits with your regular router? Yes, you can use CNC router bits on a regular router, however, due to the long length of the bit, it can make it cumbersome for typical applications in tight areas.
Different Size Router Bit Shanks
The most common sizes for the router bit shanks are 1/4″ and 1/2″. The size is relative to the size of the job you are routing. Since we are discussing specifically wood sign making the majority of the router bits you need to be using are 1/4″ shanks.
Additionally, the size of the router bit shaft is thought to be relative to the size of the router you are using. Actually, the size of the router is more relative to the power you want to use on different applications. A 2.5 hp router for example will typically come with a 1/2″ collet for a 1/2″ router bit shank. Due to the horsepower of the router, it is anticipated you will use a bigger router bit shank for bigger jobs which will need more power.
Most of your routers used for wood sign making are 1.25 hp. They have a 1/4″ collet for 1/4″ router bit shanks. This doesn’t mean you can’t change the collet to a 1/2″ or 1/4″ collet to accept the different size router bit shank. It really depends on the horsepower of the router.
There are advantages to using a 1/2″ router bit shank over the 1/4″ router bit shank.
Durability – For the most part, 1/2″ router bit shanks are stronger due to the size of the shank. If you are anticipating routing a hardwood species or cutting a lot of shapes out of wood for your wood sign making then maybe a 1/2″ shank router bit is appropriate.
Mass – A 1/2″ router bit shank typically means the router bit itself is bigger and would be able, along with the bigger router horsepower, to remove more wood material.
Grip – Due to the bigger shank size it has more space for the collet to grip. This works very well if you using the routing bit to cut out different wood signs.
However, from a wood sign-making perspective, the 1/4″ shank works very well. Lastly, the 1/4″ shank is very available and the cost is cheaper. This is definitely an advantage.
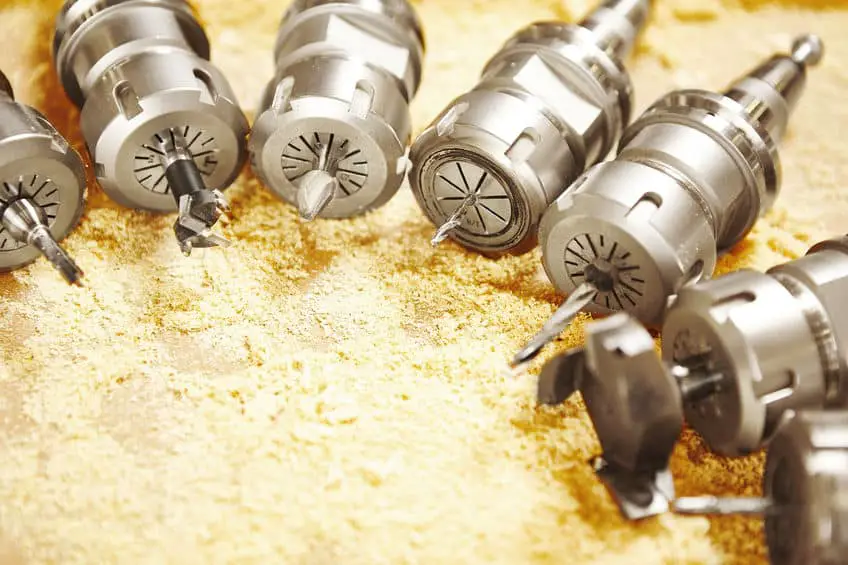
Collets – What Is A Collet And How Deep To Insert The Router Bit
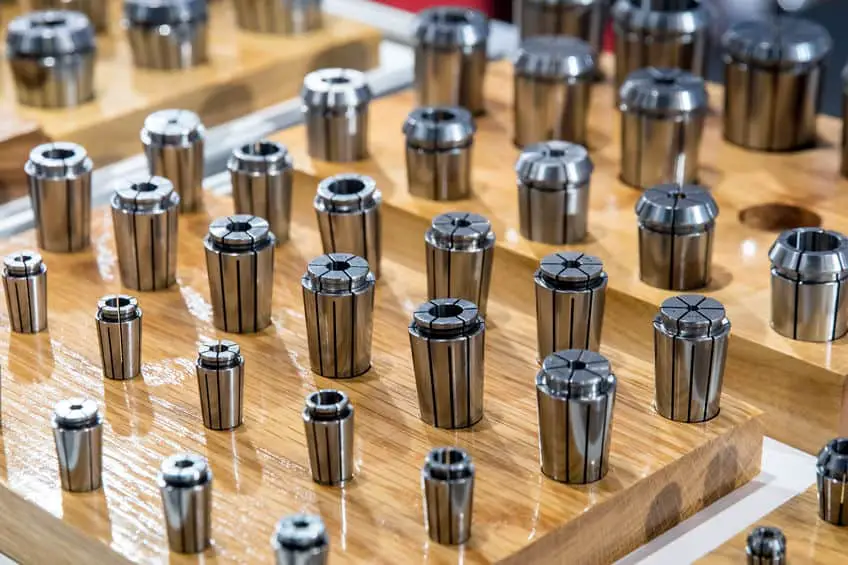
Think of a collet as sort of a chuck on a drill. You place the drill bit in the chuck and tighten the chuck. The same applies to the collet on the router. It attaches to the bottom of the router with a coupler over top of it.
You place the router bit inside the collet and then tighten the coupler. Most routers these days have a button to hold down while you are tightening the coupler. Older routers have the coupler and a jam nut so you will need to use two wrenches to tighten. There are many types on the market ranging in size, manual and quick change.
A big question that is asked all the time is how far into the collet do you place the router bit. There is room for a lot of conversation on this subject as there are varying opinions.
But I believe you will determine for yourself. My thoughts are to be safe and place about a 1/4″ into the collet. Ensure you tighten the coupler and ensure the bit is tight.
If you would like a good view of a collet and its operation I have to include a really good video for an explanation of the above.
Recommended Router Bits For Wood Sign Making
During my journey into wood sign making, I narrowed my choice of router bits to the application or purpose I was using. There are basic kits you can purchase out there with basic setups for routing. However, I have found they aren’t exclusive to the wood sign-making application.
You have to purchase separate ones which makes it a little more difficult. In an effort to help you with keeping your budget low I will recommend the below bits for starting out.
If you would like to see what products I’m using and purchase you can see my recommended products here – “Recommended Products“
- Carving Liner – Used for extreme detail and fine carving. This router bit is great for the small carving and images.
- Profile Bit – Used for most applications in carving wood signs. This router bit is great for generic lettering and images that don’t require fine detail
- 90 Degree V Groove – This is mostly used for background removal in large spaces on the wood sign
- 60 Degree V Grove – Used for inset lettering – This router bit is vary common in wood sign making
- Spiral Upcut – This is great for cutting out pieces of the wood sign shapes and sizes all the way through the material. It is also commonly referred to as an End Mill
- Champer – This is great for bevel routing and edging such as scallops – Also referred to as cupping.
Below is an excellent video and demo regarding the bits listed above.
How To Use Router Bits
During my research, it was interesting to find there is not a lot of information available on how to use router bits. As I am wanting to provide the best general guide for you I wanted to provide this information to you.
There are things to consider about using router bits. I mentioned above that the size of the router (1.25 hp and 2.5 hp for example) makes a difference and it does on the shank size. It also makes a difference in the use of the router bits.
Router Speed Settings For Bits
Most routers on the market today come with variable speed controls in the form of a dial setting for example. The great thing about this variable speed is they work very well with speed settings for your router bits.
If you want to know the speed settings for your router bits consult with the documentation of the router bit you purchased. However, if you want a general rule I have created the below chart. Please note the below is not official and you need to ensure your safety so consult your bit’s documentation.
| Bit Diameter Size | Speed |
|---|---|
| 1.0 inch and under | 24,000 rpm |
| 1.5 inch | 18,000 rpm |
| 2.5 inch | 15,000 rpm |
| 3.0 inch | 12,000 rpm |
Router Feeds For Bits
While using a router either by hand or by CNC you need to ensure your router bit is not fighting the wood. What I mean is you will see indicators such as a burned edge or the sound of the router being bogged down. Both of these are indicators that the router bit is being overworked.
How do you know what feed speed to use? I tend to look at the species of wood. Is it a hardwood species or softwood species? If the wood is hardwood I tend to slow down the feed. You can tell by the sound of the router if you are fighting the wood carving or not.
I have included the below video for you to see a little more information on using your router bits.
Problems With Router Bits
There are some very common problems folks deal with regarding router bits. I have experienced some of these when I was a beginner and learned along the way. Hopefully, this helps you avoid some of my mistakes.
| Problem | Reason | Solution |
|---|---|---|
| Burned Bit | Bit run to slow or dull bit | Adjust to proper speed for router bit |
| Broken Bit | Attempting to carve to much material to quick | Adjust your depth and make multiple passes |
| Slipping Bit | Bit not tightened in Collet | Clean debris from Collet and tighten |
Most of the problems with router bits are easily fixed by using them properly considering the speed, feed rate, and amount of material that you are carving.
Router Bit Maintenance
Maintaining your router bits is very important and will save you money down the road. As with all woodworkers, wood sign makers who use routers and routing bits will encounter router bit maintenance.
Sharpening your router bits is key to them operating optimally and saving your money buying new ones. There are many ways to sharpen your router bit. Some folks use a diamond stone, hand diamond tool, or diamond stone on a grinder. Either way, a diamond surface is a key to sharpening your router bit. I prefer the hand tool with a diamond edge. Easy to use and store.
Cleaning your router bit is very important and well for longevity. This includes the router bit itself and the bearing if the router bit has it. Using an organic solvent cleaner.
Checking and cleaning the router bit bearings helps ensure optimal performance as well. Remove the bearing, whether on top or on the bottom, and ensure it is working well. Most folks don’t know is you can replace the bearing at a cheaper cost than replacing the router bit.
This may save you money and get continued router bit performance. Much like any tool if you take care of the router bit it will work well for you over time and save you money.
As all router bits are different shapes and sizes I wanted to give you the basics to understand what you need to sharpen. A common misconception is to sharpen on the curved edge of the router bit. Actually, you need to sharpen on the flat edge. This is typically the edge that will be cutting into the wood.
Frequently Asked Question – FAQ – Router Bits
Do router bits fit all routers? – Generically not all router bits fit all routers. You need to find out what size of the shank and what purpose you are using the router bit. Bigger and most older routers have a 1/2″ collet for using 1/2″ shanks on router bits. Smaller routers generally use a 1/4″ collet for using 1/4″ router bits. Secondly, what purpose is the router bit? Will you need more horsepower to accommodate the bit if it is a bigger router bit and removing more material.
Can you use a router bit in a drill? – This is not recommended mainly due to a safety and purpose issue. Router bits are used with a stable platform due to the stress being put on the router bit to cut and remove material. The use of a router bit in a drill can become unstable and cause harm.
What do the different router bits do? Each group of routers bits has a purpose. They range from edging, joining, and cutting out shapes depending on the application. They come in different sizes and shapes depending on what appearance or removal you are wanting to perform. I recommend you visit “The Router Bit Glossary” for an excellent overview.
How do you change a router bit? You will want to ensure the power of the router is disconnected by unplugging the power cord. If the router has a base you will need to remove the base. Ensure you have the router secure by holding it upside down against a solid surface. To remove a router bit – If your router has a button (typically on the side next to the router bit) hold the button in and place the wrench on the collet and turn slowly until it locks. Left to loosen and remove the bit. If your router has no button to hold the shaft, it will require two wrenches to turn in opposite directions. To install a new or different router bit place the bit in the collet all the way till it bottoms out and then pulls out about a 1/8th of an inch or just a hair more and then tighten the collet as mentioned above.
How do I remove a collet? You will want to ensure the power of the router is disconnected by unplugging the power cord. If the router has a base you will need to remove the base. Ensure you have the router secure by holding it upside down against a solid surface. To remove a collet – If your router has a button (typically on the side next to the router bit) hold the button in and place the wrench on the collet and turn slowly until it locks. Left to loosen and remove the bit. If your router has no button to hold the shaft, it will require two wrenches to turn in opposite directions. After the collet coupler is loose, completely remove the collet by completing to turn left.