Are you a woodworking enthusiast or embarking on a home renovation project? Whether you’re a novice or a seasoned craftsman, mastering the art of carpentry requires a blend of skill, precision, and creativity. But what if you could take your craftsmanship to the next level?
Discover expert carpentry tips that will help you enhance your woodworking skills and create standout pieces in your next project.
Key Takeaways:
- Choosing the right wood species and moisture content is critical for the success of your project.
- Investing in high-quality measuring tools and ensuring accurate measurements and markings are essential for precision.
- Keeping your tools sharp not only improves the quality of your cuts but also enhances safety in the workshop.
- Prioritizing safety, learning various joinery techniques, and paying attention to detail in finishing are crucial for achieving professional results.
- Embracing mistakes as learning opportunities and mastering miter cuts and estimating framing materials will elevate your carpentry skills to new heights.
Selecting the Right Wood for Your Project
Choosing the right wood is crucial for the success of your project. When considering wood selection, it’s essential to pay attention to factors such as wood species, moisture content, and other characteristics that can affect the overall outcome of your woodworking venture.
Wood species play a significant role in the performance and aesthetics of your project. Different species have varying levels of hardness, grain patterns, and durability, making them more suitable for specific applications. For instance, hardwoods like oak, maple, and cherry are commonly used for furniture and cabinetry due to their strength and beautiful grain patterns. Softwoods like pine and cedar, on the other hand, are popular choices for outdoor projects such as decks or fences.
Another critical factor to consider is the moisture content of the wood. Wood with high moisture content has a higher chance of warping or cracking as it dries. On the other hand, wood with low moisture content may become brittle and difficult to work with. It’s crucial to ensure that the moisture content of the selected wood is appropriate for the intended use and environmental conditions.
Before starting your project, it’s wise to source your wood from a reputable supplier who can provide accurate information about the species and moisture content of the wood. Additionally, consider conducting a moisture content test to ensure the wood is suitable for your project.
By carefully considering wood selection, including the species and moisture content, you can ensure that your project not only looks visually appealing but also stands the test of time.
Precision in Measuring and Marking
Accurate measurements and clear markings are crucial in carpentry to ensure precise and seamless results. Investing in high-quality measuring tools is essential to achieve accurate measurements and enhance the overall craftsmanship of your projects. Some essential measuring tools that every carpenter should have in their arsenal include:
- Tape Measures
- Combination Squares
- Marking Gauges
These tools enable you to take precise measurements and mark the wood accurately, ensuring a perfect fit and alignment. Double-checking your measurements before making any cuts or modifications is a good practice to ensure accuracy.
For better visibility and ease of use, consider using a tape measure with clear and legible markings. Combination squares with built-in levels can help you achieve accurate 90-degree angles, ensuring the squareness of your workpieces.
“Measure twice, cut once.”
Following this age-old adage emphasizes the importance of careful measuring and how it impacts the final outcome of your project. Taking the time to measure accurately and mark your wood correctly can save you time, effort, and material wastage.
Calibration: Ensuring Accuracy with Measuring Tools
To maintain the accuracy of your measuring tools, it’s crucial to calibrate them regularly. Calibration involves adjusting the tool to ensure the measurements it provides are precise and reliable.
Refer to the manufacturer’s instructions or consult online resources for guidance on calibrating your specific measuring tools. This process may involve minor adjustments or using calibration blocks to verify the accuracy of your instruments.
Regular calibration not only ensures accurate measurements but also enhances the longevity and functionality of your tools. By keeping your measuring tools in optimal condition, you can consistently produce high-quality carpentry work.
| Measuring Tool | Description |
|---|---|
| Tape Measure | A flexible tape with markings used to measure length, width, and height accurately. |
| Combination Square | A versatile tool used for measuring angles, checking squareness, and marking lines. |
| Marking Gauge | A tool used to scribe lines parallel to the edge of the wood, ensuring accurate and consistent markings. |
Keeping Tools Sharp for Clean Cuts
Sharp tools are essential for achieving clean and precise cuts in your carpentry projects. Not only do sharp tools improve the quality of your work, but they also contribute to a safer working environment. Blunt or dull tools can lead to imprecise cuts and potential accidents.
To ensure that your tools remain sharp and effective, it is important to establish a regular sharpening routine. This routine should include sharpening saw blades, chisels, and other cutting tools. Regular maintenance and sharpening will ensure that your tools are always in optimal condition for the best results.
When sharpening your tools, consider using a honing guide. A honing guide helps maintain consistent angles during the sharpening process, resulting in better edge retention and improved cutting performance. It provides stability and control, enabling you to achieve the desired sharpness without any guesswork.
Additionally, it’s crucial to replace or refurbish worn-out tools. Over time, tools can become damaged or lose their sharpness, affecting the quality of your cuts. By regularly inspecting your tools and replacing or refurbishing them when necessary, you can avoid imprecise cuts and ensure a safer and more efficient woodworking experience.
Remember, keeping your tools sharp is a vital part of maintaining the highest standards of craftsmanship. By prioritizing your sharpening routine and using a honing guide, you’ll not only achieve cleaner cuts but also elevate the overall quality of your carpentry work.
Key takeaways:
- Sharp tools contribute to cleaner cuts and improved safety.
- Establish a regular sharpening routine for saw blades, chisels, and cutting tools.
- Consider using a honing guide to maintain consistent angles during sharpening.
- Replace or refurbish worn-out tools to avoid imprecise cuts and potential accidents.
Prioritizing Safety in the Workshop
Safety should always be your top priority when working on carpentry projects. By following proper safety practices and utilizing personal protective equipment, you can ensure a secure and accident-free workspace. Here are a few essential safety measures to consider:
1. Personal Protective Equipment
Wearing the appropriate personal protective equipment (PPE) is crucial in preventing injuries. Make sure to use the following:
- Safety glasses: Protect your eyes from flying debris or particles.
- Ear protection: Reduce the risk of hearing damage caused by loud tools or machinery.
- Dust masks: Prevent inhalation of harmful dust and fumes.
- Appropriate clothing: Wear durable, non-loose-fitting garments to protect against cuts and abrasions.
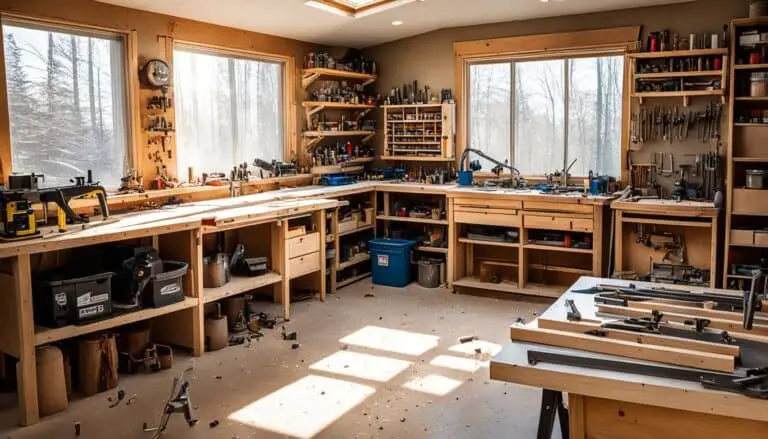
2. Clear Workspace
Keeping your workspace organized and free from clutter is essential for safety:
- Clear the floor of any obstacles, tools, or materials that may cause tripping hazards.
- Ensure adequate lighting in your workspace to minimize accidents.
- Keep electrical cords and cables neatly organized and out of the way.
3. Safety Practices
Adhering to safety practices will significantly reduce the risk of accidents:
- Familiarize yourself with the proper operation of all tools and equipment.
- Always use tools for their intended purpose and handle them with care.
- Regularly inspect your tools and equipment for any signs of damage or malfunction.
- Avoid distractions while working, such as using your phone or listening to loud music.
- Keep children and pets away from the workshop area at all times.
By prioritizing safety and implementing these practices, you can create a secure and accident-free environment for your carpentry projects.

Mastering Joinery Techniques
In the world of carpentry, mastering joinery techniques is crucial for creating sturdy and durable woodworking projects. By honing your skills in joinery, you can ensure that every connection in your work is strong and long-lasting, providing a solid foundation for your creations.
There are several joinery techniques that are widely used and have stood the test of time. Let’s explore three popular methods: dovetail joints, mortise and tenon joints, and half-lap joints.
Dovetail Joints
Dovetail joints are known for their exceptional strength and aesthetic appeal. They are commonly used in drawer construction, box making, and furniture assembly. The unique interlocking design of dovetail joints creates a strong connection that resists pulling apart. By mastering this technique, you can elevate the craftsmanship of your woodworking projects.
Mortise and Tenon Joints
Mortise and tenon joints are versatile and widely utilized in woodworking. This traditional method involves a protruding tenon fitting into a corresponding mortise, creating a secure connection. From table frames to door construction, this joint offers exceptional strength and stability. With practice, you can perfect the art of creating precise mortise and tenon joints.
Half-Lap Joints
Half-lap joints are a simple yet effective way to join two pieces of wood together. This technique involves removing half the thickness of each piece at the joint, allowing them to interlock seamlessly. Half-lap joints are commonly used in frame construction, shelving, and cabinetry. With accurate measurements and precise cutting, you can achieve strong and attractive connections with half-lap joints.
By mastering these joinery techniques, you can enhance the structural integrity and visual appeal of your woodworking projects. Each method offers its own unique advantages, and with practice, you can become proficient in creating professional-quality joinery that stands the test of time.
Attention to Detail in Finishing
Paying attention to detail is a key factor in taking your carpentry work to the next level. By focusing on sanding and finishing techniques, as well as checking for squareness and level, you can achieve impeccable results that showcase your craftsmanship. Let’s explore these critical aspects in more detail:
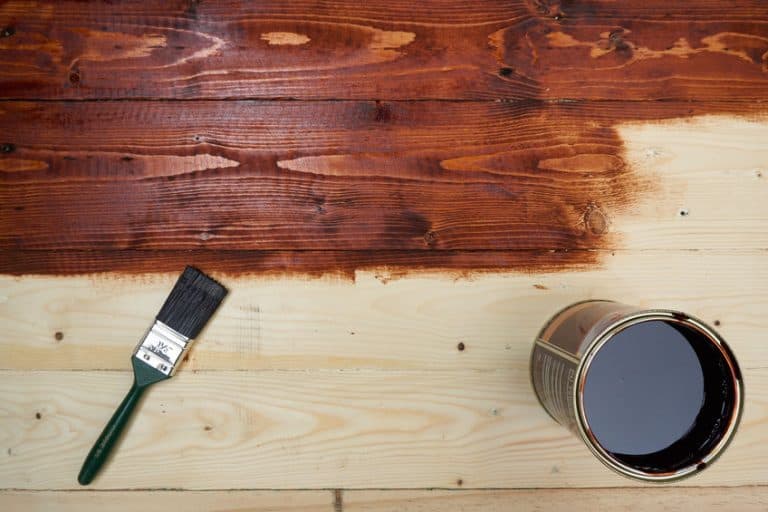
Sanding and Finishing
Thoroughly sanding your surfaces before applying finishes is essential for achieving a smooth and professional look. Start with a coarse-grit sandpaper to remove any imperfections or roughness. Gradually progress to finer-grit sandpaper to create a polished finish. Be sure to sand in the direction of the wood grain to avoid scratches and maintain a consistent appearance.
Once your surfaces are sanded, apply your chosen finish, whether it be stain, paint, or varnish. Follow the manufacturer’s instructions and apply multiple thin coats, allowing proper drying time between each application. This will ensure a durable and attractive finish that enhances the natural beauty of the wood.
Checking for Squareness and Level
Ensuring squareness and levelness is crucial for achieving precise and professional-looking carpentry work.
When working on corners or joints, use a square to check that they are perfectly 90 degrees. Place the square against the corner or joint, ensuring that it touches both adjoining surfaces. Adjust as necessary to achieve a square fit. This attention to detail will result in clean and visually appealing corners.
Furthermore, use a level to check that your surfaces are flat and straight. A level will help you identify any unevenness or inconsistencies in your work. Place the level on the surface, ensuring that the bubble is centered between the two lines. If adjustments are needed, make them before moving forward. Achieving level surfaces will elevate the quality and professionalism of your finished project.

| Benefits of Attention to Detail in Finishing | Techniques | Tools |
|---|---|---|
| 1. Enhanced aesthetics | – Thorough sanding for a smooth surface – Applying multiple coats of finish for a polished look | – Sandpaper (coarse to fine-grit) – Brush or applicator for applying finishes |
| 2. Professional craftsmanship | – Checking for squareness using a square – Verifying levelness with a level | – Square – Level |
| 3. Improved structural integrity | – Ensuring proper joint fit with squareness – Preventing warping or uneven surfaces with levelness | – Square – Level |
Learning from Mistakes
Mistakes happen, even to experienced carpenters. However, what sets successful carpenters apart is their problem-solving mindset and their ability to learn from these mistakes. Instead of getting discouraged, embrace every challenge as an opportunity for growth and improvement.
To make the most of these learning experiences, it’s important to document the lessons learned. One effective way to do this is by maintaining a journal or record of your projects. Documenting what worked well and areas for improvement not only helps you track your progress but also provides valuable insights for future projects.
Documenting Lessons Learned Example:
“During my recent cabinet project, I underestimated the importance of proper sanding and finishing techniques. As a result, the final product had inconsistent surfaces that lacked a professional touch. I realized the importance of paying attention to detail and ensuring thorough sanding and finishing before final assembly. Moving forward, I will prioritize this step to achieve a flawless finish.”
By actively engaging with and reflecting on your mistakes, you can continuously improve your craftsmanship and develop a repertoire of problem-solving techniques. Remember, setbacks are opportunities in disguise, leading you towards a more refined and skillful carpentry practice.
| Benefits of a Problem-Solving Mindset | Benefits of Documenting Lessons Learned |
|---|---|
|
|
Fine-tuning Miter Cuts
Achieving a perfect miter cut often requires practice. Start by working on smaller test pieces to eliminate any imperfections. Adjusting the miter saw angle is crucial in achieving the desired fit. Once you have perfected your technique on the test pieces, proceed to cut the actual parts for your project.
Practice on Test Pieces
Before making miter cuts on your actual project, it is advisable to practice on test pieces. This allows you to familiarize yourself with the miter saw and refine your technique. By working on smaller test pieces, you can identify and eliminate any imperfections in your cuts. Take your time to perfect your miter cutting skills before moving on to the final project.
Eliminating Imperfections
During the practice phase, pay attention to any imperfections in your miter cuts. These imperfections may include gaps, uneven edges, or inaccurate angles. By carefully analyzing your test pieces, you can identify the specific areas that need improvement. Through practice and adjustments, you can refine your technique and achieve cleaner, more precise miter cuts.
Adjusting the Miter Saw Angle
The miter saw angle plays a crucial role in achieving accurate miter cuts. Depending on the desired fit, you may need to adjust the miter saw angle accordingly. Experiment with different angles to find the perfect balance for your project. Remember to double-check your measurements and make small adjustments as necessary.
By practicing on test pieces, eliminating imperfections, and fine-tuning the miter saw angle, you can achieve precise and seamless miter cuts in your carpentry projects.
Estimating Framing Materials
Estimating the amount of framing materials needed can be simplified with a formula. By following this guideline, you can ensure that you have enough framing materials for your project, including studs and plate material for the walls.
Formula for estimating framing materials:
- Plan for one stud per linear foot of wall.
- Allocate five linear feet of plate material (bottoms, tops, and ties) per linear foot of wall.
This estimation takes into account the necessary extra material for corners, blocking, braces, as well as frames for windows and doors. By following this formula, you can avoid running out of framing materials during your project and ensure a smooth construction process.
| Type of Material | Quantity per Linear Foot of Wall |
|---|---|
| Studs | 1 |
| Plate Material | 5 linear feet (bottoms, tops, and ties) |
The Power of Trim Guns
Trim guns powered by air are a game-changer when it comes to fastening interior trim. These specialized tools make the process faster, better, and neater, allowing you to achieve professional-looking results with ease. So, what makes air-powered trim guns so impressive?
“Air-powered trim guns eliminate the need for pre-drilling, reducing the risk of splitting wood and saving you valuable time in your carpentry projects.”
One of the key advantages of air-powered trim guns is their ability to eliminate the need for pre-drilling. Unlike traditional nailing methods, these powerful tools can drive 18-gauge brads directly into the wood without the risk of splitting. This not only speeds up the installation process but also ensures neater results by leaving barely noticeable holes that can easily be filled.
When it comes to choosing the right trim gun, an 18-gauge brad trim gun is a versatile choice. This type of gun can accommodate brads ranging from 5/8 to 2 inches in length, making it suitable for a wide range of trim applications. Whether you’re working with baseboards, crown molding, or door casings, an 18-gauge brad trim gun will provide you with the precision and control you need.
Writing Measurements Down
When it comes to carpentry, precision is key. Every shape and number matters, and accuracy can make or break your project. To ensure you don’t forget crucial dimensions on your way to the saw, consider creating a convenient “notepad” on your tape measure.
You can achieve this by sticking masking tape to your tape measure or sanding down the side to create a writable surface. This makeshift notepad allows you to jot down measurements as you work without the need for a separate notepad or fumbling for a pen. Simply grab your trusty tape measure and write directly on the tape itself.
By having a designated space on your tape measure for jotting down shapes and numbers, you’ll have all the information you need right at your fingertips. This practical hack saves time and ensures accuracy throughout your carpentry project.
The Toenail Trick for Positioning Lumber
When you encounter stubborn lumber that refuses to cooperate, don’t fret. The toenail trick is a simple yet effective technique that can help you adjust and position the wood exactly where you need it.
To execute the toenail trick, all you need is a big nail and a hammer. Drive the nail at an angle through the edge of the stud, securing it in place. The angled nail acts as a temporary anchor, allowing you to manipulate the lumber without it shifting or falling.
This technique is particularly handy when dealing with warped or misaligned pieces of wood. By using the toenail trick, you have more control over the movement of the lumber, and you can coax it into the desired position.
Once you’ve aligned the wood to your satisfaction, you can remove the toenail and permanently fasten it using screws or nails.
Remember, the toenail trick is a valuable tool in your carpentry arsenal when it comes to adjusting stubborn lumber. So the next time you encounter a piece that’s giving you trouble, give this trick a try and see how it can help you achieve precise results.

Marking Instead of Measuring
Holding trim in place and marking it is often more accurate than measuring. This technique applies to various carpentry work, including installing siding, laying shingles, and framing. Marking eliminates the chances of measurement errors and speeds up the process.
Why Marking Instead of Measuring?
When it comes to carpentry, accuracy is key. Measuring tape can be prone to human error, resulting in incorrect measurements and costly mistakes. By using the marking technique, you eliminate the need for precise measurements, reducing the risk of errors and ensuring a more accurate outcome.
How to Use the Marking Technique
The marking technique involves holding the trim or material in place and marking it directly as opposed to measuring and transferring measurements. Follow these steps to ensure accuracy:
- Position the trim or material in its desired location.
- Use a pencil or a marking tool to mark the necessary dimensions directly on the material.
- Double-check the markings to ensure they align with your project requirements.
By marking instead of measuring, you eliminate the chances of transcription errors, ensuring precise cuts and installations. This technique is particularly useful when dealing with irregular shapes or non-standard measurements.
| Advantages | Disadvantages |
|---|---|
| Increased accuracy | Requires a steady hand and good visual judgment |
| Saves time and effort | Dependent on the placement and stability of the trim or material |
| Minimizes the chances of mistakes | Not ideal for precise measurements or fine woodworking |
“The marking technique allows for greater accuracy and eliminates the risk of measurement errors. It’s a time-saving approach that professional carpenters rely on to achieve precise cuts and flawless installations.”
Whether you’re installing trim, working with siding, or framing a structure, utilizing the marking technique can significantly improve the accuracy and efficiency of your carpentry projects. By eliminating measurement mistakes, you’ll achieve superior results and save time, making the entire process more streamlined and enjoyable.
Using Nippers to Pull Nails
When it comes to trim carpentry work or removing trim from a wall, having the right tools on hand can make your job easier and more efficient. One such tool that is often overlooked but incredibly useful is a pair of nippers. Nippers are small, handheld tools with sharp, pointed jaws that can grip and cut through various materials.

When it comes to pulling nails, nippers can be a game-changer. Instead of struggling with traditional methods like a hammer and pry bar, you can simply rely on the power of nippers. Here’s how:
- Begin by finding the nail you want to remove. Locate the backside of the trim where the nail is embedded.
- Using the sharp jaws of the nippers, grip the head of the nail firmly.
- With a quick, firm motion, pull the nail through the back of the trim.
By pulling the nail through the back of the trim, you avoid damaging the visible surface. This method is especially useful for delicate trim pieces that need to be preserved during removal.
Not only does this technique minimize the risk of damage, but it also saves you time and effort. Instead of spending extra minutes trying to pry out a stubborn nail, nippers allow you to quickly and efficiently remove it.
So, next time you’re working on trim carpentry or need to remove trim from a wall, make sure you have a pair of nippers in your toolbox. They’ll become your go-to tool for effortlessly pulling nails and making your carpentry tasks a breeze.
Conclusion
Mastering the art of carpentry craft requires both technical precision and artistic expression. By following these expert tips, you can enhance your woodworking skills and achieve outstanding results in your carpentry projects. Remember that each project is a learning experience, allowing you to refine your techniques and grow as a craftsman.
Through attention to detail and a commitment to enduring craftsmanship, you can create beautifully crafted pieces that stand the test of time. Embrace the challenges that come with each project and take pride in the fine details that set your work apart. Whether you are a beginner or an experienced carpenter, these tips will help you elevate your skills and produce exceptional woodworking projects.
As you continue your carpentry journey, seek inspiration from renowned carpenters and explore new techniques. Woodworking is not just a skill, but a passion that can bring you joy and fulfillment. Enjoy the process, embrace creativity, and let your love for carpentry shine through in every project you undertake. Happy woodworking!
FAQ
What are some expert carpentry tips for woodworking or home renovation projects?
Some expert carpentry tips include selecting the right wood for your project, precision in measuring and marking, keeping tools sharp for clean cuts, prioritizing safety in the workshop, mastering joinery techniques, attention to detail in finishing, learning from mistakes, fine-tuning miter cuts, estimating framing materials, using power tools like trim guns for neater results, writing measurements down, using the toenail trick for positioning lumber, marking instead of measuring for accuracy, and using nippers to pull nails for trim carpentry work.