Are you looking to add a touch of greenery to your indoor space? Or maybe you want to showcase your favorite plants in a stylish and creative way? Look no further! In this article, we will guide you step-by-step on how to create your own DIY plant stand. Whether you’re a beginner or a seasoned DIY enthusiast, this project is easy to tackle and will elevate your plants to new heights. So, are you ready to unleash your creativity and build a plant stand that reflects your personal style?
Key Takeaways:
- Create a DIY plant stand to elevate your indoor space and showcase your favorite plants.
- Follow our step-by-step guide to build a plant stand that suits your style and preferences.
- Customize your plant stand by adding extra tiers or adjusting the measurements to create a unique design.
- Choose the right materials and finishes to ensure the longevity and functionality of your plant stand.
- Display your plants with pride and enhance the ambiance of your indoor space.
Materials and Tools You Will Need
Creating your own DIY plant stand is a fun and rewarding project that requires a few essential materials and tools. By gathering these items, you’ll be well-equipped to build a sturdy and affordable wooden plant stand.
- Scrap 2x2s for the frame
- Scrap 2×8 pieces or plywood for the tops
- 2 ½” wood screws
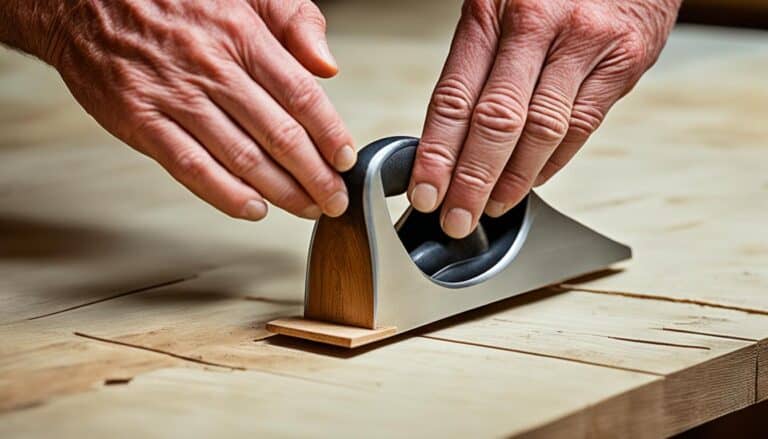
- Miter saw or any saw that can cut straight lines
- Drill/driver
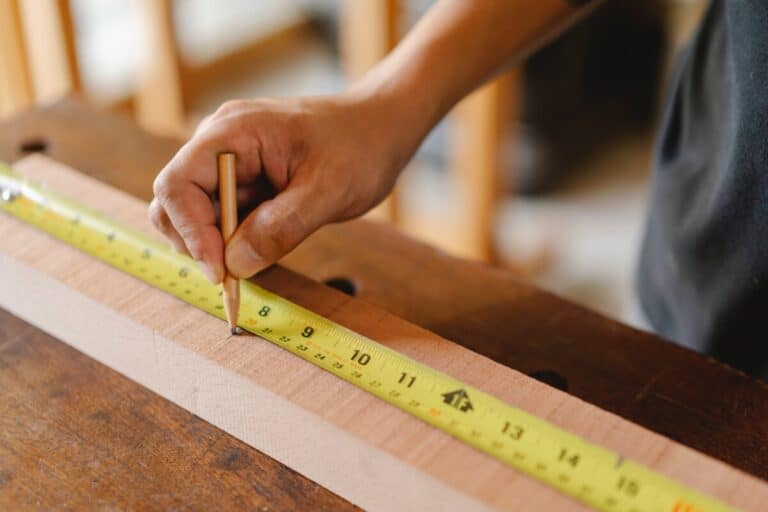
- Measuring tape
- Clamp
With these materials and tools at hand, you’ll have everything you need to embark on your DIY plant stand project. The scrap wood will give your plant stand a rustic and natural aesthetic, while the affordability of the materials makes it a budget-friendly option.
Planning and Customization
Before you begin building your DIY plant stand, it’s important to plan and customize it according to your preferences. While the tutorial will provide you with specific measurements and instructions, you can get creative and add your own touches to make it a modern plant stand that suits your style. Whether you want to add more tiers or adjust the measurements, this project can be customized to meet your needs.
Building the Frame
To make your DIY plant stand sturdy and stable, the first step is to create the frame. This frame will provide the structure and support for the tiers where your plants will be placed. Get ready to unleash your creativity and explore various creative plant stand ideas.
Start by using the scrap 2×2 pieces to assemble a capital “T” shape. This will serve as the base of the plant stand. Place one 2×2 vertically to form the center of the “T” and attach two more 2x2s horizontally at the top and bottom of the vertical piece.
Next, it’s time to attach the remaining 2x2s to create the rest of the frame. Connect the 2x2s on each end of the vertical piece, ensuring they are securely fastened. This will create a sturdy and durable frame that can support your plants.
Remember, this is your chance to get creative with your plant stand. Consider adding unique design elements or incorporating different materials to make your plant stand stand out. Let your imagination run wild and design a frame that reflects your personal style.
Benefits of a Sturdy Frame
A well-built frame is essential for the longevity and stability of your DIY plant stand. It provides a solid foundation for your plants and ensures that they are properly supported. With a sturdy frame, you can confidently display your favorite plants, knowing that they are safe and secure.
Example Creative Plant Stand Ideas
“I took my DIY plant stand to the next level by painting the frame in vibrant colors and adding decorative accents like hanging baskets. It’s now a statement piece in my living room!” – Sarah
- Combine different types of wood for a unique and rustic look.
- Add shelves at different heights to create visually appealing tiers.
- Incorporate metal accents or geometric shapes for a modern touch.
- Use repurposed materials like vintage ladders or crates to give your plant stand a unique charm.
Remember, the possibilities are endless when it comes to designing your DIY plant stand frame. Let your imagination guide you and have fun creating a plant stand that is both functional and visually appealing.
| Advantages of a Sturdy Frame | Example Creative Plant Stand Ideas |
|---|---|
| Provides stability and support for your plants | Combine different types of wood for a unique and rustic look |
| Ensures longevity of the plant stand | Add shelves at different heights to create visually appealing tiers |
| Allows for customization and creativity | Incorporate metal accents or geometric shapes for a modern touch |
| Elevates the overall aesthetic of your indoor space | Use repurposed materials like vintage ladders or crates for a unique charm |
Adding the Tops
Once the frame is built, it’s time to add the tops where the plants will sit on. For this step, you can use scrap 2×8 pieces or plywood squares. Simply center these on each tiered post and secure them using wood glue and 2 ½” wood screws through the center.
This step completes the basic structure of the DIY plant stand, providing a platform for your plants to thrive. The addition of the tops not only adds functionality but also enhances the overall aesthetic appeal of your plant stand.
By using different materials and finishes for the tops, you can create a unique and personalized look for your plant stand. Consider using reclaimed wood for a rustic touch or opt for colored plywood squares to add a pop of color to your indoor space.
Pro Tip: Measure and cut the tops to the desired size, ensuring they are large enough to accommodate the plant pots without overcrowding the space. It’s important to ensure that the tops are securely attached to provide a stable and supportive surface for your plants.
| Materials | Tools |
|---|---|
| – Scrap 2×8 pieces or plywood squares | – Wood glue |
| – 2 ½” wood screws | – Screwdriver |
| – Measuring tape | – Drill |
Adding the tops not only completes the construction of the DIY plant stand but also sets the stage for showcasing your beautiful plants. Once the tops are secured, you can arrange your plants on each tier, creating a stunning display that adds life and color to your living space. Get creative with your plant arrangement, playing with different heights and textures to create a visually appealing and dynamic plant stand.
Customization Options
With the basic structure of your DIY plant stand complete, now is the time to explore customization options. You can consider adding extra tiers to the stand by “branching off” one of the tier posts and attaching another tier. Additionally, you can experiment with the measurements and sizes of the 2×2 pieces and tops to create a unique and creative plant stand that suits your needs and preferences.
By customizing your DIY plant stand, you can create a one-of-a-kind piece that reflects your personal style. Whether you prefer a minimalist design with clean lines or a more intricate and ornate stand, the possibilities are endless.
One option for customization is to add additional tiers to accommodate more plants. This can be done by attaching additional 2×2 posts to the main frame and securing them with screws. By branching off from an existing tier post, you can create a staggered look that adds visual interest to your plant stand.
Another way to customize your plant stand is by experimenting with the measurements and sizes of the 2×2 pieces and tops. By adjusting the lengths of the posts or the dimensions of the tops, you can create a stand that perfectly fits your space and plants. Don’t be afraid to think outside the box and try different combinations to achieve a look that is truly unique.
Additionally, you can explore different finishes and paint colors to add a personal touch to your plant stand. Whether you prefer a natural wood look, a bold pop of color, or a sleek and modern finish, choose a paint that complements your overall aesthetic.
Examples of Customization Options:
- Adding additional tiers at different heights for a cascading effect
- Using different materials for the tops, such as reclaimed wood or marble, for a more unique look
- Painting the plant stand in a vibrant color to make it a focal point in the room
- Adding decorative elements, such as hooks or brackets, to hang small potted plants
Remember, the key to customization is to let your creativity shine. Don’t be afraid to experiment and have fun with your DIY plant stand to create a truly personalized piece that showcases your green thumb and design sensibilities.
Finishing Touches
Once the construction of your DIY plant stand is complete, it’s time to add the finishing touches. You have the flexibility to choose the perfect finish that complements your style and enhances the overall aesthetic of your space.
To achieve a rustic and natural look, you can leave the stand as it is, showcasing the raw beauty of the wood. This minimalist approach can create a timeless appeal and blend seamlessly with various interior designs.
If you prefer a more modern and colorful appearance, you can apply a wood stain or paint to the plant stand. A wood stain can add depth and richness to the wood, highlighting its natural grain and giving it a warm, earthy tone. On the other hand, painting the plant stand in bold or vibrant colors can make it a striking focal point in your space.
The choice of finish will ultimately depend on your personal style, the overall design theme of your home, and the specific ambiance you want to create. Consider experimenting with different finishes to find the perfect balance between modernity and affordability.
Examples of Finishes for Your DIY Plant Stand
- Classic and Elegant: A smooth, dark walnut stain for a timeless appeal.
- Contemporary and Sleek: A matte black paint finish for a modern, minimalist look.
- Colorful and Vibrant: Bright pastel colors or bold hues to infuse energy and personality into your space.
- Natural and Earthy: A clear, matte varnish to protect the wood while maintaining its organic charm.
Explore different finishes and find the one that suits your taste and budget. Remember, the finishing touches play a vital role in transforming your simple DIY plant stand into a modern statement piece that proudly displays your greenery.
| Finish Type | Characteristics |
|---|---|
| Wood Stain | Enhances natural wood grain, offers various colors and shades, retains a rustic or vintage look |
| Paint | Provides a wide range of vibrant or subtle colors, adds a bold and contemporary touch |
| Varnish | Protects the wood, maintains its natural appearance, offers a matte or glossy finish |
Displaying Your Plants
After completing your DIY indoor plant stand, it’s time to showcase your favorite greenery. Whether you choose to place it by a sunlit window, next to your cozy reading chair, or in a corner that needs a touch of nature, the plant stand provides a perfect elevated platform for your indoor plants to flourish.
You have the freedom to arrange your plants in a way that suits your aesthetic preferences. Consider grouping them by size for a clean and organized look, or mix and match different plant varieties to create a visually appealing display. With the plant stand as the focal point, your green beauties will not only thrive but also enhance the overall ambiance of your living space.

If you have a collection of plants, you can create a stunning visual effect by arranging them at varying heights on different tiers of the plant stand. This not only adds dimension to your display but also creates an interesting focal point in the room.
Remember to consider the specific lighting needs of your indoor plants when positioning them on the plant stand. Place plants that require more sunlight near windows or under appropriate artificial lighting, while shade-loving plants can be positioned in shadier spots of your home.
Get creative with your plant arrangement and experiment with different combinations and layouts. By adding decorative elements like small figurines, candles, or even string lights, you can further personalize your display and create a unique atmosphere.
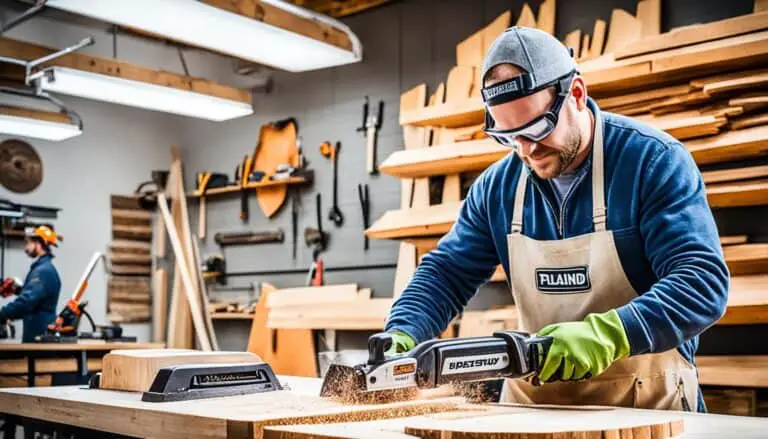
Additional Inspiration for Scrap Wood Projects
If you enjoyed building your DIY plant stand with scrap wood, there are plenty of other projects you can explore. From a scrap wood monitor stand to a scrap wood bookshelf, the possibilities are endless. These projects allow you to make the most of what you already have and unleash your creativity to create functional and stylish pieces for your home.
When it comes to DIY projects, working with scrap wood not only helps reduce waste but also gives your creations a unique and rustic charm. By repurposing leftover materials, you can create one-of-a-kind furniture pieces that add character to your living space.
Here are a few ideas to inspire your next scrap wood project:
- Scrap Wood Wine Rack: Transform your leftover wood into a stylish wine rack that showcases your favorite bottles. You can get creative with the design, using different types of wood for a contrasting look. This project combines functionality with a touch of sophistication.
- Scrap Wood Coasters: Add a personal touch to your coffee table with homemade coasters. Cut your scrap wood into small squares or circles, and sand the edges for a smooth finish. You can leave the wood natural or apply a protective sealant for added durability.
- Scrap Wood Wall Art: Turn your scrap wood into a unique piece of wall art by arranging different-sized wood pieces in an abstract or geometric pattern. Paint or stain the wood in colors that complement your home decor for a stunning visual display.
- Scrap Wood Storage Box: Create a stylish storage solution by repurposing your scrap wood into a functional box. Use it to organize small items like jewelry, stationery, or even as a planter for succulents. The possibilities are endless.
Remember, the key to successful scrap wood projects is to let your imagination run wild and experiment with different designs, finishes, and techniques. Don’t be afraid to mix and match wood types or incorporate other materials like metal or glass for added visual interest.
Embrace Sustainability and Creativity with Scrap Wood
“Scrap wood projects not only allow you to create unique and functional pieces for your home but also help reduce waste and embrace sustainability. So, let your creativity flow and turn your leftover wood into stunning works of art!”
By embracing scrap wood projects, you can transform discarded materials into beautiful and practical items that reflect your style and values. These projects also present an opportunity to learn new woodworking skills and gain a deeper appreciation for the art of repurposing.
So, the next time you have scrap wood left over from a project, don’t throw it away. Instead, let your creativity soar and embark on a new DIY adventure. You never know what amazing creations you’ll come up with!
Creative Plant Stand Ideas for Different Spaces
While this tutorial focused on creating an indoor DIY plant stand, there are numerous creative plant stand ideas that can be applied to different spaces. Whether you want to create a plant stand for your patio, balcony, or garden, the principles remain the same. By using different materials, designs, and sizes, you can create plant stands that elevate the beauty of your outdoor space and provide a platform for your plants to thrive.
Outdoor Plant Stand Ideas
When it comes to outdoor plant stands, there are endless possibilities. Here are a few ideas to inspire you:
- Create a rustic wooden plant stand using reclaimed pallets. Cut the pallets to size and assemble them into a box shape, adding legs for support. This simple design adds a touch of charm to your garden.
- Elevate your plants with a tiered metal plant stand. Choose a stand with multiple levels to showcase a variety of plants, creating a visually appealing and organized display.
- Repurpose old ladders into unique plant stands. By adding shelves or using the rungs as platforms, you can turn an old ladder into a trendy and functional addition to your outdoor space.
- For a modern and minimalist look, consider concrete plant stands. These sleek and sturdy stands provide a contemporary touch to any garden or patio.
Indoor Plant Stand Ideas
If you’re looking to create a plant stand for your indoor space, here are some ideas to consider:
- Add a touch of elegance with a marble or stone plant stand. These natural materials provide a luxurious and sophisticated look, elevating your indoor plants to the next level.
- Get creative with hanging plant stands. Utilize macramé plant hangers or install ceiling hooks to suspend your plants at different heights, creating a stunning and space-saving display.
- Opt for a minimalist and space-efficient ladder plant stand. This design allows you to showcase multiple plants in a narrow vertical space, making it perfect for small apartments or rooms with limited floor space.
- Create a living wall with a vertical plant stand. These unique structures can be built with wooden pallets or metal grids, providing a stunning focal point and maximizing your plant display.
Experiment with these plant stand ideas and let your creativity flourish. Remember to consider the specific needs of your plants, such as light requirements and drainage, when choosing or designing a plant stand. With the right plant stand, you can transform any space into a green oasis.
The Best Wood for a Plant Stand
When it comes to choosing the right materials for your DIY plant stand, the type of wood plays a significant role in its durability and suitability for outdoor use. While there are several options available, cedar is often considered the best choice for a wooden plant stand.
Cedar wood offers a variety of benefits that make it ideal for constructing a plant stand. Firstly, it is known for its exceptional durability, ensuring that your plant stand will withstand the test of time. It is naturally resistant to decay and insects, making it a reliable choice for outdoor settings, where your plant stand may be exposed to various environmental factors.
Furthermore, cedar wood is highly effective at withstanding moisture, which is crucial for plant stands that may come into contact with water or need to endure rainy weather conditions. This resistance to moisture helps prevent warping, splitting, or rotting, enhancing the longevity of your plant stand.
If cedar wood is not readily available or falls outside of your budget, there are alternative options. You can use other types of wood, such as pine, redwood, or cypress, and treat them with stain or paint and a polyurethane coating. This sealant will provide added protection against moisture, ensuring that your plant stand remains durable and suitable for outdoor use.
The choice of wood for your plant stand ultimately depends on your preferences, budget, and the specific climatic conditions in your area. Consider factors such as durability, resistance to decay and insects, and ability to withstand moisture when making your decision.
Pros and Cons of Cedar Wood for Plant Stands
To help you assess the suitability of cedar wood for your DIY plant stand, here are some pros and cons to consider:
| Pros | Cons |
|---|---|
| Cedar is highly durable and long-lasting. | Cedar wood may be more expensive compared to other types of wood. |
| Cedar is naturally resistant to decay and insects. | Cedar wood may not be readily available in all areas. |
| Cedar can withstand moisture, reducing the risk of warping or rotting. | Cedar may have a distinct scent that some people may find unpleasant. |
Considering these factors will help you make an informed decision and choose the best wood for your plant stand that suits your needs and preferences.
Avoid Pressure-Treated Wood for Plant Stands
While pressure-treated wood is commonly used for outdoor projects due to its resistance to decay and insects, it is not recommended for constructing plant stands. Pressure-treated wood contains chemicals that can be harmful to plants when in direct contact with the soil or the plants themselves. To ensure the health and well-being of your plants, it is best to avoid pressure-treated wood for your plant stand.
Options for Outdoor Plant Stands
If you are looking for outdoor plant stand options, there are several choices available. You can opt for metal stands like wrought iron or aluminum, cast concrete stands, PVC or plastic stands, decorative ceramic garden stools, or even repurpose outdoor furniture. It’s important to choose materials that are suitable for outdoor use and can withstand the specific climate conditions in your area. By selecting the right outdoor plant stand, you can create a beautiful and functional display for your outdoor plants.
Types of Outdoor Plant Stands
| Material | Description |
|---|---|
| Metal (wrought iron or aluminum) | Strong and durable, with intricate designs available. |
| Cast concrete | Sturdy and weather-resistant, suitable for larger plants. |
| PVC or plastic | Lightweight and affordable, with various styles and colors. |
| Decorative ceramic garden stools | Elegant and decorative, adding a touch of sophistication to your outdoor space. |
| Repurposed outdoor furniture | Create a unique and sustainable plant stand by repurposing old chairs or tables. |
When choosing an outdoor plant stand, consider the style and aesthetic you want to achieve, as well as the specific needs of your plants. Different materials offer different levels of durability, weather resistance, and design options. Be sure to select a stand that complements your outdoor space and provides a stable and secure platform for your plants to thrive.

Tips for Preventing Plants from Leaning
If you notice your plants leaning, it’s important to take action to provide them with the support they need. By following these simple plant care tips, you can help your plants maintain an upright position and thrive in their pot or plant stand.
Rotate the Plant for Even Exposure to Light
One effective solution for preventing plant leaning is to regularly rotate the plant. By rotating the plant every few weeks, you ensure that all sides receive equal exposure to sunlight. This encourages uniform growth and prevents the plant from leaning towards the light source.
Use Dowel Stakes for Additional Support
For larger plants, such as monstera or jasmine, you can provide additional support by using dowel stakes. Carefully insert the stake into the soil near the base of the plant, making sure not to damage the roots. Gently tie the plant to the stake using soft plant ties or twine, securing it without causing any harm. This added support will help your plant maintain an upright position and prevent leaning.
By implementing these plant care tips, you can ensure that your plants receive the necessary support to thrive in their pot or plant stand. Remember to regularly check on your plants and make any adjustments needed to keep them growing upright and beautifully.
Conclusion
Creating your own DIY plant stand is a fantastic way to enhance the beauty of your indoor space and showcase your beloved greenery. Whether you prefer a minimalist wooden design or want to get creative with customizations and materials, building a plant stand can be a rewarding and fulfilling project. By following the step-by-step guide provided in this article and exploring different plant stand ideas, you can create a modern and stylish display that perfectly suits your indoor plants.
With DIY plant stands, the possibilities are endless. You can choose to keep it simple with clean lines and natural finishes, or you can inject personality by incorporating unique materials and customization options. The beauty of DIY is that you have full creative control to design a plant stand that matches your style and complements your existing decor.
So, why wait? Roll up your sleeves, gather your materials, and embark on the journey of building your very own DIY plant stand. Not only will you enjoy the process, but you’ll also have a beautiful addition to your home that brings joy and life to your indoor space.
FAQ
What materials and tools do I need to create a DIY plant stand?
For your DIY plant stand, you will need scrap 2x2s for the frame, scrap 2×8 pieces or plywood for the tops, 2 ½” wood screws, a miter saw or any saw that can cut straight lines, a drill/driver, a measuring tape, and a clamp.
Can I customize the DIY plant stand to suit my style?
Yes, you can customize the DIY plant stand according to your preferences and style. While the tutorial provides specific measurements and instructions, you can add extra tiers or adjust the sizes to create a modern and unique plant stand.
How do I build the frame of the DIY plant stand?
To build the frame of the DIY plant stand, you will assemble a capital “T” shape using scrap 2×2 pieces. You can then attach the rest of the 2x2s on each end to create a sturdy base for the plant stand.
How do I add the tops to the DIY plant stand?
To add the tops to the DIY plant stand, you can use scrap 2×8 pieces or plywood squares. Simply center these on each tiered post and secure them with wood glue and 2 ½” wood screws through the center.
Can I customize the DIY plant stand further?
Yes, you can customize the DIY plant stand further by adding extra tiers, adjusting the measurements and sizes of the 2×2 pieces and tops, or even experimenting with different designs and materials.
How can I add finishing touches to the DIY plant stand?
You can choose to leave the DIY plant stand as it is for a rustic look or apply a wood stain or paint to give it a modern or colorful appearance. The choice of finish will depend on your style and the overall aesthetic of your space.
How should I display my plants on the DIY plant stand?
You can display your plants on the DIY plant stand by arranging them by size or creating a visually appealing display with different plant varieties. Place the plant stand by a window, next to your favorite chair, or in a cozy corner to enhance the overall ambiance of your space.
Are there other projects I can make with scrap wood?
Yes, there are plenty of other projects you can make with scrap wood, such as a scrap wood monitor stand or a scrap wood bookshelf. These projects allow you to get creative and make functional and stylish pieces for your home.
Can I create different types of plant stands for outdoor spaces?
Yes, you can create different types of plant stands for outdoor spaces. You can choose from metal stands like wrought iron or aluminum, cast concrete stands, PVC or plastic stands, decorative ceramic garden stools, or repurpose outdoor furniture to create beautiful and functional displays for your outdoor plants.
What is the best wood for a plant stand?
Cedar is often considered the best wood for a plant stand due to its durability, resistance to decay and insects, and ability to withstand moisture. However, you can also use other types of wood and seal them with stain or paint and a polyurethane to ensure their longevity and suitability for outdoor use.
How can I prevent my plants from leaning in the plant stand?
If you notice your plants leaning, you can rotate them to ensure even exposure to light. For larger plants, such as monstera or jasmine, you can use dowel stakes to provide additional support and help them maintain an upright position in the plant stand.