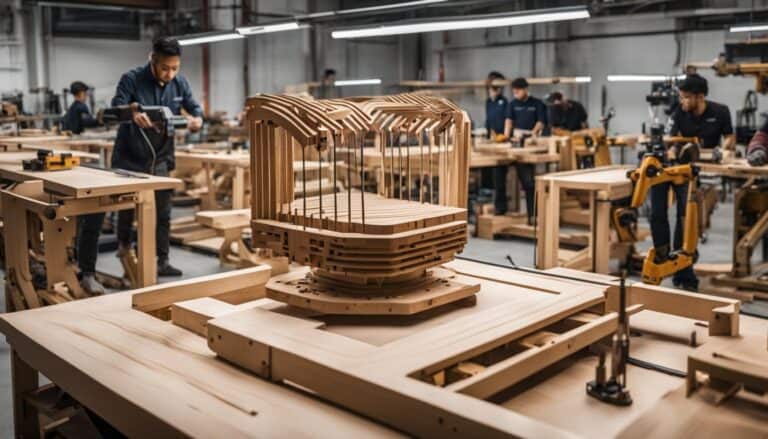
If you’ve ever been mesmerized by intricately crafted wooden furniture or admired the smooth finish on a wooden sculpture, you may have wondered how these masterpieces are made. Woodworking is an art that has been practiced for centuries, and it’s not as daunting as it may seem. Whether you’ve never picked up a saw or you’re looking to refine your skills, this article will provide you with essential woodworking tips and techniques to get you started on your woodworking journey.
Have you ever wondered how to unleash your inner carpenter and create stunning wooden objects? How can you transform a simple piece of wood into a work of art? In this article, we’ll reveal essential woodworking tips and techniques that will empower you to embark on your woodworking adventure with confidence and success. From choosing the right tools to mastering fundamental woodworking techniques, you’ll gain the knowledge and skills needed to bring your woodworking visions into reality. So, are you ready to unlock your woodworking potential and unleash your creativity? Let’s dive in!
Key Takeaways:
- Learn essential woodworking tips and techniques to start your woodworking journey.
- Understand the basics of woodworking, including wood selection and tool preparation.
- Safety should always be a priority in woodworking.
- Master fundamental woodworking techniques such as milling, jointing, sawing, drilling, routing, gluing, clamping, shaping, sanding, and finishing.
- Explore the potential of woodworking as a hobby or a profession.
Getting Started with Woodworking
Before diving into woodworking, it’s important to understand the basics. Start by familiarizing yourself with the different types of wood and their characteristics. Understanding the properties of different woods will help you choose the right material for your projects and ensure the best results.
Learn how to properly handle and store wood to prevent warping or damage. Keep in mind that wood is highly sensitive to changes in humidity and temperature. Storing wood in a dry, well-ventilated area and using proper stacking techniques will help maintain its quality.
Gathering essential tools is another crucial step in getting started with woodworking. Some of the tools you’ll need include saws, chisels, clamps, measuring tools, and safety equipment. Investing in quality tools will make your woodworking experience more enjoyable and ensure accurate and efficient results.
Once you have the basics covered, it’s time to start practicing your skills. Starting with small woodworking projects will allow you to gradually build your expertise and gain confidence. Simple projects like a cutting board or a small shelf are great options for beginners.
Remember, woodworking is a journey of learning and experimentation. Don’t be afraid to make mistakes and learn from them. With time and practice, you’ll develop your own unique woodworking style.
Essential Woodworking Tools for Beginners
As a beginner in woodworking, it can be daunting to navigate through the wide range of tools available. However, starting with the right set of tools is crucial for a successful woodworking journey. Here are some essential woodworking tools that every beginner should consider:
- Miter Saw: A versatile saw that allows you to make precise angled cuts for trim work, frame building, and other projects.
- Circular Saw: Ideal for making straight cuts in various materials, including plywood and lumber.
- Chisels: Essential for carving and shaping wood, chisels come in different sizes and are used for precision work.
- Hand Planes: Used for smoothing and flattening wood surfaces, hand planes help achieve a polished finish.
- Tape Measure: A must-have tool for accurate measurements and ensuring precise cuts.
These tools will equip you to handle a wide range of beginner projects, from simple woodworking tasks to more advanced creations. Investing in quality tools will not only enhance accuracy but also make woodworking more enjoyable.
Expanding Your Tool Collection
As you gain experience and take on more complex projects, you may find the need to acquire specialized tools. Depending on your woodworking interests, some additional tools you may consider include:
- Router: Used for creating intricate designs, grooves, and decorative edges.
- Jigsaw: Allows for curved cuts and intricate shapes, making it perfect for woodworking projects with creative designs.
- Drill Press: Provides precision drilling and can be used for repetitive drilling tasks.
- Clamps: These are essential for securing wood pieces together during gluing and assembly.
- Random Orbit Sander: Speeds up the sanding process and ensures a smooth finish.
Remember, building your tool collection should be gradual and based on your specific needs and preferences as a woodworker. Take the time to research and invest in tools that align with the types of projects you enjoy.
Now that you have an idea of some essential woodworking tools, you can confidently begin your woodworking journey. Remember to prioritize safety, practice using your tools correctly, and continue to refine your skills over time.
Happy woodworking!
| Tool | Description |
|---|---|
| Miter Saw | A versatile saw for making precise angled cuts in trim work and frame building. |
| Circular Saw | Ideal for making straight cuts in various materials, including plywood and lumber. |
| Chisels | Essential carving and shaping tools available in different sizes for precision work. |
| Hand Planes | Used for smoothing and flattening wood surfaces to achieve a polished finish. |
| Tape Measure | A must-have tool for accurate measurements and ensuring precise cuts. |
Woodworking Safety Tips
Safety should always be a top priority in woodworking. By following proper safety protocols, you can protect yourself from potential accidents and injuries. Here are some essential woodworking safety tips to keep in mind:
1. Wear Protective Equipment
It’s crucial to wear the right protective equipment to safeguard yourself during woodworking projects. The following items are essential:
- Safety goggles: Protect your eyes from flying debris and wood particles.
- Gloves: Keep your hands safe from sharp tools and splinters.
- Dust mask: Prevent the inhalation of harmful dust particles.
2. Keep Your Workspace Clean and Organized
Before starting any woodworking project, ensure that your workspace is clean and organized. A clutter-free environment reduces the risk of accidents and allows for better focus and maneuverability.
3. Familiarize Yourself with Tool Use and Safety Guidelines
Prioritize getting acquainted with the proper use of woodworking tools and follow safety guidelines. Read and understand the manufacturer’s instructions for each tool before operating it. This knowledge will prevent accidents and ensure accurate and safe woodworking.
4. Take Your Time and Avoid Rushing
Woodworking requires patience and precision. Never rush or force a cut, as this can lead to accidents and result in imprecise and unsatisfactory outcomes. Take your time to plan, measure, and execute each step carefully.
Remember, woodworking safety is crucial for a fulfilling and injury-free woodworking experience. By incorporating these safety tips into your practice, you can fully enjoy the art of woodworking while minimizing risks and maximizing success.
| Woodworking Safety Tips |
|---|
| Wear protective equipment (safety goggles, gloves, dust mask) |
| Keep your workspace clean and organized |
| Familiarize yourself with tool use and safety guidelines |
| Take your time and avoid rushing |
Understanding Woodworking Techniques
Woodworking is a craft that requires a variety of techniques to bring your projects to life. Whether you’re a beginner or have some experience, it’s important to understand the fundamental woodworking techniques that will help you create quality and precise results. By mastering these techniques, you’ll be able to tackle a wide range of woodworking ideas and turn them into beautiful creations.
Milling
Milling is the process of transforming rough lumber into precisely shaped blocks. It involves using tools like jointers, planers, and table saws to flatten and shape the wood. Milling ensures that your wood is uniform and ready for joinery, providing a solid foundation for your projects.
Jointing
Jointing is essential for creating flat and square edges on your wood. It involves flattening one face and one edge of a board, which is crucial for proper joinery. By jointing your wood, you can ensure that your pieces fit together seamlessly, resulting in strong and sturdy connections.
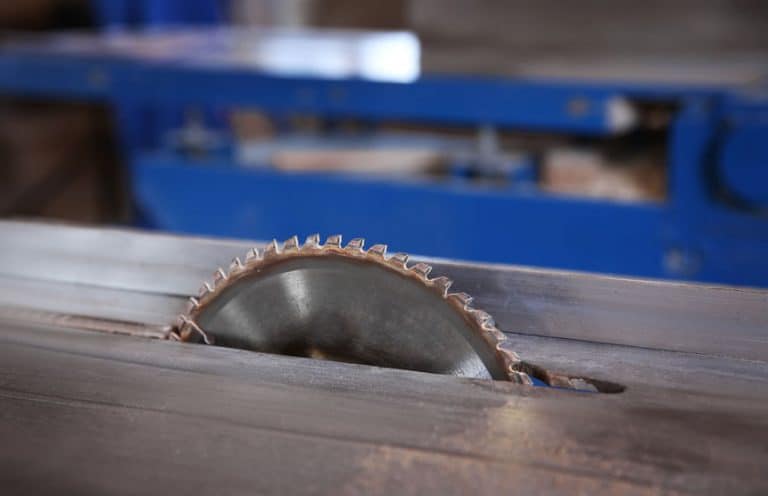
Sawing
Sawing is a fundamental technique in woodworking that allows you to cut wood into desired shapes and sizes. There are various types of saws used for different purposes, such as chop saws, hand saws, table saws, and bandsaws. Mastering sawing techniques will enable you to make precise cuts and achieve the desired outcomes for your projects.
Drilling
Drilling is the process of creating holes in wood using drill bits. It is a versatile technique that allows you to add hardware, create joints, or simply customize your projects. Understanding different drill bits and practicing drilling techniques will help you achieve accurate and clean holes in your woodworking projects.
Routing
Routing involves using a handheld or mounted router to shape and cut wood. It allows you to create decorative edges, grooves, and intricate designs. By learning how to handle routers and master different routing techniques, you can add intricate details and unique touches to your woodworking projects.
Gluing and Clamping
Gluing and clamping are essential for joining wood pieces together. Choosing the right glue for your project and applying it correctly ensures strong and durable bonds. Clamps, on the other hand, hold the wood in place until the glue dries. By mastering gluing and clamping techniques, you can create seamless and sturdy connections in your woodworking projects.
Shaping and Sanding
Shaping involves using various tools and techniques to give your wood projects unique profiles and contours. It includes processes like carving, turning, veneering, and lamination. Once your project is shaped, sanding plays a vital role in achieving a smooth and polished finish. Proper sanding techniques will help you remove imperfections and create a professional look and feel for your work.
Finishing
Finishing is the final step in woodworking and involves applying protective coatings to enhance the beauty and durability of your projects. It includes techniques like staining, painting, varnishing, and applying finishes like oils or waxes. By understanding different finishing techniques, you can bring out the natural beauty of the wood and protect it for years to come.

Mastering these woodworking techniques will open up a world of possibilities for your projects. By learning and practicing each technique, you’ll gain confidence and craftsmanship, allowing you to bring your woodworking ideas to life with precision and creativity.
Milling and Jointing Techniques
In woodworking, milling and jointing techniques are essential skills that every beginner should learn. These techniques involve shaping and preparing wood for joinery, ensuring precise and accurate results in your woodworking projects.
Milling Techniques
Milling is the process of transforming rough lumber into geometrically precise blocks. By using tools like jointers, planers, and table saws, you can flatten and shape the wood according to your desired dimensions.
Jointing Techniques
Jointing is the process of flattening one face and one edge of a board, making it ready for joinery. This technique ensures that the wood has flat and square surfaces, allowing for strong and seamless connections between pieces.
“Milling and jointing techniques are fundamental to almost any woodworking project, from building furniture to crafting cabinets. By mastering these techniques, you’ll be able to achieve precise and accurate joinery, resulting in high-quality and professional-looking pieces.”
Whether you’re just starting out or looking to improve your woodworking skills, learning milling and jointing techniques is crucial. These techniques pave the way for successful and visually appealing projects, setting the foundation for more complex woodworking endeavors.
| Benefits of Milling and Jointing Techniques | How to Execute Milling and Jointing Techniques |
|---|---|
| 1. Creates geometrically precise wood blocks | 1. Start with a rough lumber board |
| 2. Ensures flat and square surfaces for joinery | 2. Use a jointer to flatten one face of the board |
| 3. Facilitates accurate and seamless joinery | 3. Use a jointer or table saw to flatten one edge of the board |
| 4. Provides a solid foundation for woodworking projects | 4. Repeat the jointing process for all boards involved in the project |
By incorporating milling and jointing techniques into your woodworking repertoire, you’ll have the skills necessary to create precise, strong, and visually appealing pieces. These techniques form the basis for many other woodworking skills and are essential for any woodworker looking to enhance their craft.
Sawing Techniques
Sawing is a foundational woodworking technique that allows you to cut wood into desired shapes and sizes. Whether you’re a beginner or an experienced woodworker, understanding different sawing techniques is essential for various woodworking projects. Here, we’ll explore some of the common types of saws used in woodworking and their specific uses.
Types of Saws
1. Chop Saws: Also known as miter saws, these saws are designed for making precise crosscuts and angled cuts in wood. They are commonly used for framing, crown molding, and trim work.
2. Hand Saws: Hand saws come in different forms, such as crosscut saws, rip saws, and panel saws. They are versatile tools for making straight cuts and are excellent for small woodworking projects or when a power source is not available.
3. Portable Circular Saws: These handheld saws are lightweight and easy to maneuver, making them perfect for cutting large sheets of wood or making long rip cuts. They are commonly used in construction and carpentry.
4. Table Saws: Table saws are stationary saws with a flat table surface. They are suitable for making long, straight cuts and are commonly used for rip cuts, crosscuts, and bevel cuts. Table saws offer precision and stability for various woodworking projects.
5. Chainsaws: Chainsaws are powerful saws used for cutting wood quickly, especially for tasks such as felling trees or cutting logs. They require proper handling and safety precautions.
6. Bandsaws: Bandsaws feature a continuous loop of toothed metal for making curved cuts and intricate shapes in wood. They are commonly used for cutting curves, resawing, and intricate scrollwork.
7. Scroll Saws: Scroll saws are specialized saws designed for intricate and detailed cuts. They are commonly used for making decorative woodwork, such as scrollwork, fretwork, and intarsia.

Proper selection and use of the right saw for each woodworking project will greatly impact the quality and efficiency of your work. Take the time to familiarize yourself with the different types of saws and their uses to achieve precise and accurate results.
Mastering sawing techniques is crucial for any woodworker, as it allows you to shape and divide wood according to your project needs. Whether you’re making straight cuts, curved cuts, or intricate details, using the right saw and employing proper cutting techniques will ensure the success of your woodworking projects.
Drilling and Boring Techniques
Drilling and boring are essential woodworking techniques that allow you to create precise holes in wood. Whether you need to fasten pieces together or add decorative elements, mastering these techniques is crucial for any woodworker.
Drilling involves using a drill bit to create a hole in the wood. There are different types of drill bits available, each designed for specific hole sizes and materials. Here are some commonly used drill bits:
- Twist bits: These are the most common drill bits, suitable for drilling holes in various materials, including wood.
- Forstner bits: These bits are ideal for drilling flat-bottomed holes, making them perfect for creating recessed areas or mortises.
- Spade bits: Also known as paddle bits, these are used for drilling larger holes quickly, typically for rough work or plumbing installations.
When drilling, ensure that you use the appropriate speed and apply consistent pressure to achieve clean and accurate holes. You can perform drilling tasks using a handheld drill or a stationary drill press, depending on the requirements of your project.
On the other hand, boring is the technique used to enlarge pre-existing holes. It involves using a specialized boring tool or bit to increase the size of a hole according to your needs. Boring is commonly used when creating dowel joints or fitting hardware onto wooden surfaces.
Note: To prevent tear-out or splintering, it is recommended to use a backing board when drilling or boring through wood.
Boring Technique
Here is a step-by-step guide on how to execute the boring technique:
- Secure the wood firmly to prevent any movement during the boring process.
- Select an appropriate boring tool or bit based on the desired hole size.
- Align the boring tool with the pre-existing hole and gradually increase the size by rotating the tool in a clockwise direction.
- Apply steady and controlled pressure to avoid any kickbacks or accidents.
- Periodically remove the waste material and ensure that the hole size matches your requirements.
Drilling and Boring Safety Tips
When practicing drilling and boring techniques, it’s important to prioritize safety. Here are some safety tips to keep in mind:
- Always wear safety goggles to protect your eyes from flying debris.
- Use clamps or a vice to secure the wood in place and prevent it from shifting during drilling or boring.
- Ensure that your work area is well-lit and free from any obstructions.
- Follow the manufacturer’s recommendations for the appropriate speed and feeding rate.
- Keep your hands away from the drill or boring tool and maintain a firm grip on the handle.
Remember, practice makes perfect when it comes to drilling and boring. Take the time to familiarize yourself with different drill bits and techniques to achieve accurate and professional results in your woodworking projects.
| Drill Bit Type | Best Use |
|---|---|
| Twist bits | General-purpose drilling in wood and other materials |
| Forstner bits | Creating flat-bottomed holes, recessed areas, or mortises |
| Spade bits | Rough work or drilling larger holes |
Routing Techniques
In woodworking, routing is a highly versatile technique that allows you to shape and cut wood with precision. By using a handheld or mounted router, you can create beautiful edge treatments, grooves, and intricate patterns. Understanding the various router bits and their uses is essential for mastering this technique and exploring the full potential of routing.

Router Bits for Different Applications
Router bits come in a wide range of shapes and sizes, each designed for specific woodworking tasks. Here are some common router bits and their applications:
- Straight Bits: These bits have straight cutting edges and are ideal for creating grooves, dadoes, and rabbets.
- Rounding Over Bits: Rounding over bits are used to create smooth, rounded edges on wood, giving a finished look to your projects.
- Cove Bits: Cove bits are used to create concave profiles and decorative edges on furniture and trim.
- Chamfer Bits: Chamfer bits are used to create beveled edges on wood, adding visual interest to your projects.
- Flush Trim Bits: Flush trim bits are designed to trim the edges of one wood piece to be flush with another, creating clean and seamless joints.
- Rabbeting Bits: Rabbeting bits are used to create a square recess along the edge of a wood piece, perfect for joining panels or adding depth to your projects.
Safety Precautions
When using a router, it’s important to prioritize safety and follow these precautions:
- Always wear protective eyewear, ear protection, and a dust mask to protect yourself from flying debris and noise.
- Ensure your workpiece is securely clamped down to prevent movement and achieve clean, accurate cuts.
- Keep your hands away from the router bit and use push blocks or featherboards to guide the wood through the cut.
- Take shallow cuts and make multiple passes when working with harder woods or making deeper cuts to prevent excessive strain on the router and improve overall control.
- Never start the router with the bit in contact with the wood. Always begin the cut with the router bit clear of the workpiece.
Proper handling, technique, and safety precautions are crucial when working with a router. Take the time to familiarize yourself with the tool and practice on scrap wood before starting your projects.
Gluing and Clamping Techniques
Gluing and clamping are essential techniques in woodworking that allow you to create strong and durable joints. By using the right glue and employing proper clamping methods, you can ensure the integrity of your woodwork projects.
Types of Glue:
- White interior glue: Ideal for indoor woodworking projects where a strong bond is required.
- Yellow interior glue: Suitable for woodworking projects that require water resistance.
- Exterior glue: Designed for outdoor woodworking projects, providing durability against moisture and weather elements.
- Epoxy: Offers maximum strength and versatility, often used for bonding different materials.
Types of Clamps:
| Clamp Type | Best Used For |
|---|---|
| Bar Clamps | Large-scale projects |
| Pipe Clamps | Long and narrow pieces |
| F-clamps | General woodworking |
| Spring-loaded Clamps | Small projects or delicate pieces |
When gluing, it’s important to follow these steps:
- Prepare the surfaces: Ensure that the surfaces to be glued are clean, dry, and free from any debris.
- Apply the glue: Using a brush or applicator, evenly spread the glue on one or both surfaces to be joined.
- Position and clamp: Align the pieces together and use the appropriate clamps to hold them firmly in place.
- Remove excess glue: Wipe off any excess glue with a damp cloth before it dries.
- Allow for drying time: Follow the instructions on the glue bottle for the recommended drying time.
Proper clamping is crucial to achieve a strong bond. Apply enough pressure to ensure good contact between the glued surfaces, but avoid applying excessive pressure that could cause the glue to squeeze out excessively.
Remember to always check the glue manufacturer’s instructions and recommendations for specific applications. With effective gluing and clamping techniques, you can create durable and beautiful woodworking projects.

Shaping and Molding Techniques
When it comes to woodworking, shaping and molding techniques allow you to transform wood into unique non-rectangular shapes and create intricate decorative profiles. These techniques add depth, dimension, and personality to your woodworking projects. Here are some commonly used shaping and molding techniques that can take your woodworking skills to the next level:
1. Scrollwork
Scrollwork involves intricately cutting or carving wood to create delicate, scroll-like patterns. It requires precision and attention to detail, often done using a scroll saw or a handheld fret saw. Scrollwork adds an elegant touch to furniture, picture frames, and other decorative elements.
2. Lathe Turning
Lathe turning is a technique that involves shaping wood by rotating it against a tool called a lathe. This technique allows you to create cylindrical or symmetrical objects such as bowls, vases, and furniture legs. Lathe turning requires skill and patience to achieve smooth and balanced shapes.
3. Veneering
Veneering is the process of applying thin slices of wood, called veneers, onto a solid wood surface to enhance its appearance. It allows you to incorporate exotic wood species or create intricate patterns that would be challenging to achieve with solid wood alone. Veneering adds depth, texture, and visual interest to your woodworking projects.
4. Lamination
Lamination involves bonding multiple layers of wood together to create a sturdy and visually appealing composite material. It allows you to incorporate contrasting wood species, achieve curved or bent shapes, and add strength and stability to your woodworking projects. Lamination is often used in furniture making, curved moldings, and architectural elements.
Mastering shaping and molding techniques requires practice, patience, and a good understanding of the tools involved. Each technique has its own challenges and requires specific tools to achieve the desired results. By incorporating these techniques into your woodworking projects, you can elevate your craftsmanship and bring your creative visions to life.
Sanding and Filing Techniques
When it comes to woodworking, sanding and filing are crucial finishing techniques that help smooth the wood surface and shape it according to your desired specifications. Whether you’re working on a small project or a large piece of furniture, understanding the proper sanding and filing techniques is essential for achieving a polished and professional result.
Sanding Techniques
There are two primary methods of sanding in woodworking: hand sanding and powered sanding. Hand sanding involves using sandpaper or abrasive pads to manually smooth the wood surface. This technique provides more control and is ideal for intricate details or small areas that are difficult to reach with power tools.
Powered sanding, on the other hand, utilizes various tools such as a disc sander, spindle sander, or random orbit sander. These power tools make the sanding process quicker and more efficient, especially when working on larger surfaces or when a smoother finish is desired.
Pro Tip: Start with a coarse-grit sandpaper or abrasive and gradually work your way up to finer grits. This helps remove any rough spots or imperfections and leaves you with a smooth and even surface.
Filing Techniques
Filing is another important technique used in woodworking to shape wood and remove rough spots. It involves using files or rasps, which are coarse tools with a series of parallel teeth or ridges. The type of file or rasp you choose will depend on the specific shaping needs of your project.
When filing, it’s crucial to use steady, smooth strokes to achieve the desired shape. Start with a coarse file or rasp to remove excess material, and then switch to a finer file to refine the shape and create a smoother surface. Take your time and frequently check the progress to ensure you’re achieving the desired results.
| Sanding Grit | Common Uses |
|---|---|
| Coarse (40-60 grit) | Removing heavy material, shaping, and smoothing rough surfaces. |
| Medium (80-120 grit) | Smoothing surfaces, preparing for finishing, and removing scratches from coarser grits. |
| Fine (150-220 grit) | Preparing surfaces for finishing, removing finer scratches, and achieving a smoother finish. |
| Extra Fine (230-400 grit) | Final sanding before applying finishes, removing very fine scratches, and achieving a silky smooth surface. |
By combining effective sanding and filing techniques, you can transform rough and uneven wood surfaces into beautifully smooth and polished pieces. Remember to always wear protective gear when sanding or filing, such as safety goggles and a dust mask, to safeguard your health and minimize the risk of inhaling fine wood particles.
Woodworking as a Career
If you have a passion for woodworking, you may be considering turning your hobby into a career. As a professional woodworker, you can design and build a wide range of wooden objects, from cabinets and furniture to musical instruments. Becoming a professional woodworker requires practical skills, a deep knowledge of woodworking techniques, and valuable hands-on experience.
The Path to Becoming a Professional Woodworker
Many professional woodworkers start their journey as hobbyists. They develop their skills and knowledge by working on various woodworking projects in their spare time. However, to transition into a woodworking career, it’s essential to gain real-world experience and expertise.
One avenue to consider is seeking apprenticeships or internships with established woodworkers or woodworking firms. This hands-on experience allows you to learn from seasoned professionals, refine your skills, and gain insights into the industry. Apprenticeships provide a structured learning environment and valuable mentorship opportunities.
Alternatively, you can enroll in formal woodworking programs offered by vocational schools, community colleges, or trade schools. These programs offer comprehensive training in woodworking techniques, safety protocols, and business management skills. Through a formal education, you’ll have the opportunity to build a solid foundation of knowledge and gain credibility in the field.
Skills Required for a Woodworking Career
To succeed as a professional woodworker, you need more than just technical skills. Here are some essential skills and qualities to consider:
- Creativity: Professional woodworkers must have a creative mindset to develop unique designs and solutions for clients.
- Attention to detail: Precision is crucial in woodworking, and paying close attention to details ensures high-quality craftsmanship.
- Problem-solving: Woodworking projects often present challenges that require creative problem-solving skills to overcome.
- Time management: Balancing multiple projects and meeting deadlines is essential for success as a professional woodworker.
- Customer service: Interacting with clients, understanding their needs, and providing excellent customer service are vital aspects of a woodworking career.
Building Your Reputation and Portfolio
As a professional woodworker, establishing a strong reputation and building a portfolio of your work are key to attracting clients and growing your career. Consider showcasing your projects on a professional website or social media platforms to gain exposure and generate interest. Networking with other professionals in the woodworking industry can also lead to valuable connections and potential collaborations.
Remember, becoming a successful professional woodworker takes time, dedication, and continuous learning. By honing your skills, gaining experience, and building a strong network, you can turn your woodworking passion into a fulfilling and lucrative career.
How to Start Woodworking
If you’re interested in getting started with woodworking, there are several steps you can take to begin your journey. By following these guidelines, you’ll be well on your way to creating beautiful objects from wood.
Learning the Basics
Before diving into woodworking, it’s essential to learn the fundamentals. Familiarize yourself with different types of wood and their characteristics. Understand how to handle and store wood properly to prevent damage. By gaining knowledge of the basics, you’ll feel more confident in your woodworking endeavors.
Gathering Essential Tools
To start woodworking, you’ll need the right tools by your side. Begin by investing in the essentials, such as a miter saw, circular saw, chisels, hand planes, and a measuring tape. These tools will enable you to tackle most beginner projects efficiently. As you progress, you can expand your collection to include more specialized tools.
Setting Up a Workspace
Create a dedicated workspace where you can pursue your woodworking projects. This area should provide enough space for you to comfortably work and store your tools. Keep your workspace organized and well-lit to ensure efficiency and safety. Having a designated woodworking area will make it easier for you to focus on honing your skills.
Learning from Experienced Woodworkers
One of the best ways to learn woodworking is by seeking guidance from experienced woodworkers. Consider taking classes or workshops to gain practical knowledge of techniques and safety protocols. Joining a woodworking community or forum can also provide valuable insights and advice from seasoned professionals.
Starting with Small Projects
As a beginner, it’s important to start with small woodworking projects to practice and build confidence. Choose simple projects that align with your skill level and gradually progress to more complex ones. By starting small, you’ll develop your skills and gradually expand your capabilities.
Continuing to Learn and Refine Skills
Woodworking is an ongoing learning process. As you gain experience, continue to learn and refine your skills. Explore advanced techniques and experiment with different woodworking projects. The more you practice, the more proficient you’ll become in creating beautiful and intricate woodwork.
With these steps in mind, you’re ready to embark on your woodworking journey. Remember to be patient, persevere through challenges, and always prioritize safety. Woodworking can be a rewarding and fulfilling hobby that allows you to unleash your creativity while working with one of nature’s most stunning materials.
Conclusion
Woodworking is an incredibly rewarding hobby that allows you to unleash your creativity and bring your ideas to life. By mastering the essential woodworking tips and techniques, you can create unique and beautiful objects from wood. Throughout your woodworking journey, remember to prioritize safety by wearing protective equipment and following proper tool handling procedures.
Invest in high-quality tools and take the time to learn how to use them effectively. Whether you’re milling, sawing, drilling, routing, or shaping, accuracy and precision are essential for achieving professional-looking results. Practice each technique and experiment with different woodworking projects to hone your skills and gain confidence in your abilities.
As you continue to explore the art of woodworking, never forget to enjoy the process. Embrace the challenges and the satisfaction that comes with bringing your vision to life. Whether you’re a beginner or an experienced woodworker, there’s always something new to learn and discover in this versatile craft. So grab your tools, unleash your creativity, and let woodworking take you on an exciting journey of craftsmanship and self-expression.
FAQ
What is woodworking?
Woodworking is a versatile and rewarding hobby that involves creating objects from wood.
What are some essential woodworking tips for beginners?
Some essential woodworking tips for beginners include learning the basics, practicing safety measures, and starting with small projects.
How do I get started with woodworking?
To get started with woodworking, you should familiarize yourself with the basics, gather essential tools, and set up a workspace.
What are some essential woodworking tools for beginners?
Some essential woodworking tools for beginners include a miter saw, circular saw, chisels, hand planes, and a tape measure.
How can I ensure safety in woodworking?
Safety in woodworking can be ensured by wearing protective equipment, keeping the workspace clean and organized, and following safety guidelines.
What are some important woodworking techniques?
Important woodworking techniques include milling, jointing, planing, sawing, drilling, routing, gluing, clamping, shaping, sanding, and finishing.
What is milling in woodworking?
Milling is the process of taking rough lumber and making it into geometrically precise blocks using tools such as jointers, planers, and table saws.
What are some common sawing techniques in woodworking?
Common sawing techniques in woodworking include using chop saws, hand saws, portable circular saws, table saws, chainsaws, bandsaws, and scroll saws.
How do I drill and bore holes in wood?
Drilling involves creating holes using drill bits, while boring is used to enlarge pre-existing holes. Different types of drill bits and drilling equipment are used for specific applications.
What is routing in woodworking?
Routing is a technique that involves using a handheld or mounted router to shape and cut wood for various purposes such as edge treatments and creating grooves.
How can I join wood together in woodworking?
Wood can be joined together using techniques such as gluing and clamping. Different types of glue and clamps are used based on specific applications.
What are some shaping and molding techniques in woodworking?
Shaping and molding techniques in woodworking include scrollwork, lathe turning, veneering, and lamination, which allow for creating decorative profiles and non-rectangular shapes.
How can I achieve a smooth finish in woodworking?
Sanding and filing are finishing techniques used to smooth the wood surface. Hand sanding and powered sanding with tools such as disc sanders, spindle sanders, or random orbit sanders are commonly used.
Can woodworking be a career?
Yes, woodworking can be a career. Many professional woodworkers design and build wooden objects such as cabinets, furniture, and musical instruments for a living.
How can I start woodworking as a hobby?
To start woodworking as a hobby, you can learn the basics, gather tools, take classes or seek guidance, and start with small projects to practice and gain confidence.
Is woodworking a fulfilling hobby?
Yes, woodworking is a fulfilling hobby that offers endless creative possibilities and allows you to create unique and beautiful objects from wood.