Building a workbench for your garage is a great way to organize your space and provide a sturdy surface for all your woodworking projects. With these easy-to-follow DIY workbench plans, you can create a customizable workbench that suits your needs and skill level. Whether you’re a beginner or an experienced woodworker, these plans will help you create a functional and durable workbench for your garage.
Key Takeaways:
- Building a workbench for your garage can help you maximize your space and keep your woodworking projects organized.
- DIY workbench plans provide step-by-step instructions and guidance to help you create a customized workbench.
- Consider factors such as the size of your garage and the type of projects you’ll be working on when choosing a workbench design.
- Gather all the necessary materials and tools before starting the construction process.
- Follow the specific building instructions provided by the workbench plans to ensure a sturdy and secure construction.
Choosing the Right Workbench Design
When it comes to selecting the perfect workbench design for your garage, there are a few factors to consider. First and foremost, think about the size of your garage and how much space you have available. You want to ensure that the workbench fits comfortably in your workspace while leaving enough room for maneuvering around it.
Next, think about the type of projects you’ll be working on. Are you an avid woodworker who needs a large surface area for cutting and assembling? Or do you primarily focus on smaller DIY projects that require less space? Tailoring your workbench design to your specific needs will enhance your overall productivity and efficiency.
Customizability is another key aspect to look for in a workbench design. Plans that offer adjustable heights or modular features can be beneficial, allowing you to adapt the workbench to different tasks or work comfortably at the desired height. This flexibility ensures that your workbench remains versatile and adaptable to your evolving needs.
Storage options are also something to consider when choosing a workbench design. Having ample storage space, whether it’s built-in shelves, drawers, or cabinets, can make a significant difference in keeping your tools, materials, and accessories organized and within easy reach. This helps streamline your workflow and saves you time and effort searching for items during projects.
Furthermore, the overall style of your workbench deserves consideration. Whether you prefer a farmhouse-inspired design, an industrial look, or a rustic aesthetic, it’s essential to choose a workbench that aligns with your personal taste and the overall decor of your garage. A well-designed workbench not only serves as a functional workspace but also adds visual appeal to your garage environment.
Take your time to explore various garage workbench plans and customizable workbench designs, considering your garage size, project requirements, customizability, storage options, and preferred style. By selecting the right workbench design, you’ll create a workspace that not only meets your practical needs but also reflects your personal style and enhances your woodworking experience.
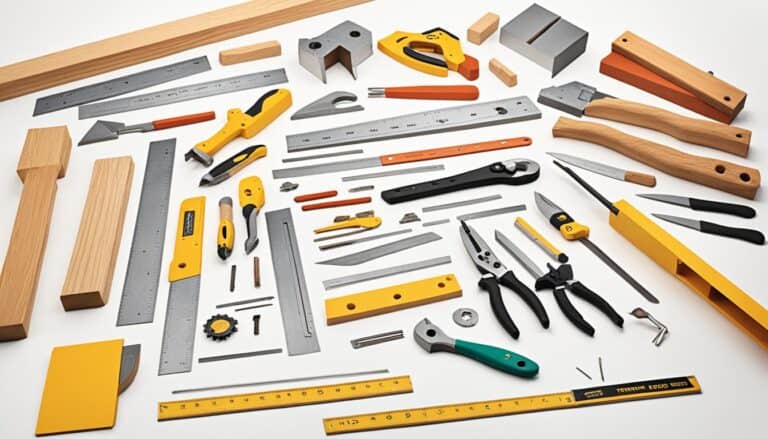
Materials and Tools Needed
Before you start building your workbench, gather all the necessary materials and tools. Here’s what you’ll need:
Materials
- 2×4 lumber
- Plywood
- Self-tapping wood screws
Tools
- Saw
- Drill
- Sander
These materials will provide the foundation for your workbench, offering both strength and stability. The 2×4 lumber will be used for the framing, while the plywood will serve as the top surface. Self-tapping wood screws will secure the components together, ensuring a sturdy and secure construction.
When using the saw, make sure to follow proper safety precautions and wear appropriate protective gear. A drill will be necessary for creating holes and attaching screws, while a sander will help smooth the surfaces for a professional finish.
It’s essential to follow the specific building instructions provided by the workbench plans to ensure you use the right materials and tools for the job. This will guarantee that your workbench is not only functional but also built to last.
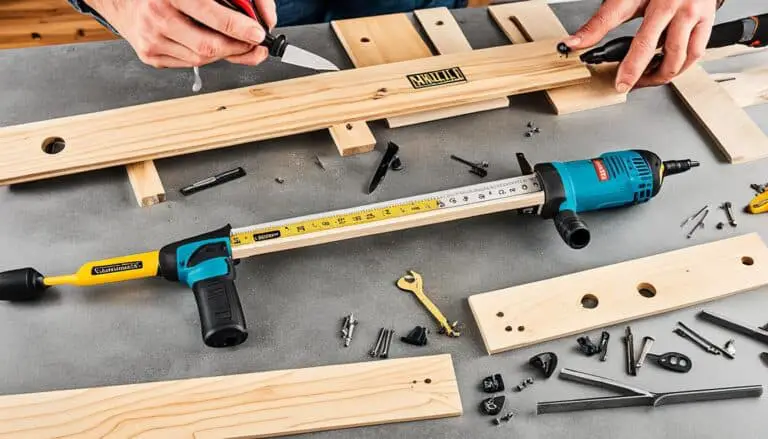
Step-by-Step Construction Process
Follow the step-by-step instructions provided by the workbench plans to construct your workbench. Building a workbench requires careful attention to detail and proper execution of each construction step. By following these instructions, you can ensure a successful and sturdy outcome for your DIY project. Here is a breakdown of the construction process:
- Cut the lumber: Begin by cutting all the required lumber to the specified dimensions. Use a saw to accurately cut the pieces according to the workbench plans. Precise measurements are crucial for a well-fitted workbench.
- Assemble the side aprons: Connect the side aprons to the legs using screws and glue. This step provides the framework for the workbench and ensures stability.
- Attach the supports: Install the supports between the side aprons to enhance the structural integrity of the workbench. It is recommended to use screws for a secure connection.
- Add the end aprons: Attach the end aprons to complete the framework of the workbench. Secure them to the side aprons and supports using screws and glue.
- Attach the bottom shelf: Install the bottom shelf by fixing it securely to the framework. This provides extra storage space for tools and materials.
- Finish with the top surface: Attach the top surface made of plywood to complete the workbench. Ensure that it is securely fastened to the framework for a stable work surface.
By following these construction steps, you can create a sturdy and functional workbench that will serve as a reliable workspace for your woodworking projects.
Workbench Construction Process Overview:
| Construction Steps | Description |
|---|---|
| Cut the lumber | Cut the required lumber according to the specified dimensions in the plans. |
| Assemble the side aprons | Connect the side aprons to the legs using screws and glue. |
| Attach the supports | Install the supports between the side aprons for added stability. |
| Add the end aprons | Attach the end aprons to the side aprons and supports. |
| Attach the bottom shelf | Install the bottom shelf for extra storage space. |
| Finish with the top surface | Attach the plywood top surface to complete the workbench. |
Finishing and Painting
Once the construction is complete, it’s time to give your workbench a polished and professional look. The finishing and painting process will not only enhance the appearance of your workbench but also provide protection against wear and tear.
Here are the steps to follow for a successful finish:
1. Fill Holes and Sand
Before applying any finish, make sure to fill any visible holes or imperfections with wood filler. Use a putty knife to spread the filler evenly and let it dry according to the manufacturer’s instructions. Once dry, sand the entire surface of the workbench using sandpaper or a sanding block. This step will help smooth out any rough edges and create a clean canvas for the finish.
2. Apply Primer or Wood Conditioner
To ensure an even color and better adhesion of the paint or stain, it’s recommended to apply a coat of primer or wood conditioner. This step is particularly important if you’re working with a porous wood like pine. Follow the manufacturer’s instructions to apply the primer or conditioner using a brush or roller.
3. Choose Your Finish
Now it’s time to decide whether you want to paint or stain your workbench. Paint provides a clean and vibrant look, while stain enhances the natural beauty of the wood grain. Consider your personal preference and the overall aesthetics of your workspace.
4. Apply Paint or Stain
If you choose to paint, use a brush or roller to apply the paint evenly on the workbench surface. Allow each coat to dry completely before applying additional coats for a smooth and durable finish. For staining, use a brush or cloth to apply the stain, following the direction of the wood grain. Wipe away any excess stain and allow it to dry according to the manufacturer’s instructions.
5. Seal with Protective Coating
To protect your workbench from moisture, scratches, and other potential damage, it’s essential to seal the paint or stain with a protective coating. Consider using spar urethane, which is known for its durability and resistance to UV rays. Apply the protective coating according to the manufacturer’s instructions, and allow sufficient drying time before using your workbench.
By following these finishing steps, you can transform your newly constructed workbench into a functional and visually appealing centerpiece for your garage or workshop.

Finishing and painting is an important step to protect and enhance the appearance of your workbench.
Recommended Workbench Accessories
Enhance the functionality and organization of your workbench with the addition of these recommended accessories. These accessories will help optimize your workflow and ensure that your tools and materials are easily accessible.
Pegboards
Installing a pegboard above your workbench is a simple yet effective way to store and organize your frequently used tools. Pegboards allow you to hang your tools conveniently, keeping them within reach while maximizing your workspace. With various hooks and holders available, you can customize the arrangement of your tools to suit your needs.
Tool Racks or Hooks
Tool racks or hooks are another great option for keeping your workspace organized. These accessories can be mounted on the wall or attached to the side of your workbench, providing additional storage for your tools. By keeping your tools off the workbench surface, you’ll have more room to work and reduce clutter.
Vise
A vise is an essential accessory for any workbench. It provides a secure clamping surface, allowing you to hold your workpieces firmly in place. Whether you’re sawing, drilling, or sanding, a vise ensures stability and accuracy during your woodworking projects. Choose a vise that suits the size and weight requirements of your projects.
Power Strip with Built-in Outlets
A power strip with built-in outlets is a convenient addition to your workbench. It allows you to easily plug in and power your tools without the need for multiple extension cords. With outlets located right on your workbench, you can eliminate tangled cords and have instant access to power when you need it.
Other Accessories
In addition to the above accessories, there are various other options to consider based on your specific needs. Some examples include:
- Task Lighting: Install additional lighting above your workbench to ensure optimal visibility.
- Workbench Mats: Use non-slip workbench mats to protect your work surface and provide cushioning for delicate projects.
- Storage Bins or Drawers: Add storage bins or drawers on the side or underneath your workbench to store smaller tools and materials.
- Workbench Casters: Attach casters to your workbench for easy mobility, allowing you to move it around your garage as needed.
By incorporating these recommended accessories into your workbench setup, you can create a well-equipped and efficient workspace that meets your woodworking needs. Experiment with different combinations of accessories to find the setup that works best for you.
Kreg Workbench Plans
If you’re looking for a workbench design that is simple, sturdy, and mobile, the Kreg workbench plans are a perfect choice. This workbench offers clean lines and a modern look, making it a sleek addition to your garage or workshop. With its durable construction, this workbench can withstand heavy use and provide a stable surface for all your woodworking projects.
One of the standout features of the Kreg workbench is its mobility. Equipped with casters, you can easily move it around your workspace to accommodate your needs. Whether you need to bring the workbench closer to your project or create more floor space, the casters make it effortless to maneuver.
Another advantage of the Kreg workbench plans is their simplicity, making them accessible to woodworkers of all skill levels. Even if you’re a beginner, these plans provide detailed instructions, a tools list, and a materials list to guide you through the construction process. With a little bit of effort and some basic woodworking skills, you can create a functional workbench that meets your needs.
Moreover, the Kreg workbench plans offer the flexibility to customize your workbench with additional components. Whether you want to add storage shelves, drawers, or a pegboard, you can easily modify the design to suit your preferences and optimize your workspace. The modular nature of the Kreg workbench allows you to adapt it to your specific requirements and make it truly your own.
Benefits of Kreg Workbench Plans:
- Simple and sturdy design
- Mobility with casters
- Accessible for woodworkers of all skill levels
- Customizable with additional components
With its practicality and versatility, the Kreg workbench is an ideal choice for any woodworking enthusiast. It provides a reliable workspace where you can tackle projects with ease. Whether you’re a hobbyist or a professional, the Kreg workbench plans offer a solution that combines functionality, durability, and style.
| Pros | Cons |
|---|---|
| Simple and modern design | Requires basic woodworking skills |
| Mobile with casters | May require additional tools not included in the basic tools list |
| Customizable with additional components | Materials can be costly depending on the selected options |
| Suitable for beginners |
With the Kreg workbench plans, you can enjoy the satisfaction of building your own workbench and have a reliable and customizable space for your woodworking projects.
Shanty 2 Chic Workbench Plans
Looking for a workbench with a large and spacious worktop and ample storage space? The Shanty 2 Chic workbench plans are perfect for your garage. Designed for easy mobility, this workbench can be moved around effortlessly. It provides a sturdy work surface along with a convenient bottom shelf for storing power tools and other equipment.
With the option to add hooks for tools, you can keep your workspace organized and within reach. Whether you’re a beginner or an experienced woodworker, these plans provide detailed instructions, supply list, and complete directions to help you build your own functional and attractive workbench.
Check out the image below to get a visual idea of the Shanty 2 Chic workbench:
Fine Woodworking Workbench Plans
If you’re looking for a simple yet functional workbench plan, Fine Woodworking has got you covered. Their workbench plan is ideal for those who prefer basic tools and easy-to-find materials. With the comprehensive supplies list, detailed blueprints, and instructional video provided, you’ll have all the guidance you need to complete your workbench project successfully.
The Fine Woodworking workbench plan is designed for those on a budget, offering a cost-effective solution without compromising on durability or functionality. Now, you can create a solid workbench that meets your woodworking needs without breaking the bank.
Whether you’re a beginner or an experienced woodworker, this workbench plan is suitable for all skill levels. With clear instructions and step-by-step guidance, you’ll be able to tackle this project with confidence and achieve satisfying results.
The Benefits of Fine Woodworking Workbench Plans:
- Uses basic tools and easy-to-find materials
- Budget-friendly option
- Detailed supplies list, blueprints, and instructional video
- Suitable for all skill levels
Get started on your workbench project today with Fine Woodworking’s easy-to-follow workbench plans. Transform your garage or workshop into a functional and organized space that enhances your woodworking experience.

Ana White Workbench Plans
When it comes to building a sturdy workbench with ample workspace and convenient mobility, the Ana White workbench plans are a top choice for woodworkers. Whether you’re a beginner or an experienced craftsman, these plans provide detailed instructions to guide you through the construction process.
The Ana White workbench features a large worktop that provides plenty of space for your projects. You’ll never have to worry about limited workspace again. The bottom shelf adds extra storage for tools and materials, ensuring everything you need is within reach.
One of the standout features of this workbench is its easy mobility. The design allows you to move the workbench wherever it is needed, making it a flexible addition to any workshop or garage. Whether you’re repositioning the workbench for different projects or rearranging your workspace, the Ana White workbench is designed to be effortlessly portable.
The plans include color photos, a supply list, and complete directions, making it easy for you to follow along and build your own workbench. The detailed instructions ensure that even if you’re a beginner, you can successfully construct a sturdy workbench that will last for years to come.
Key Features of Ana White Workbench Plans:
- Large worktop for ample workspace
- Bottom shelf for added storage
- Designed for easy mobility
- Includes color photos, supply list, and complete directions
Whether you’re tackling small DIY projects or working on larger woodworking endeavors, the Ana White workbench plans provide a solid foundation for your work. With its durable construction and thoughtful design, this workbench offers the perfect blend of functionality and practicality.
So, gather your tools and materials, and get ready to build your own Ana White workbench. With these plans, you’ll have a reliable and versatile workbench that will enhance your woodworking experience and bring your projects to new heights.
Bob’s Woodworking Plans for a Garage Workbench
When it comes to building a sturdy and functional workbench for your garage, look no further than Bob’s Woodworking Plans. This comprehensive plan provides detailed instructions, illustrations, photos, and more, making it easy for you to follow along and bring your workbench to life.
The finished workbench featured in Bob’s Woodworking Plans offers a mobile design, allowing you to easily move it around your garage as needed. With a large worktop, drawers, and cabinets for additional storage space, this workbench provides ample room to keep your tools and materials organized.
Constructed using high-quality materials and precision techniques, Bob’s Woodworking Plans ensure that your workbench is not only sturdy but also built to last. Whether you’re a seasoned woodworker or just starting out, these plans offer step-by-step guidance to help you create a professional-grade workbench that will serve you well for years to come.
Bob’s Woodworking Plans also provide helpful tips and tricks along the way, ensuring that you have all the knowledge you need to successfully complete your project. From choosing the right tools and materials to mastering the construction process, these plans leave no stone unturned.
In addition to the detailed instructions and illustrations, Bob’s Woodworking Plans offer valuable insights into workbench design, customization options, and finishing techniques. With this wealth of information at your fingertips, you’ll be able to create a workbench that not only meets your specific needs but also reflects your personal style.
So why wait? Start building your dream workbench today with Bob’s Woodworking Plans and enjoy the satisfaction of having a functional and beautiful addition to your garage workspace.
Features of Bob’s Woodworking Plans Garage Workbench
| Features | Description |
|---|---|
| Mobile Design | A workbench that can be easily moved around the garage to fit your needs. |
| Large Worktop | Provides ample space for woodworking projects and other tasks. |
| Drawers and Cabinets | Additional storage options to keep your tools and materials organized. |
| Sturdy Construction | Built to last with high-quality materials and precision techniques. |
| Customization Options | Allows you to tailor the workbench to your specific needs and personal style. |
Fix This Build That Kids Workbench Plans
Looking for a fun and practical woodworking project for your little ones? Look no further than Fix This Build That’s Kids Workbench Plans. Designed specifically for children, this workbench provides a safe and engaging space for kids to explore their creativity and develop essential skills.
The Kids Workbench features a sturdy worktop where children can hammer, saw, and build to their heart’s content. The bottom shelf offers storage for tools and materials, keeping everything organized and easily accessible. Additionally, the pegboard provides a convenient way to hang and display their tools, giving the workbench an authentic workshop feel.
While this workbench is designed with kids in mind, it can also be adjusted to suit adult use in small spaces. Simply raise the counter level to create a comfortable working height for grown-ups.
Fix This Build That’s Kids Workbench Plans come complete with a detailed tool list and materials list, making it easy to gather everything you need for the project. Additionally, the plans include diagrams and color photos, along with step-by-step building instructions that even beginners can follow.
Encourage your child’s creativity, ignite their passion for woodworking, and foster their problem-solving skills with this engaging and educational Kids Workbench. Get started on this exciting project today!
Key Features of Fix This Build That Kids Workbench Plans:
- Sturdy worktop for hands-on projects
- Bottom shelf for tool and material storage
- Pegboard for easy organization and display of tools
- Adjustable counter level for adult use in small spaces
Materials List:
| Materials | Quantity |
|---|---|
| 2×4 lumber | 8 feet |
| 1/2-inch plywood | 1 sheet |
| Screws | Various sizes |
Tool List:
- Saw
- Drill
- Sander
- Tape measure
- Clamps
Wood Magazine’s Workbench Plan with Outfeed Table
If you’re looking to maximize space in your workshop, Wood Magazine offers a free workbench plan that doubles as an outfeed table for a table saw. This innovative design allows you to have a sturdy workbench while also providing added functionality as an outfeed table, supporting your workpieces during cutting operations.
With detailed instructions, a comprehensive supplies list, and a blueprint, you can confidently tackle this project and create a versatile workbench that meets your woodworking needs. The plan ensures that you have all the necessary information and resources to construct a sturdy and functional workbench with an integrated outfeed table.

“The Wood Magazine’s workbench plan with an outfeed table is a game-changer for those looking to optimize their workshop space. With this design, you can have a dedicated workbench and a convenient outfeed table, all in one. It’s a practical solution for woodworkers who want to maximize their efficiency without sacrificing quality.”
Key Features of Wood Magazine’s Workbench Plan with Outfeed Table:
- Sturdy workbench design with integrated outfeed table
- Detailed instructions for construction
- Comprehensive supplies list
- Accurate blueprint for easy reference
- Space-saving solution for small workshops
By following Wood Magazine’s workbench plan, you can create a functional, durable, and space-efficient workbench with an outfeed table. Whether you’re a novice or an experienced woodworker, this plan offers step-by-step guidance to help you successfully complete your workbench project.
Family Handyman’s Budget-Friendly Workbench Plan
Looking to build a workbench on a budget? Family Handyman has you covered with their budget-friendly workbench plan. This plan allows you to complete your workbench in just a few hours and for less than $100, making it an affordable option for DIY enthusiasts.
This simple yet sturdy workbench offers ample space for your tools and woodworking projects. It’s designed to provide a solid surface for your work and withstand heavy use. With its straightforward construction, even beginners can tackle this project with confidence.
Family Handyman provides detailed instructions, illustrations, and a material list to guide you through the entire construction process. Their step-by-step instructions ensure that you can complete the workbench efficiently and accurately.
Not only do they provide written instructions, but Family Handyman also offers videos that demonstrate each step of the construction process. These videos give you a visual reference to follow along with, making it even easier to build your workbench successfully.
Take a look at what one satisfied user had to say about Family Handyman’s budget-friendly workbench plan:
“I was skeptical at first, but this workbench plan surpassed my expectations. It was straightforward to build, and the final result is a sturdy and functional workbench. I highly recommend it to anyone looking for an affordable yet reliable workbench option. Thanks, Family Handyman!”
If you’re on a tight budget but still want a quality workbench, Family Handyman’s budget-friendly workbench plan is the perfect solution. Get started on your DIY project today and create a practical workbench that meets your needs without breaking the bank.
Conclusion
Building a workbench for your garage is a rewarding project that offers both functionality and organization to your woodworking space. Having a dedicated workbench not only provides a sturdy surface for your projects but also helps keep your tools and materials organized.
With the variety of free workbench plans available, you have the flexibility to choose a design that suits your needs and skill level. Whether you’re a beginner looking for a simple and budget-friendly option or an experienced woodworker seeking a more advanced and customizable design, there is a workbench plan out there for you.
Start by selecting a plan that matches your requirements and gather all the necessary materials and tools. Follow the step-by-step instructions provided in the plans, ensuring a proper construction process. Once your workbench is built, you can personalize it with finishing touches such as paint or stain, making it a visually appealing addition to your workspace.
By building your own workbench using the free plans available, you not only save money but also have the satisfaction of creating something with your own hands. So, what are you waiting for? Begin your woodworking journey today and experience the convenience and satisfaction that a well-built workbench brings to your projects.
FAQ
What is a workbench?
A workbench is a sturdy table-like structure used by woodworkers and DIY enthusiasts to work on their projects. It provides a flat and stable surface for various tasks, such as sawing, drilling, sanding, and assembling.
Why should I build a workbench for my garage?
Building a workbench for your garage has multiple benefits. It offers a dedicated space for woodworking projects, helps to organize tools and materials, and provides a sturdy surface for working. It can also serve as a storage solution with built-in drawers, shelves, or hooks.
Can I customize the design of my workbench?
Yes, many workbench plans allow for customization. You can choose the size, height, and style that best fits your garage and woodworking needs. Some plans also include modular features, allowing you to add or remove components as needed.
What materials and tools do I need to build a workbench?
The materials typically include 2×4 lumber, plywood, and self-tapping wood screws. Basic woodworking tools like a saw, drill, and sander will be needed as well. The specific materials and tools required may vary depending on the chosen workbench plan.
How do I construct a workbench?
Follow the step-by-step instructions provided by the workbench plans. Start by cutting the lumber to the specified dimensions. Then, assemble the different components using screws and glue. Finally, attach the bottom shelf and the plywood worktop to complete the construction.
How do I finish and paint my workbench?
After the construction is complete, fill any holes with wood filler and sand the surface for a smooth finish. Apply a primer or wood conditioner, followed by the desired paint or stain. Finish with a protective coating for durability, such as spar urethane.
What accessories can I add to my workbench?
Some recommended accessories include pegboards for tool organization, tool racks or hooks, a vise for secure clamping, and a power strip for convenient power access. Explore the various accessories available to enhance your workbench’s functionality.
What are some popular workbench plans?
Popular workbench plans include the Kreg workbench plan, Shanty 2 Chic workbench plan, Fine Woodworking workbench plan, Ana White workbench plan, Bob’s Woodworking Plans for a Garage Workbench, Fix This Build That Kids Workbench plan, Wood Magazine’s workbench plan with an outfeed table, and Family Handyman’s budget-friendly workbench plan.
Are there workbench plans specifically designed for kids?
Yes, there are workbench plans available specifically designed for kids. These plans offer a smaller worktop height and often include features like a bottom shelf and pegboard for tool organization.
Which workbench plans are budget-friendly?
Family Handyman offers a budget-friendly workbench plan that can be completed in a few hours and for less than 0. This simple yet sturdy workbench provides ample space for tools and woodworking projects.
Where can I find free workbench plans?
You can find free workbench plans from various sources, including websites like Kreg, Shanty 2 Chic, Fine Woodworking, Ana White, Bob’s Woodworking Plans, Fix This Build That, Wood Magazine, and Family Handyman. These plans often include detailed instructions, materials lists, and diagrams to help you build your own workbench.