Making your own cutting board is a fun and rewarding DIY project that allows you to create a personalized and functional addition to your kitchen. Whether you enjoy woodworking or simply want to try your hand at a new project, a DIY cutting board is a perfect choice. With the right materials and tools, you can craft a cutting board that suits your specific needs and adds a touch of handmade beauty to your culinary space.
Key Takeaways:
- DIY cutting boards allow you to create a personalized and functional addition to your kitchen.
- With the right materials and tools, anyone can make their own cutting board at home.
- A homemade cutting board adds a touch of handmade beauty to your culinary space.
- Woodworking cutting boards can be a fun and rewarding project for DIY enthusiasts.
- By following the right techniques and taking your time, you can easily create a cutting board that meets your needs and preferences.
Is a Plastic Cutting Board Safer?
When it comes to choosing a cutting board for your kitchen, many people wonder whether a plastic cutting board is safer than a wood cutting board. Plastic cutting boards are a popular choice due to their durability and ease of maintenance. They are resistant to knife cuts, dishwasher-safe, and can be easily cleaned with soap and water.
Some believe that plastic cutting boards are more sanitary because they are non-porous and less likely to harbor bacteria. However, it’s essential to note that the safety of a cutting board depends on proper cleaning and maintenance practices, regardless of the material.
Well-crafted wood cutting boards can also be safe and hygienic when used and cared for correctly. Wood has natural antimicrobial properties that can inhibit the growth of bacteria. When cleaned with hot, soapy water and dried thoroughly after each use, wood cutting boards can be just as safe as their plastic counterparts.
Now, let’s take a closer look at the pros and cons of each option:
| Plastic Cutting Board | Wood Cutting Board |
|---|---|
| • Durable and long-lasting | • Natural antimicrobial properties |
| • Dishwasher-safe | • Less prone to knife marks |
| • Easy to clean with soap and water | • Gentle on knife blades |
| • Lightweight and easy to handle | • Adds warmth and aesthetic appeal to the kitchen |
| • May develop deep cut grooves over time | • Requires periodic oiling for maintenance |
Ultimately, the choice between a plastic or wood cutting board comes down to personal preference, aesthetics, and proper cleaning practices. Both options can be safe and functional in your kitchen, as long as you maintain good hygiene habits and regularly inspect the cutting board for any signs of wear or damage.
To ensure maximum safety and hygiene, consider having separate cutting boards for different types of food, such as one for raw meats and another for fruits and vegetables. This can help prevent cross-contamination and reduce the risk of foodborne illnesses.
Remember, whether you choose a plastic or wood cutting board, always prioritize regular cleaning, proper storage, and routine inspections to ensure the highest level of cutting board safety in your kitchen.
Types of Wood to Use
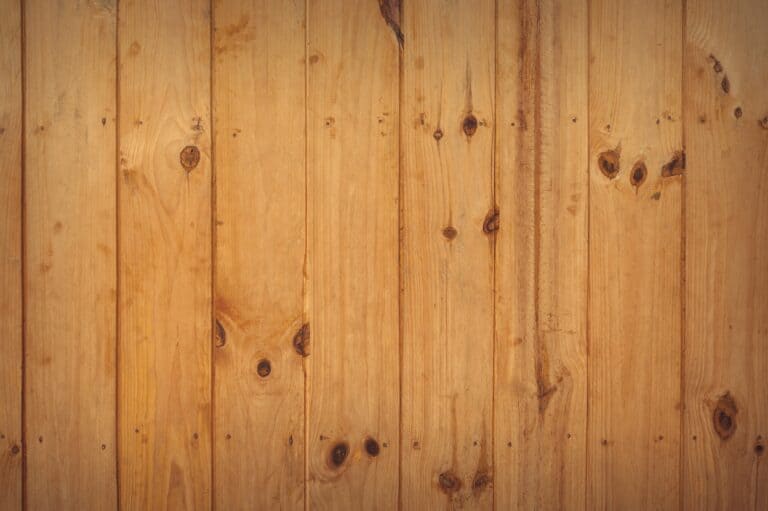
When making a DIY cutting board, it is important to choose the right type of wood. Hardwoods like maple, walnut, and cherry are excellent choices for cutting board materials due to their durability and resistance to knife cuts. These hardwoods provide a sturdy surface that can withstand regular use in the kitchen.
Maple is a popular choice for cutting boards due to its tight grain and light color. It is known for its hardness and resistance to moisture, making it a practical option.
Walnut is another great choice as it offers a rich, dark color and a beautiful grain pattern. It is also a dense wood that provides durability and strength.
Cherry wood is known for its natural reddish-brown hue, which adds warmth and elegance to any kitchen. It is a strong hardwood that is resistant to warping and has a smooth surface.
When selecting wood for a cutting board, it is crucial to choose pieces that are free of warps, have a flat surface, and don’t have blemishes or excessive knots. These imperfections can compromise the stability and functionality of the cutting board.
The ideal cutting board thickness should range from 1 1/4 to 2 inches. This thickness ensures durability and provides a substantial surface for slicing, dicing, and chopping ingredients.

Choosing the right wood for your cutting board will not only enhance its functionality but also add a touch of beauty to your kitchen. The natural qualities of hardwoods like maple, walnut, and cherry make them excellent materials for creating a cutting board that will last for years to come.
Types of Cutting Boards
When it comes to DIY cutting boards, there are several types to consider, each with its own characteristics and benefits. Understanding the differences between these cutting boards can help you choose the right one for your needs. Let’s explore the three main types: face grain, edge grain, and end grain cutting boards.
Face Grain Cutting Board
A face grain cutting board is the most common and least expensive option. It is made by arranging the wood planks so that the flat sides of the boards form the cutting surface. While face grain cutting boards are easy to make and have an attractive appearance, they may be more prone to warping or cracking over time.
Edge Grain Cutting Board
Edge grain cutting boards feature a vertical pattern with the edges of the wood planks forming the cutting surface. This type of cutting board is known for its strength and durability, making it a great choice for slicing and dicing. Edge grain boards are less likely to warp or crack compared to face grain boards.
End Grain Cutting Board
The end grain cutting board is considered the gold standard in terms of durability and knife-friendliness. It features a checkerboard pattern created by arranging multiple wood blocks with their end grain facing up. This construction absorbs the impact of the knife, minimizing damage to the blade. While end grain boards require more time and effort to make, their superior durability and unique aesthetics make them a popular choice among enthusiasts.
To help visualize the differences, here is a table summarizing the characteristics of each type of cutting board:
| Type of Cutting Board | Pros | Cons |
|---|---|---|
| Face Grain | Easy to make, attractive appearance | Potential warping or cracking |
| Edge Grain | Durable, great for slicing and dicing | Less resistant to warping or cracking compared to end grain |
| End Grain | Highly durable, knife-friendly, unique aesthetics | More time-consuming to make |
When choosing a cutting board for your DIY project, consider your budget, preferences, and the level of durability required. Whether you opt for a face grain, edge grain, or end grain cutting board, each type offers its own charm and functionality for your kitchen.
Gather Your Tools
To make your DIY cutting board, you will need a variety of tools. Having the right tools is essential for ensuring a successful and safe project. Here are the key tools you’ll need:
- Tape Measure: Accurately measure the dimensions of your cutting board.
- Hand Saw: Cut the wood boards to the desired length.
- Jigsaw: Use it to make intricate cuts or curves, if desired.
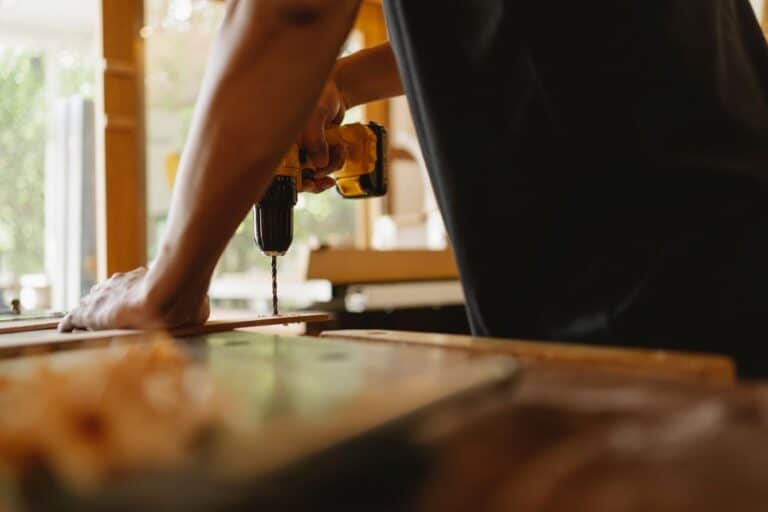
- Power Drill: Drill holes for hanging or any other purposes.
- Router: Create decorative edges or grooves on your cutting board.
- Sandpaper: Smooth the surface and edges of the cutting board.
- Eye and Ear Protection: Protect yourself with safety goggles and earplugs or earmuffs.
Having these DIY cutting board tools at your disposal will help you achieve the desired results with precision and ease.

Remember to always wear the appropriate safety gear, such as eye and ear protection, when using power tools. Safety should be a top priority throughout your DIY cutting board project.
How to Make a Face-Grain Cutting Board
Follow these step-by-step instructions to make a face-grain cutting board. With a few simple tools and materials, you can create a beautiful and functional addition to your kitchen.
- Start by selecting a hardwood board of your choice. Popular options include maple, walnut, and cherry, known for their durability and resistance to knife cuts.
- Measure and mark the desired length of your cutting board on the hardwood board.
- Using a circular saw, carefully cut along the marked line to create the length of the cutting board.
- Next, decide on the width and mark it on the board perpendicular to the length.
- Once again, use the circular saw to make the cut, ensuring a straight and even edge.
- To add a hanging option, drill a hole near one end of the cutting board, large enough to fit a leather strip through.
- Thread the leather strip through the hole, leaving enough length to create a loop for hanging.
- If you want to add a personal touch to your cutting board, consider using a stencil to create a design or pattern. Apply food-safe paint using a brush or stencil brush and let it dry completely.
In just a few simple steps, you can create a face-grain cutting board that is both practical and visually appealing. Use it for chopping, slicing, and dicing, knowing that you made it with your own hands.
| Materials Needed | Tools Needed |
|---|---|
|
|
Cut a Drip Groove
Adding a drip groove to your cutting board is a practical and aesthetic choice. It helps prevent juices and liquids from spilling over the edges and onto your countertop. Here’s how you can create a groove on your cutting board:
- Start by marking the desired starting and stopping points for the groove on the edges of your cutting board.
- Using a router fitted with a straight bit, carefully cut along the marked lines to create the groove. Make sure to hold the router firmly and move it along the marked lines in a controlled manner.
- After cutting the groove, it may have rough edges or sharp corners. To smooth them out, wrap sandpaper around a dowel or wooden block.
- Gently sand the inside and edges of the groove using the sandpaper-wrapped dowel. This will help make the groove less prone to collecting liquids and easier to clean.
- Once you’re satisfied with the smoothness of the groove, clean off any sawdust or debris with a damp cloth.
Now your cutting board has a functional and stylish drip groove to enhance its usability and keep your kitchen clean and tidy.
Note: A drip groove can be especially useful when working with juicy fruits, vegetables, or raw meats. It helps contain the liquids and prevents them from spreading onto your kitchen surface.
Sand It Smooth
Once you have assembled your cutting board, it’s time to give it a smooth and professional finish through sanding. Sanding helps to refine the surface, remove any imperfections, and prepare the board for sealing.
Start by using sandpaper or a sanding sponge to rub the entire surface of the board in smooth, even strokes. This will help to level the surface and create a uniform finish. You can begin with a coarse-grit sandpaper (around 80 grit) to remove any rough spots or unevenness. Then, gradually progress to finer-grit sandpaper (up to 220 grit) to achieve a smoother surface.
*Expert Tip: When sanding, be sure to sand with the grain of the wood to prevent unwanted scratches or marks.
Next, focus on sanding the edges of the cutting board. You can use a sanding sponge or wrap a piece of sandpaper around a small, flat block of wood to ensure even pressure. Gently sand the edges, rounding them slightly to create a more comfortable grip and a pleasing aesthetic.
If you want to add an extra touch of elegance to your cutting board, consider using a round-over bit on a router. This will create a smooth, curved edge along the perimeter of the board, giving it a polished and professional look.

After you’ve finished sanding, wipe off any sawdust with a damp cloth to reveal the true beauty of the wood. Take a moment to appreciate the smoothness of the surface and the craftsmanship of your cutting board.
Seal the Cutting Board
To protect and preserve your cutting board, you should apply a sealant.
Food-grade mineral oil or butcher block oil are excellent choices for sealing the surface of the hardwood.
Apply the oil liberally, allowing it to absorb into the wood. Reapply as necessary until the wood no longer absorbs the oil.
| Sealant Options | Pros | Cons |
|---|---|---|
| Food-grade Mineral Oil | – Safe for food contact – Keeps wood moisturized – Easy to apply | – Requires regular reapplication – Can leave a slightly greasy feel |
| Butcher Block Oil | – Food-safe and non-toxic – Provides a natural finish – Adds a richer color to the wood | – May take longer to dry – Prone to oxidation over time |
How to Clean a Wood Cutting Board
Properly cleaning your wood cutting board is essential for maintaining its hygiene and extending its lifespan. Follow these steps to ensure your cutting board stays clean and safe to use:
Step 1: Hand Washing with Soap and Hot Water
To start, hand wash your cutting board using mild soap and hot water. Avoid submerging it in a dishwasher, as the high heat and harsh detergents can damage the wood. Gently scrub the surface with a sponge or brush to remove any food particles and stains.
Step 2: Removing Odors and Sanitizing
If your cutting board has lingering odors or requires sanitization, you can use natural ingredients like salt and lemon. Sprinkle coarse salt over the board and rub it in with a sliced lemon. The salt acts as an abrasive, while the lemon provides a fresh scent and natural antimicrobial properties.
The citric acid in lemon helps to kill bacteria and neutralize odors, leaving your cutting board clean and fresh.
Step 3: Regular Application of Mineral Oil
To keep your wood cutting board moisturized and prevent it from drying out or cracking, regularly apply a small amount of food-grade mineral oil. This helps to seal the wood and protect it from moisture absorption and bacterial growth.
Regularly cleaning and maintaining your wood cutting board ensures its longevity and keeps it safe for food preparation.
Step 1: Gather Materials and Tools
Before you begin your DIY cutting board project, it’s essential to gather all the necessary materials and tools. By having everything prepared, you can ensure a smooth and successful woodworking experience.
Materials
- Hardwood planks from a reputable lumber store
- Titebond III glue for strong and durable bonds
- Mineral oil for sealing and preserving the wood
Tools
- A saw to cut the hardwood planks to size
- Clamps for securing the pieces together while the glue dries
- An orbital sander for smoothing the surface
- A belt sander for shaping and refining the edges
Remember, using high-quality materials and tools is crucial for achieving the best results. This ensures both the longevity and functionality of your cutting board.
| Materials | Tools |
|---|---|
| Hardwood planks from a reputable lumber store | A saw to cut the hardwood planks to size |
| Titebond III glue for strong and durable bonds | Clamps for securing the pieces together while the glue dries |
| Mineral oil for sealing and preserving the wood | An orbital sander for smoothing the surface |
| A belt sander for shaping and refining the edges |
With all your materials and tools at hand, you are now ready to move on to the next step: deciding the dimensions of your cutting board.
Step 2: Decide Your Dimensions
Determining the dimensions of your cutting board is an important step in creating a personalized and functional kitchen tool. By considering the thickness, length, and width that will work best for your intended use, you can ensure that your cutting board meets your specific needs.
Start by thinking about the thickness of your cutting board. A standard thickness for a cutting board is around 1 1/4 to 2 inches. This provides a sturdy surface for cutting and chopping while still being easy to handle and store.
Next, consider the length and width of your cutting board. The dimensions should be based on the size of your kitchen and your typical cooking tasks. If you have limited countertop space or a small kitchen, a smaller cutting board may be more suitable. On the other hand, if you often cook for a large family or entertain guests, a larger cutting board may be necessary to accommodate your needs.
Think about where you will store your cutting board when it is not in use. If you have limited cabinet space, you may need to adjust the dimensions to ensure that the cutting board fits comfortably in your storage area. Additionally, consider the size of your sink when determining the dimensions of your cutting board, as it should be easy to clean and maneuver.
Furthermore, if you plan to use your cutting board as a serving board for cheese, charcuterie, or other appetizers, consider creating specific dimensions that will enhance its functionality and presentation. A larger size with enough space for various food items can make it more appealing and practical for entertaining.
Remember to take into account the balance between the size and weight of your cutting board. While a larger cutting board offers more cutting space, it may also be heavier and harder to handle. Consider what you feel comfortable working with in your kitchen.
Ultimately, the dimensions of your cutting board should align with your personal preferences and cooking habits. By customizing the size to your specific needs, you’ll create a cutting board that enhances your culinary experience and adds an element of personalization to your kitchen.
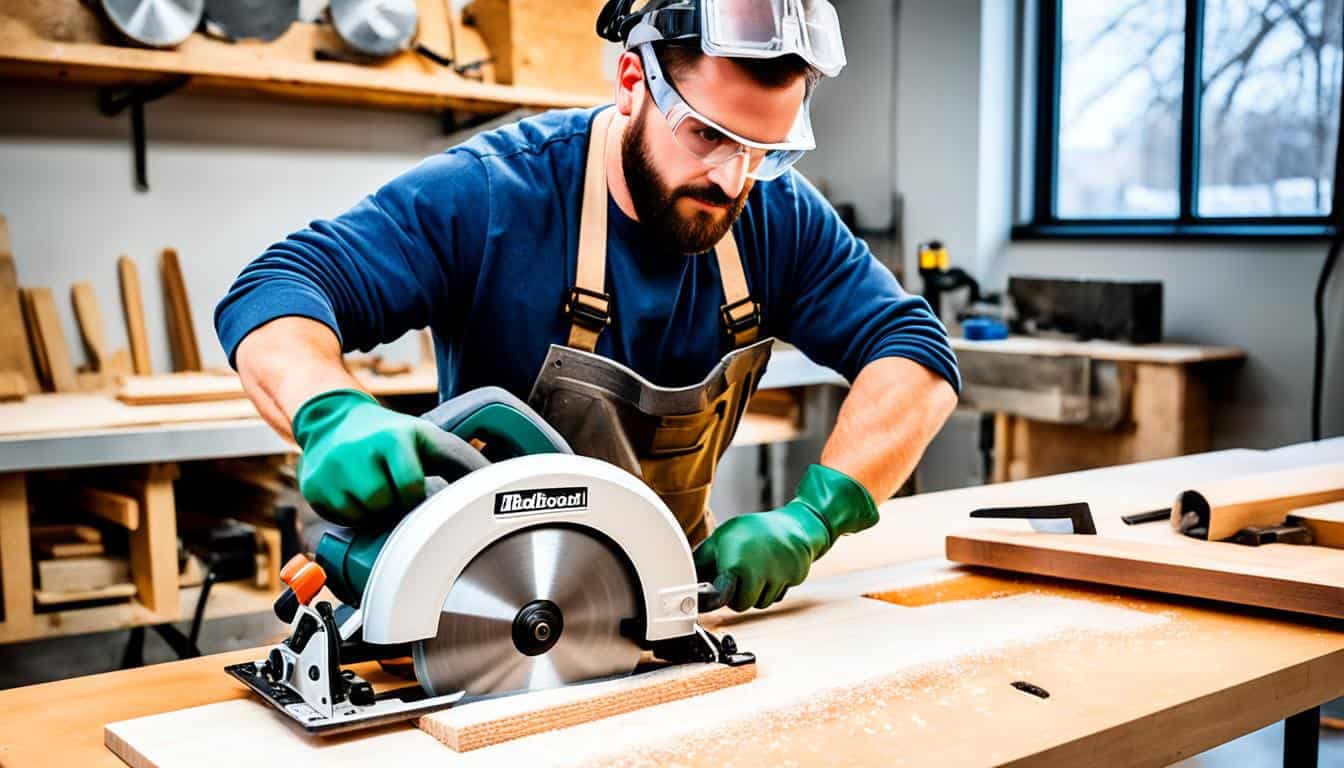
Step 3: Cut the Boards
Now that you have selected the perfect hardwood and determined the dimensions for your cutting board, it’s time to cut the boards to size. This step is crucial to achieve the desired shape and ensure a precise fit for your project.
There are two common tools you can use for cutting the boards: a table saw or a jigsaw. The choice depends on your preference and the complexity of the design. Regardless of the tool you choose, it’s important to follow these steps for a successful cut:
- Make a pilot hole: Before cutting, start by making a pilot hole on the marked lines. This will help guide the blade and prevent any tear-out or splintering.
- Use a table saw: If you have access to a table saw, it’s a great tool for making straight and precise cuts. Set the blade height according to your desired thickness, align the marked lines with the saw’s blade, and slowly feed the wood through, ensuring your hands are clear of the blade.
- Consider a jigsaw: If your design requires intricate or curved cuts, a jigsaw can be a better option. Start by inserting the blade through the pilot hole and carefully follow the marked lines, maintaining a steady pace and applying consistent pressure.
Remember to always prioritize safety when using power tools. Wear safety glasses to protect your eyes from any flying debris and consider using a push block or aide to move the wood through the saw, keeping your hands at a safe distance from the blade.
Once you have made the cuts, double-check that they are straight and at the desired angles. Take your time and make any necessary adjustments before moving on to the next steps of your DIY cutting board project.
| Tool | Pros | Cons |
|---|---|---|
| Table Saw |
|
|
| Jigsaw |
|
|
Safety glasses are an essential protective gear when working with power tools.
Conclusion
Embarking on a DIY cutting board project is a fantastic way to add a touch of personalization to your kitchen while creating a functional and beautiful piece. By following the steps outlined in this guide and choosing the right materials, you can craft a handmade cutting board that perfectly suits your style and culinary needs.
Investing time and effort into your DIY cutting board project will yield a rewarding result. Whether you opt for a face grain, edge grain, or end grain design, the end product will reflect your dedication and creativity. Not only will you have a handmade cutting board to use in your everyday cooking, but you’ll also have a unique piece that adds character to your kitchen.
Remember, woodworking is a versatile skill that can be honed through projects like this. As you become more confident in your abilities, you can explore other kitchen DIY projects and expand your woodworking repertoire. So gather your tools, select the perfect wood, and let your creativity soar as you embark on your own DIY cutting board project.
FAQ
Is it safe to use a wood cutting board?
Yes, when properly cleaned and maintained, well-crafted wood cutting boards can be just as safe and sanitary as plastic cutting boards.
What type of wood is best for a cutting board?
Hardwoods like maple, walnut, and cherry are excellent choices for cutting board materials due to their durability and resistance to knife cuts.
What are the different types of cutting boards?
There are face grain cutting boards, edge grain cutting boards, and end grain cutting boards to choose from, each with its own pattern and durability.
What tools do I need to make a DIY cutting board?
You will need a tape measure, hand saw, jigsaw, power drill, router, sandpaper, and eye and ear protection.
How do I make a face-grain cutting board?
Start by cutting a hardwood board to your desired length, drill a hole for hanging, and customize with a design or pattern.
How do I add a drip groove to my cutting board?
Mark and cut the desired groove, use a router to create the groove, and smooth it with sandpaper.
How do I sand my cutting board?
Use sandpaper or a sanding sponge to rub the board smooth, round the corners, and use a round-over bit for a polished look.
How do I seal my cutting board?
Apply food-grade mineral oil or butcher block oil liberally, allowing it to absorb into the wood, and reapply as necessary.
How do I clean a wood cutting board?
Hand wash the cutting board with soap and hot water, avoid using a dishwasher, and occasionally sanitize with salt and lemon.
What materials and tools do I need for a DIY cutting board?
You will need hardwood planks, Titebond III glue, a saw, clamps, an orbital sander, belt sander, and mineral oil.
How do I decide on the dimensions for my cutting board?
Consider your desired thickness, length, and width based on your needs and storage space.
How do I cut the boards for my cutting board?
Use a table saw or jigsaw to cut the boards to your desired dimensions, ensuring proper safety measures.