Are you ready to embark on a woodworking journey? Whether you’re a beginner looking to hone your skills or an experienced DIY enthusiast wanting to take your projects to the next level, mastering essential woodworking skills is crucial. From understanding basic techniques to using the right tools, these skills will empower you to create beautiful and functional wooden pieces with confidence.
So, what exactly are the woodworking skills that every craftsman needs in their toolkit? How can you acquire these skills and apply them to your DIY projects? In this article, we will delve into the world of woodworking and explore the fundamentals that are essential for any woodworking endeavor.
Join us as we unlock the secrets of woodworking and uncover the techniques, tips, and knowledge you need to succeed in your woodworking journey. Whether you dream of crafting intricate furniture, building custom cabinets, or simply creating unique wooden gifts for loved ones, this article will equip you with the essential woodworking skills to turn your ideas into reality.
Key Takeaways:
- Mastering essential woodworking skills is crucial for DIY projects.
- Understanding basic techniques and using the right tools is key.
- This article will guide you through the world of woodworking.
- Acquire the skills needed to create beautiful and functional wooden pieces with confidence.
- Unlock the secrets of woodworking and turn your ideas into reality.
Understanding Woodworking Techniques
Woodworking techniques are fundamental in creating stunning and functional wooden pieces. To master the art of woodworking, it is essential to have a solid understanding of various techniques. Let’s explore the key techniques that every woodworker should know:
- Milling: Milling is the initial step in woodworking, where rough lumber is transformed into precisely dimensioned blocks. It involves using tools like a jointer, planer, and table saw for flattening, smoothing, and cutting wood.
- Jointing and Planing: These techniques involve achieving flat and smooth surfaces by using tools like jointer and hand planes to flatten and smooth the wood. They are crucial for creating precise joinery and ensuring a professional finish.
- Sawing: Sawing is a fundamental technique used to cut wood in various woodworking projects. Different types of saws, such as chop saws, hand saws, and table saws, offer versatility and accuracy for different cutting tasks.
- Drilling and Boring: Drilling and boring techniques are used to create holes in wood. The choice of drill bits, such as twist bits and forstner bits, depends on the desired hole size and material. Tools like drill presses and handheld drills aid in precise drilling.
- Routing: Routing involves shaping, cutting, and trimming wood using a router. It is a versatile technique used to create various edge treatments, grooves, and patterns in woodworking projects.
- Gluing and Clamping: Gluing and clamping techniques are essential for joining wood pieces together. Different types of glue, such as white glue and epoxy, are used for specific applications, while clamps provide the necessary pressure for strong and sturdy joints.
- Shaping and Sanding: Shaping techniques allow woodworkers to create non-rectangular shapes and decorative elements using tools like scroll saws and lathes. Sanding is the final step that ensures a smooth and polished finish on woodworking projects.
By understanding and mastering these woodworking techniques, you’ll have the skills and knowledge to transform raw wood into beautiful and functional pieces. Each technique plays a crucial role in the woodworking process, allowing you to unleash your creativity and bring your woodworking projects to life.
Woodworking Techniques Table
| Technique | Description |
|---|---|
| Milling | Transforming rough lumber into precisely dimensioned blocks using tools like a jointer, planer, and table saw |
| Jointing and Planing | Achieving flat and smooth surfaces by flattening and smoothing wood with tools like jointer and hand planes |
| Sawing | Cutting wood using different types of saws like chop saws, hand saws, and table saws |
| Drilling and Boring | Creating holes in wood using drill bits and tools like drill presses and handheld drills |
| Routing | Shaping, cutting, and trimming wood using a router to create edge treatments, grooves, and patterns |
| Gluing and Clamping | Joining wood pieces together using different types of glue and applying clamps for pressure |
| Shaping and Sanding | Creating non-rectangular shapes and achieving a smooth finish using tools like scroll saws and sandpaper |
Mastering these techniques will take your woodworking skills to the next level, enabling you to create stunning and professional-grade projects.
Milling: The First Step in Woodworking
Milling is a crucial process in woodworking that transforms rough lumber into precisely shaped and dimensioned blocks. By employing the right tools and techniques, you can achieve accurate and smooth surfaces, laying the foundation for successful joinery and impeccable craftsmanship.
When it comes to milling, there are three essential tools you need to be familiar with: the jointer, planer, and table saw.
First, let’s talk about the jointer. This machine is designed to flatten one face of the rough lumber. By running the board across the jointer’s rotating blades, you can remove any imperfections, such as twists, bows, or cupping. This process creates a flat, even surface, which serves as a reference for subsequent milling steps.
Next, we have the planer. Once you’ve established a flat face using the jointer, the planer comes into play. It smoothens the opposite face of the board, making it parallel to the jointed face. The planer’s rotating cutter head shaves off the rough surface, resulting in a consistently even thickness across the entire board.
Finally, we have the table saw. After jointing and planing, you’ll have a flat reference face and opposing parallel face. To complete the milling process, the table saw is used to rip the remaining rough edge of the lumber, making it parallel to the jointed face. This ensures precise dimensions and accurate joinery for your woodworking project.
The milling process is crucial for achieving accurate measurements, smooth surfaces, and straight edges in your woodworking projects. It prepares the wood for further shaping, joinery, and ultimately guarantees the overall precision and quality of your final masterpiece.
Advantages of Milling in Woodworking
“Milling serves as the backbone of woodworking, providing the foundation for precise joinery and flawless craftsmanship.” – Expert Woodworker
Here are some key advantages of milling:
- Enables accurate and precise measurements for joinery and assembly
- Produces flat and smooth surfaces for easy finishing
- Ensures evenly thick boards for consistent visual appeal
- Creates straight and parallel edges for seamless joint connections
- Allows for efficient material utilization and waste reduction
Mastering the milling process is essential for any woodworker looking to take their skills to the next level. By understanding and applying these techniques, you’ll be well-equipped to tackle a wide range of woodworking projects with confidence and precision.
| Tool | Description |
|---|---|
| Jointer | A machine used to flatten one face of the rough lumber, ensuring a flat surface for subsequent milling steps. |
| Planer | A machine used to smooth the opposite face of the lumber, making it parallel to the jointed face and ensuring consistent thickness. |
| Table Saw | A versatile tool that cuts the remaining rough edge of the lumber, making it parallel to the jointed face and ensuring precise dimensions. |
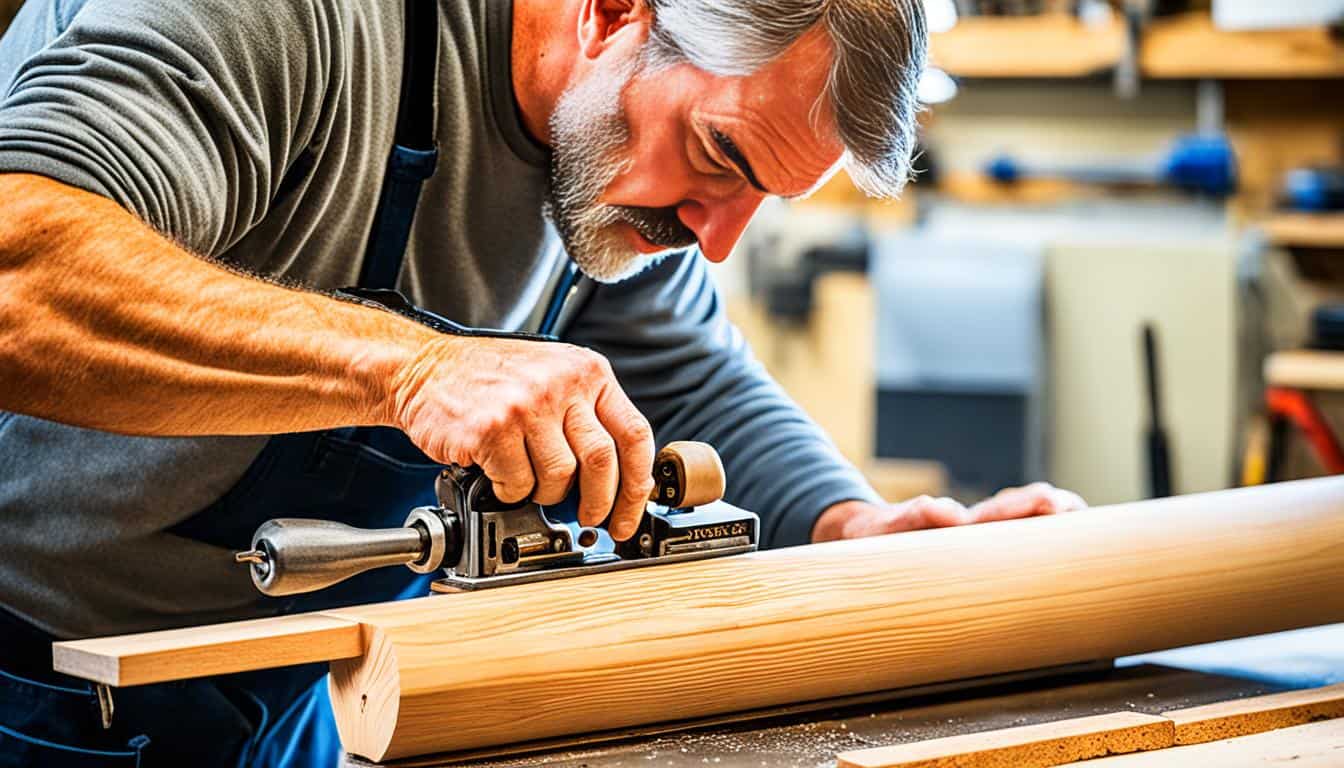
Jointing & Planing: Achieving Flat and Smooth Surfaces
When it comes to woodworking, achieving flat and smooth surfaces is essential for creating professional-looking projects. Two key techniques that can help you achieve this are jointing and planing. Jointing is the process of flattening one face and one edge of a board, while planing is used to smooth the surface and remove excess material. Let’s take a closer look at these techniques and the tools involved.
Jointing:
Jointing is the first step in achieving a flat surface. By using a jointer, you can ensure that your board has one perfectly flat face and one straight edge. This is crucial for creating precise joinery and ensuring that your project is straight and level. Jointing not only prepares the wood for further processing but also helps align the edges for a seamless fit when joining multiple pieces together.
Planing:
After jointing, planing is used to smooth the surface of the wood and remove any imperfections or excess material. Hand planes are versatile tools that allow for fine details and precise smoothing. Electric planers, on the other hand, are ideal for quickly removing larger amounts of material. Both options have their advantages and can be used depending on the specific requirements of your project.
Common Applications:
Jointing and planing are essential techniques for various woodworking applications, including:
- Creating flat and smooth tabletops
- Preparing stock for joinery
- Dimensioning lumber to a specific thickness
- Flattening boards for panel glue-ups
- Preparing surfaces for finishing
Choosing the Right Tools:
When it comes to jointing and planing, there is a range of tools available to suit different needs. Here are some popular options:
| Tool | Pros | Cons |
|---|---|---|
| Hand planes | – Versatile and can handle various woodworking tasks. – Allows for finer control and precision. – Suitable for small to medium-sized projects. | – Requires manual effort and technique. – Slower than electric alternatives for large projects. |
| Electric planers | – Fast material removal. – Ideal for larger projects. – Saves time and effort. | – Less precise than hand planes. – Limited control on smaller details. |
Regardless of the tool you choose, mastering jointing and planing techniques will be invaluable in your woodworking journey. These techniques ensure flat and smooth surfaces, allowing you to create beautiful, professional-looking projects.

With jointing and planing, you can achieve a woodworking masterpiece with a surface as smooth as glass.
Sawing: Cutting Wood for Every Project
Sawing is a fundamental woodworking technique that plays a crucial role in almost every woodworking project. Whether you need to cut lumber, create intricate designs, or make precise and accurate cuts, there’s a saw for every task. Understanding the different types of saws and their specific uses will ensure that you have the right tool for the job.
Chop Saw: A chop saw, also known as a miter saw, is perfect for rough cutting lumber. Its powerful motor and abrasive blade make quick work of cutting through wood, making it ideal for framing or general construction projects.
Hand Saw: Hand saws are a versatile and portable option for woodworking. They come in various types, such as crosscut saws, rip saws, and coping saws, each designed for specific cutting tasks. Hand saws allow for greater control and precision, making them suitable for fine woodworking and detailed cuts.
Portable Circular Saw: Portable circular saws are essential for making fast and efficient cuts in wood. With their adjustable depth and angle settings, they are perfect for cutting large sheets of plywood, making long rip cuts, or tackling trim work.
Table Saw: A table saw is a stationary tool that offers unparalleled accuracy and versatility. It features a circular blade protruding from a flat working surface, allowing for precise crosscuts, rip cuts, and miter cuts. The table saw is a staple in any woodworking workshop.
Chainsaw: Chainsaws are primarily used for initial rough cuts, particularly in outdoor or larger-scale woodworking projects. They excel in cutting through thick logs or branches quickly and efficiently.
Bandsaw: Bandsaws are designed for making curved cuts and intricate designs in wood. With their thin, continuous blade and adjustable table, they offer excellent control and precision for detailed woodworking projects.
Scroll Saw: Scroll saws are perfect for creating intricate and delicate designs in wood. They feature a thin reciprocating blade that moves up and down, allowing for precise curves and intricate patterns. Scroll saws are popular for making decorative crafts, puzzles, and personalized wooden signs.
As you can see, choosing the right saw for your woodworking project is essential to achieve the desired results. Consider the specific cutting tasks you’ll be performing and select the appropriate saw accordingly. Having the right tool for the job will make your woodworking experience more efficient, enjoyable, and successful.
Drilling & Boring: Creating Holes in Wood

Drilling and boring are essential techniques in woodworking that allow you to create holes in wood for various purposes. Whether you’re installing hardware, creating joinery, or adding decorative elements, drilling and boring are fundamental skills that every woodworker should master.
When it comes to drilling, there are several types of drill bits suitable for different applications. The most common types include twist bits, forstner bits, and spade bits, each designed for specific hole sizes and wood types. Twist bits are versatile and can be used for general drilling tasks, while forstner bits excel at creating clean and flat-bottomed holes. Spade bits, on the other hand, are perfect for drilling large-diameter holes.
If precision and accuracy are crucial, using a drill press is recommended. A drill press offers stability, control, and consistent drilling depth, making it ideal for projects that require precise hole placement. On the other hand, handheld drills provide convenience and portability, allowing you to work in tight spaces or on smaller projects.
Here’s a breakdown of common drill bits:
| Drill Bit | Application |
|---|---|
| Twist Bits | General drilling tasks |
| Forstner Bits | Creating clean and flat-bottomed holes |
| Spade Bits | Drilling large-diameter holes |
Whether you’re drilling small pilot holes or larger holes for dowels, hinges, or other hardware, mastering the art of drilling and boring is essential for successful woodworking projects.
Routing: Shaping and Trimming Wood
Routing is a versatile technique that allows you to shape, cut, and trim wood, giving your woodworking projects a unique and decorative touch. By utilizing a router, whether handheld or mounted on a table, you can create beautiful edge treatments, intricate grooves, and follow patterns with precision. This technique opens up a world of creative possibilities for enhancing the aesthetic appeal of your woodworking projects.
When it comes to routing, choosing the right router bits is crucial. The selection of router bits depends on the specific task at hand, whether you’re creating a decorative edge or routing grooves for joinery. There are various types of router bits available, such as straight bits, flush trim bits, ogee bits, and more, each tailored to different routing applications.
Understanding the techniques involved in routing is equally important. Proper technique ensures clean and accurate cuts, minimizing the risk of tear-out and ensuring a professional finish. It’s essential to practice proper routing techniques, such as controlling the direction and speed of the router, maintaining a consistent cutting depth, and securing the workpiece firmly during routing.
Key points:
- Routing is a versatile technique used to shape, cut, and trim wood.
- A router, handheld or mounted on a table, can create edge treatments, grooves, and patterns.
- Choosing the appropriate router bits for specific tasks is crucial.
- Understanding and practicing proper routing techniques ensures clean and accurate cuts.
Whether you’re adding decorative elements to furniture, creating intricate designs, or enhancing the functionality of your woodworking projects, routing is a skill worth mastering. With the right tools, techniques, and creativity, you can take your woodworking projects to the next level.
Gluing & Clamping: Joining Wood Together
When it comes to woodworking, gluing and clamping are essential techniques for joining pieces of wood together effectively. Whether you’re working on a small craft project or building a large furniture piece, understanding the different glue types and choosing the appropriate clamps will ensure strong and sturdy joints.
Glue Types:
| Type of Glue | Common Applications |
|---|---|
| White Glue | General woodworking, indoor projects |
| Yellow Glue | Interior joinery, laminating |
| Exterior Glue | Outdoor projects, exposed to moisture |
| Epoxy | High-strength bonding, filling gaps |
Clamp Types:
- Bar clamps: Ideal for longer and wider projects due to their extended reach.
- Pipe clamps: Versatile clamps that can be customized to various lengths.
- F-clamps: Easy to use and suitable for a wide range of woodworking projects.
- Spring-loaded clamps: Provide quick and temporary holding power for smaller pieces.
Properly gluing and clamping wood together involves applying an even coat of glue to both surfaces being joined, aligning the pieces precisely, and then tightening the clamps to provide sufficient pressure. The clamps should remain in place until the glue dries completely, which can take anywhere from a few minutes to several hours depending on the type of glue used.

“A strong bond begins with the right glue and the proper application of clamping pressure.” – Woodworking Pro
By mastering the art of gluing and clamping, you can create durable and long-lasting woodworking projects that withstand the test of time.
Shaping & Molding: Creating Non-rectangular Shapes
Shaping and molding techniques are essential for woodworkers looking to take their projects to the next level. These techniques allow you to create non-rectangular shapes and add intricate decorative elements to your woodworking projects. Whether you’re aiming for a unique design or seeking to replicate classic scrollwork, mastering shaping and molding will expand your creative possibilities.

Scrollwork: Adding Intricate Designs
One fascinating shaping technique is scrollwork, which involves using a scroll saw to cut intricate designs in wood. This technique allows you to create beautiful, detailed patterns that can be used for various woodworking projects such as furniture, decorative panels, or even art pieces. Scrollwork adds a touch of elegance and sophistication to your creations, making them truly stand out.
Lathe Turning: Shaping Wood into Cylindrical Forms
If you’re interested in creating cylindrical shapes, lathe turning is the technique for you. With the help of a lathe machine, you can transform a solid block of wood into a beautifully shaped cylinder. This technique is commonly used for creating table legs, decorative spindles, or even intricate bowls. Lathe turning requires precision and skill, but the end result is always worth the effort.
Veneering and Lamination: Decorative Elements and Strong Bonds
Veneering and lamination techniques are perfect for adding decorative elements and strength to your woodworking projects. Veneering involves applying thin layers of decorative wood, known as veneers, onto a solid wood surface. This technique allows you to incorporate different wood species and grain patterns, creating visually stunning designs. Lamination, on the other hand, involves bonding multiple layers of wood together to create a stronger and more stable structure. This technique is often used for tabletops, countertops, or furniture components that require added durability.
By mastering these shaping and molding techniques, you’ll unlock a whole new world of possibilities in your woodworking projects. Whether you’re creating intricate scrollwork, shaping wood on a lathe, or adding decorative elements through veneering and lamination, these techniques will elevate your craftsmanship to new heights.
Sanding & Filing: Finishing Touches
Once you have completed the main construction of your woodworking project, it’s time to add those finishing touches that will give it a smooth and polished look. Sanding and filing are the final steps in achieving a professional and refined final product.
Hand sanding is done using sandpaper, allowing you to manually smooth out the surface of the wood. This technique gives you precise control and is ideal for small details or areas that require extra attention. It’s important to work gradually, starting with a coarse-grit sandpaper and gradually moving to finer grits for a smoother finish.
If you need to speed up the sanding process, powered sanders are a great option. Disc sanders and spindle sanders are powerful tools that can quickly remove material and smooth out larger surfaces. These powered sanders are especially useful when working with larger or more intricate projects.
For those final finishing touches, handheld random orbit sanders are the tool of choice. They provide a combination of rotating and moving in an elliptical pattern, resulting in a swirl-free finish. These sanders are versatile and can be used on flat surfaces as well as contoured or curved areas.
Alongside sanding, filing is another technique used in woodworking to shape wood and remove rough spots. With files of different shapes and sizes, you can refine edges, create bevels, or smooth out imperfections. Similar to sanding, start with a coarser file and gradually move to finer files for a polished result.
Remember, sanding and filing are essential steps in achieving a professional look and feel in your woodworking projects. By carefully sanding and shaping the wood, you’ll create a smooth surface that enhances the overall appearance of your work.
Tips for Sanding and Filing:
- Wear protective goggles and a dust mask to protect yourself from fine wood particles.
- Work in a well-ventilated area or use a dust collection system to minimize dust accumulation.
- Use proper sandpaper grits for different stages of sanding, starting from coarse grits and progressing to finer grits.
- When using powered sanders, always keep the sander moving to avoid creating uneven spots or wearing out the wood in one area.
- Regularly check the progress of your sanding or filing by running your hands over the surface to identify any rough spots or unevenness that need further attention.
- Take breaks and inspect your work under different lighting conditions to ensure a consistent and smooth finish.
Remember, the key to achieving a professional finish is patience and attention to detail. Take the time to sand and file properly, and you’ll be rewarded with a woodworking project that looks and feels outstanding.
Essential Woodworking Projects for Beginners
As a beginner woodworker, it is important to start with simple projects that allow you to practice essential skills. By tackling these projects, you will gain confidence and develop your woodworking techniques. Here are some woodworking projects that are perfect for beginners:
1. Cutting Board
Building a cutting board is an excellent project for beginners. It allows you to practice milling, gluing, and finishing techniques. You can choose different types of wood and designs to create a unique and functional cutting board.
2. Mortise and Tenon Joint
The mortise and tenon joint is a versatile woodworking joint that you should learn as a beginner. It involves cutting a square or rectangular hole (mortise) in one piece of wood and inserting a corresponding protrusion (tenon) from another piece of wood to form a strong and durable joint.
3. Cabinets
Building cabinets is a great way to practice woodworking skills and create functional storage solutions. You can start with simple wall-mounted cabinets or small storage cabinets. Working with plywood will allow you to practice making dados and rabbets, which are essential for cabinet construction.
4. Shop Cabinets
Shop cabinets are specifically designed for organizing and storing woodworking tools and materials in your workshop. They provide a practical woodworking project for beginners, allowing you to practice various woodworking techniques while creating a functional storage solution for your tools.
| Project | Skills Practiced |
|---|---|
| Cutting Board | Milling, gluing, finishing |
| Mortise and Tenon Joint | Joinery |
| Cabinets | Dados, rabbets, plywood |
| Shop Cabinets | Various woodworking techniques |
Woodworking as a Career
Woodworking is not just a hobby; it can also be a fulfilling and rewarding career. As a professional woodworker, you have the opportunity to design and build wooden objects that serve various industries and meet the needs of individuals.
To establish a successful career in woodworking, there are several pathways you can explore:
- Woodworking Apprenticeship: Pursuing an apprenticeship allows you to learn the craft under the guidance of experienced woodworkers. It provides hands-on training and a chance to develop your skills while working on real projects. An apprenticeship offers practical knowledge and insights that are invaluable for long-term success in the industry.
- Woodworking Programs: Enrolling in woodworking programs, such as vocational schools or community college courses, can provide you with a comprehensive education in woodworking. These programs cover essential woodworking skills and techniques, allowing you to sharpen your craft and expand your knowledge. They often include practical experience and may offer opportunities for internships or job placements.
- Woodworker Career Alliance: Joining professional organizations like the Woodworker Career Alliance can connect you with a network of fellow woodworkers, industry experts, and potential employers. The Woodworker Career Alliance offers certifications that validate your skills and knowledge, enhancing your credibility in the field.
By pursuing apprenticeships, enrolling in woodworking programs, and joining professional organizations, you can gain valuable experience, acquire new skills, and establish yourself as a professional woodworker.
Embarking on a woodworking career allows you to turn your passion into a sustainable livelihood. Whether you specialize in furniture making, cabinetry, or custom woodworking, the opportunities are vast. As you build your career, seek out mentorship, stay updated on industry trends, and continually refine your skills.
| Pros of Woodworking as a Career | Cons of Woodworking as a Career |
|---|---|
| Opportunity to work with your hands and create tangible objects. | Physical demands of the job, including lifting heavy materials and extended periods of standing. |
| Potential for creativity and artistic expression in design and craftsmanship. | Market fluctuations and the need to adapt to changing consumer preferences. |
| Earning potential can increase with experience and specialization. | Requires precision and attention to detail to ensure quality and customer satisfaction. |
| Opportunity for professional growth and advancement as a master woodworker or business owner. | Workshop safety is crucial to prevent injuries and ensure a healthy work environment. |
Woodworking as a career offers a blend of creativity, craftsmanship, and practical skills. Whether you aspire to work as a professional woodworker or start your own woodworking business, the possibilities are endless. Take the first steps towards a fulfilling career in woodworking by pursuing apprenticeships, education, and industry connections.
Starting Your Woodworking Journey
If you are interested in starting woodworking as a hobby, there are several steps you can take to begin your journey.
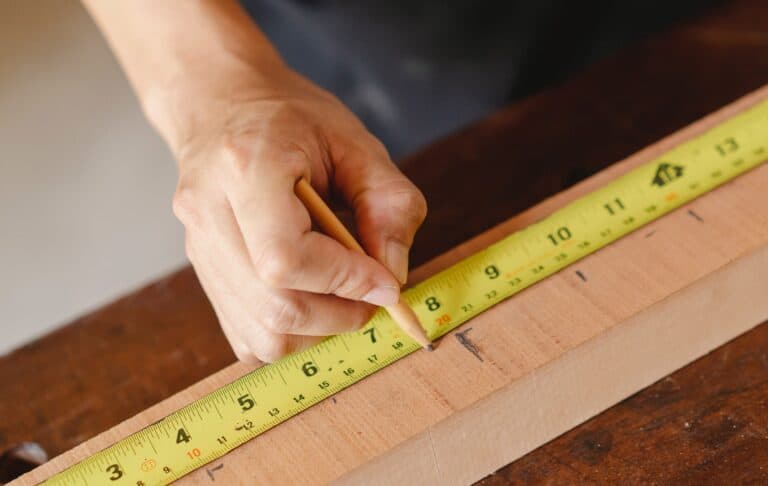
- Invest in Basic Woodworking Tools: To get started, you’ll need a set of essential woodworking tools. These include a saw for cutting wood, a chisel for shaping and carving, a hammer for driving nails, a measuring tape for accurate measurements, and a screwdriver for assembling pieces.
- Prioritize Safety Equipment: Safety should always be a top priority in woodworking. Make sure to invest in safety equipment such as safety glasses to protect your eyes from flying debris, ear protection to reduce noise, and dust masks to avoid inhaling harmful particles.
- Enroll in Woodworking Classes: Taking woodworking classes or workshops can provide valuable hands-on instruction and guidance from experienced woodworkers. You’ll learn essential techniques, proper tool usage, and gain insight into the best practices of the craft.
- Start with Small, Simple Projects: Beginning with small, simple projects allows you to gradually develop your skills and gain confidence in your abilities. Consider making items like a cutting board or a jewelry box to practice fundamental techniques.
Remember, woodworking is a journey of continuous learning and improvement. Embrace the process, explore different projects, and enjoy the satisfaction of creating something beautiful with your own hands.
Setting Up a Woodworking Workshop at Home
Setting up a woodworking workshop at home allows you to pursue your woodworking projects conveniently. Whether you’re a beginner or an experienced woodworker, having a dedicated workspace is essential for productivity and creativity. To help you get started, here are some key considerations when setting up your woodworking workshop.
1. Consider the Space Available
Before diving into the tools and equipment, assess the available space for your workshop. Ideally, choose an area that provides enough room for your projects and allows you to work comfortably. It’s essential to have adequate space for maneuvering large pieces of wood and operating power tools safely.
2. Invest in Essential Tools and Equipment
To set up a functional woodworking workshop, you’ll need a range of tools and equipment. Start with the basics and gradually add to your collection as your skills and projects progress. Some essential tools for a woodworking workshop include:
- Saw (such as a table saw, miter saw, or circular saw)
- Drill and drill bits
- Router
- Clamps
- Sander
- Chisels
- Measuring tools (such as tape measure, square, and level)
Having high-quality tools will enhance your woodworking experience and the quality of your projects. Invest in reliable brands that offer durability and precision.
3. Prioritize Safety
Woodworking involves working with sharp tools and powerful machinery. Safety should be a top priority in your workshop setup. Here are some safety measures to consider:
- Use appropriate safety equipment, such as safety glasses, ear protection, and a dust mask.
- Ensure proper ventilation to minimize exposure to dust and fumes. Consider installing a ventilation system or using fans and open windows.
- Set up a dust collection system to keep your workshop clean and reduce the risk of respiratory issues. Investing in a dust collector and connecting it to your tools can greatly improve air quality.
- Keep your workspace well-lit to avoid accidents and provide clear visibility.
- Follow safety guidelines and instructions for each tool and equipment you use. Familiarize yourself with proper handling and maintenance procedures.
4. Organize Your Workshop
An organized workshop not only improves efficiency but also creates an inspiring environment for woodworking. Consider implementing the following organizational tips:
- Designate specific areas for different woodworking tasks, such as a cutting area, assembly area, and tool storage area.
- Install adequate storage solutions, such as shelves, cabinets, and pegboards, to keep your tools and materials organized.
- Label your tools and materials to easily locate them when needed.
- Create a comfortable workbench with sufficient space for your projects.
By organizing your workshop effectively, you’ll save time searching for tools, eliminate clutter, and create a workspace that promotes productivity and creativity.
Setting up a woodworking workshop at home is an exciting endeavor that allows you to indulge in your passion for woodworking. With careful planning, the right tools, and a focus on safety, you can create a functional and inspiring space that unleashes your creativity and enables you to bring your woodworking projects to life.
Woodworking Glossary
As you delve into the world of woodworking, familiarize yourself with common woodworking terminology. Understanding terms like jointing, planing, routing, sawing, drilling, gluing, sanding, and finishing will enhance your understanding of woodworking techniques and allow you to communicate effectively with other woodworkers.
Woodworking Glossary
| Term | Definition |
|---|---|
| Jointing | The process of flattening the face and edge of a board to create a smooth, even surface for joinery. |
| Planing | The technique of smoothing the surface of wood using a planer or hand plane. |
| Routing | The process of shaping and trimming wood using a router, which can create decorative edges, grooves, and patterns. |
| Sawing | The act of cutting wood into desired sizes and shapes using different types of saws, such as a table saw, hand saw, or bandsaw. |
| Drilling | The technique of creating holes in wood using a drill and various drill bits for different hole sizes and applications. |
| Gluing | The process of joining wood pieces together using adhesive, such as white glue or epoxy, to create strong and durable bonds. |
| Sanding | The act of smoothing wood surfaces using sandpaper or powered sanders to achieve a polished and refined finish. |
| Finishing | The final step in woodworking that involves applying a protective coating, such as varnish or paint, to enhance the appearance and durability of the wood. |
Image:
Conclusion
Woodworking is a fulfilling craft that allows you to unleash your creativity and create impressive wooden projects. By honing your woodworking skills and mastering various techniques, you can confidently embark on DIY projects and bring your visions to life. Whether you are a beginner or exploring woodworking as a career, the fundamentals of woodworking play a crucial role in guiding you towards becoming a skilled woodworker.
Throughout this article, we have delved into essential woodworking skills, techniques, tips, projects, and tools. From understanding milling and jointing techniques to mastering sawing and drilling, each aspect contributes to the overall knowledge and expertise required for successful woodworking. With the right tools and knowledge, you can accomplish remarkable projects.
Remember to always prioritize safety while working with woodworking tools and equipment. Invest in the necessary safety gear like safety glasses, ear protection, and dust masks to protect yourself from potential hazards. Additionally, keep your tools sharp and well-maintained for optimal performance and safety.
Whether you are interested in woodworking as a hobby or pursuing it as a career, the journey begins by starting small. Take on simple projects to build your confidence and gradually expand your skills and project complexity. Embrace the learning process and appreciate the satisfaction that comes with creating something beautiful and functional with your own hands.
FAQ
What are some essential woodworking skills for DIY projects?
Some essential woodworking skills for DIY projects include milling, jointing, planing, sawing, drilling, routing, gluing, shaping, and sanding. These skills will help you transform raw wood into finished pieces.
What is milling in woodworking?
Milling is the process of transforming rough lumber into geometrically precise blocks. It involves using tools like a jointer, planer, and table saw to flatten, smooth, and cut the wood accurately.
How do jointing and planing contribute to woodworking?
Jointing and planing are techniques used in woodworking to achieve flat and smooth surfaces. Jointing involves flattening one face and one edge of a board, while planing is used to smooth the surface and remove excess material.
What are the different types of saws used in woodworking?
There are various types of saws used in woodworking, including chop saws, hand saws, portable circular saws, table saws, chainsaws, bandsaws, and scroll saws. Each saw has its own purpose and is suitable for different cutting tasks.
How can I create holes in wood for woodworking projects?
Drilling and boring are essential techniques for creating holes in wood. You can use various drill bits, such as twist bits, forstner bits, and spade bits, to achieve different hole sizes and types. A drill press provides precision, while handheld drills offer convenience.
How can I shape and trim wood in woodworking?
Routing is a versatile technique used to shape, cut, and trim wood. Using a router, either handheld or mounted on a table, you can create edge treatments, grooves, and follow patterns. It is important to choose the appropriate router bits for specific tasks and understand the techniques involved in routing.
What are some tips for joining wood together effectively?
Gluing and clamping are essential for joining wood together effectively. Various types of glues, such as white glue, yellow glue, exterior glue, and epoxy, are used for specific applications. Clamps, including bar clamps, pipe clamps, F-clamps, and spring-loaded clamps, provide the necessary pressure to hold the pieces of wood together until the glue dries.
How can I add decorative elements to my woodworking projects?
Shaping and molding techniques allow woodworkers to create non-rectangular shapes and add decorative elements to their projects. Scrollwork involves using a scroll saw to cut intricate designs in wood, while lathe turning utilizes a lathe machine to shape wood into cylindrical forms. Veneering and lamination are used to decorate and bind layers of wood.
What are the final steps in achieving a smooth finish on woodworking projects?
Sanding and filing are the final steps in achieving a smooth and polished finish on woodworking projects. Hand sanding is done with sandpaper, while powered sanders like disc sanders and spindle sanders speed up the process. Filing is used to shape wood and remove rough spots.
What are some recommended woodworking projects for beginners?
Recommended woodworking projects for beginners include building a cutting board, learning the mortise and tenon joint, building cabinets, and working with plywood. These projects allow beginners to practice essential skills like milling, gluing, and finishing, as well as creating precise joinery.
How can I pursue woodworking as a career?
To pursue woodworking as a career, you can consider apprenticeships, enroll in woodworking programs, and join professional organizations like the Woodworker Career Alliance. These avenues provide valuable opportunities to learn and grow in the field.
How can I start woodworking as a hobby?
To start woodworking as a hobby, you can invest in basic woodworking tools and safety equipment, enroll in woodworking classes or workshops for hands-on instruction, and start with small, simple projects to develop your skills and gain confidence.
How can I set up a woodworking workshop at home?
To set up a woodworking workshop at home, consider the available space and invest in essential tools and equipment suitable for your projects. Ensure proper ventilation and dust collection systems for safety. Organize the workshop for efficiency and create an inspiring environment for woodworking.
What are some common woodworking terms I should be familiar with?
Common woodworking terms you should be familiar with include jointing, planing, routing, sawing, drilling, gluing, sanding, and finishing. Understanding these terms will enhance your understanding of woodworking techniques and allow effective communication with other woodworkers.
What are the essential woodworking skills for DIY projects?
The essential woodworking skills for DIY projects include milling, jointing, planing, sawing, drilling, routing, gluing, shaping, and sanding. These skills are foundational for successfully completing woodworking projects.