Creating a personalized DIY jewelry box can be a rewarding and practical craft project. With just a few simple steps, you can craft a unique jewelry organizer to store and display your precious treasures. In this article, we will explore various techniques and materials to help you create your own DIY jewelry box.
Key Takeaways:
- DIY jewelry boxes can be a fun and creative way to store and display your jewelry.
- Thrift stores, garage sales, and craft stores are great places to find boxes to repurpose for your DIY project.
- Painting, decoupaging, and adding embellishments are popular techniques for customizing your jewelry box.
- Consider using materials like velvet fabric, cotton batting, and hot glue for a professional finish.
- If you prefer, you can also build a jewelry box from scratch or repurpose existing boxes.
Where Can I Buy Jewelry Boxes to DIY?
When embarking on a DIY jewelry box project, you may wonder where to find suitable boxes to repurpose or transform. Fortunately, there are various places where you can find unique and affordable options to inspire your creativity.
Thrift Stores
Thrift stores can be treasure troves for DIY enthusiasts. These stores often have a wide selection of pre-owned items, including jewelry boxes. Take your time to browse through their collections, and you might discover a hidden gem that can be transformed into a stunning DIY jewelry box.
Garage Sales and Flea Markets
Garage sales and flea markets are excellent places to find secondhand items at bargain prices. Keep an eye out for jewelry boxes that catch your eye, even if they may need some TLC. With a little creativity and effort, you can transform these finds into beautiful DIY jewelry boxes.
Antique Shops
Antique shops offer a unique selection of vintage items, including jewelry boxes. Explore these shops for beautifully crafted boxes with intricate details that can add a touch of elegance to your DIY project. While these pieces may be pricier than other options, their quality and charm make them worth considering.
Pop-up Shops
Pop-up shops, especially those specializing in handmade or vintage items, often feature unique and one-of-a-kind jewelry boxes. These temporary marketplaces are great for finding innovative designs and supporting local artisans. Keep an eye out for pop-up events in your area and explore the diverse options they offer.
Craft Stores
Craft stores are a go-to destination for DIY enthusiasts. These stores typically have a range of unfinished wooden boxes, decorative embellishments, and supplies that you can use to create your own DIY jewelry box. They are convenient options, especially if you prefer starting from scratch or customizing every aspect of your project.
Etsy
Etsy is a popular online marketplace where independent sellers offer handmade and unique items. You can find a wide range of jewelry boxes, including vintage pieces, unfinished wooden boxes, and ready-to-paint options. Shopping on Etsy gives you access to a global community of talented artisans and diverse designs.
Walnut Hollow
Walnut Hollow is a well-known brand that offers a variety of unfinished wooden boxes, ideal for DIY projects. Their selection includes small storage boxes, keepsake boxes, and trinket boxes that can be transformed into personalized jewelry boxes. With quality craftsmanship and affordable prices, Walnut Hollow is a reliable choice for DIY enthusiasts.
Remember, when purchasing jewelry boxes for your DIY project, consider the size, material, and overall condition of the box. Look for boxes that have sturdy construction and ample space to store your jewelry. Whether you choose to repurpose a vintage find or start from scratch, these sources will help you find the perfect box for your creative endeavor.
How Do You Paint a Jewelry Box?
Painting a jewelry box is a crucial step in transforming its appearance. By adding a fresh coat of paint, you can create a new look and feel that matches your personal style. When it comes to painting your DIY jewelry box, there are various techniques and materials you can use to achieve beautiful results.
Choosing the Right Paint
When selecting paint for your jewelry box, consider using chalk-type paints. These paints are a popular choice among DIY enthusiasts for their ease of use and unique finish. Chalk-type paints require minimal preparation and adhere well to various surfaces, including wood, metal, and plastic. They also offer easy distressing techniques to achieve a vintage or shabby chic look.
Some recommended paint brands for your DIY jewelry box include:
| Paint Brand | Description |
|---|---|
| DecoArt Chalky Finish Paint | A versatile and affordable option available in a wide range of colors. |
| Fusion Mineral Paint | A high-quality paint known for its excellent durability and smooth finish. |
| CeCe Caldwell’s Chalk and Mineral Paint | A non-toxic and eco-friendly paint option with a matte appearance. |
| Homemade Chalk Paint | You can also create your own chalk paint using simple ingredients like latex paint and baking soda. This allows you to customize the color and consistency according to your preference. |
Before painting, ensure that your jewelry box is clean and free from any dust or residue. Sanding the surface lightly can also help the paint adhere better.
Sealing the Finished Paint
To protect the painted surface and ensure its longevity, it’s important to apply a sealing finish. The most commonly used sealing finishes for chalk-type paints are wax and varnish.
Wax provides a soft and smooth protective layer that enhances the painted surface’s appearance. It can be applied using a brush or a cloth, and buffed to achieve a subtle sheen. However, wax may require periodic reapplication to maintain its protective qualities.
Varnish, on the other hand, offers a more durable and long-lasting finish. It provides a hard protective layer that can withstand daily use and cleaning. Choose a varnish specifically designed for use with chalk-type paints and apply it according to the manufacturer’s instructions.
“Painting a jewelry box is a fantastic way to unleash your creativity and give new life to an old or plain piece. With the right paint and sealing finish, you’ll have a beautifully transformed jewelry box that reflects your personal style.”
By following these painting techniques and using high-quality paint brands, you can create a stunning DIY jewelry box that is both stylish and functional. Get ready to paint your way to a more organized and personalized jewelry storage solution.
How Do You Decoupage a Wood Jewelry Box?
Decoupage is a popular technique that allows you to add character and customization to your wood jewelry box. By applying decorative paper or fabric to the surface, you can cover stains or create a vibrant design that reflects your personal style. Follow these steps to decoupage your wood jewelry box:
- Clean and prep the wood: Before you begin decoupaging, make sure the wood surface is clean and free of any dirt or debris. Sand the wood lightly to create a smooth surface for better adhesion of the decoupage materials.
- Choose your decoupage materials: Select tissue paper or other decorative paper or fabric that you want to use for your design. Consider colors, patterns, and textures that complement the overall look of your jewelry box.
- Apply decoupage glue: Using a decoupage medium like Mod Podge, apply a thin and even layer of glue to the surface of the wood jewelry box. Make sure to cover the entire surface where you plan to attach the decoupage materials.
- Place and adhere the decoupage materials: Carefully place the tissue paper or fabric onto the glued surface, smoothing out any wrinkles or air bubbles. Use a brush or your fingers to gently press down and adhere the materials to the wood box.
- Seal the decoupage: Once the decoupage materials are in place, apply another layer of decoupage glue on top to seal and protect the design. This step helps increase the durability and longevity of the decoupage on your jewelry box.
- Let it dry and cure: Allow your wood jewelry box to dry completely according to the instructions provided by the decoupage glue manufacturer. This curing process ensures that the decoupage is securely bonded to the wood surface.
Decoupaging a wood jewelry box offers endless possibilities for creativity. You can use various tissue paper patterns, fabric designs, or even combine both to create a unique and visually stunning piece. Whether you want to cover imperfections, add a pop of color, or showcase your artistic skills, decoupage is a versatile technique that transforms an ordinary wood box into a captivating piece of functional art.

With a little creativity and some decoupage techniques, you can transform a plain wood jewelry box into a personalized treasure. Let your imagination guide you as you experiment with different materials and designs to create a one-of-a-kind piece that reflects your style and showcases your precious jewelry.
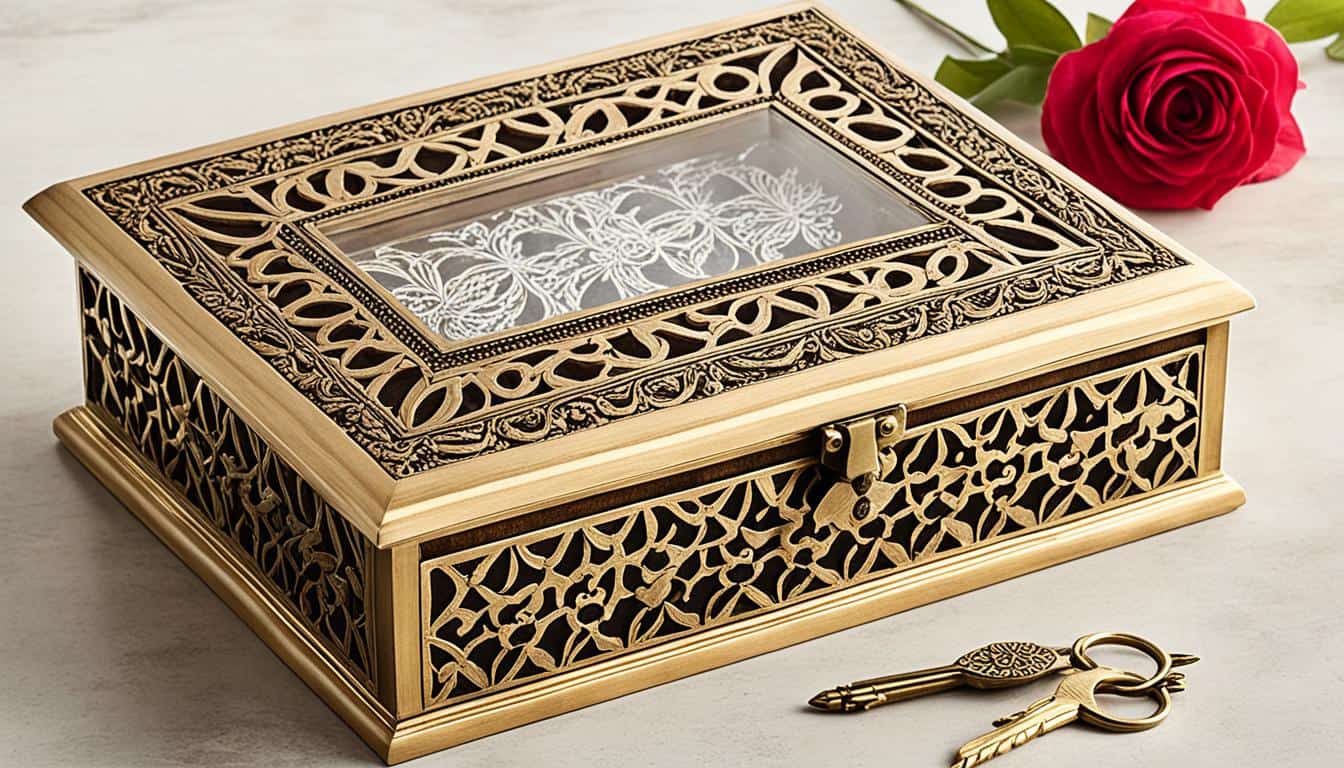
Examples of DIY Jewelry Box Projects
Looking for inspiration for your DIY jewelry box projects? Here are some examples of different makeover techniques that can elevate the look of your jewelry storage:
- Painted Jewelry Box Makeovers: Transform a plain jewelry box by painting it in a single color for a sleek and modern look. For a more textured effect, consider layering multiple colors or using different painting techniques.
- Stenciled Jewelry Box Makeovers: Add intricate patterns and designs to your jewelry box by using stencils. From geometric shapes to delicate florals, stenciling allows you to easily create unique and eye-catching designs.
- Decoupaged Jewelry Box Makeovers: Get creative by decoupaging your jewelry box with various materials such as scrapbook paper or fabric. This technique allows you to explore endless possibilities and truly personalize your box.
- Embellished Jewelry Box Makeovers: Take your jewelry box to the next level by adding decorative elements such as decorative metal sheets, silicone caulk designs, or paper clay moldings. These embellishments can give your box a luxurious and ornate look.
- Upcycled Jewelry Box Ideas: Repurpose existing boxes into unique jewelry storage solutions. For example, you can convert a jewelry box into a sewing kit or repurpose it as a stylish remote control storage box.
Let your creativity shine and experiment with these makeover techniques to create a DIY jewelry box that reflects your personal style and showcases your favorite pieces. Check out the image below for visual inspiration:
| Makeover Technique | Description |
|---|---|
| Painted Jewelry Box Makeovers | Transform a plain jewelry box by applying paint in a single or multiple colors for a unique and personalized look. |
| Stenciled Jewelry Box Makeovers | Add intricate patterns and designs to your jewelry box using stencils to create a stunning visual effect. |
| Decoupaged Jewelry Box Makeovers | Personalize your jewelry box by applying decorative paper or fabric using decoupage techniques. |
| Embellished Jewelry Box Makeovers | Elevate your jewelry box by adding decorative elements such as metal sheets, silicone caulk designs, or paper clay moldings. |
| Upcycled Jewelry Box Ideas | Repurpose existing boxes into unique jewelry storage solutions, such as transforming a jewelry box into a sewing kit or remote control storage box. |
Tips for Choosing Materials and Finishes
When it comes to creating your own DIY jewelry box, selecting the right materials and finishes is essential. Consider factors such as durability, aesthetics, and functionality to ensure a successful project. Here are some tips to guide you:
The Right Material
Choose materials that not only look great but also provide the necessary protection for your jewelry. Velvet fabric is an excellent choice for lining the interior of your jewelry box. Its soft texture not only adds a touch of luxury but also helps prevent scratches and damage to your precious pieces.
Cotton batting or foam rolls can be used to create compartments and holders within the box. These materials provide sufficient cushioning to keep your jewelry secure and organized. With compartments, you can easily separate different types of jewelry, preventing tangling and making it easier for you to find what you’re looking for.
Secure it in Place
When assembling your DIY jewelry box, it’s important to choose the right adhesive to secure the materials in place. Hot glue or fabric glue is often recommended for its strong bonding properties. These adhesives ensure that the fabric, batting, and other materials remain firmly attached, even with regular use.
Add the Finishing Touch
To protect the surfaces of your DIY jewelry box and give it a polished look, consider using a varnish or soft-touch varnish. Apply a coat of varnish to seal and protect any painted or decoupaged areas, allowing your box to withstand everyday wear and tear while maintaining its beauty.
Creating a DIY jewelry box is not only a practical storage solution but also an opportunity to showcase your creativity and personal style. By choosing the right materials and finishes, you can ensure that your DIY jewelry box is not only functional but also visually appealing and durable.
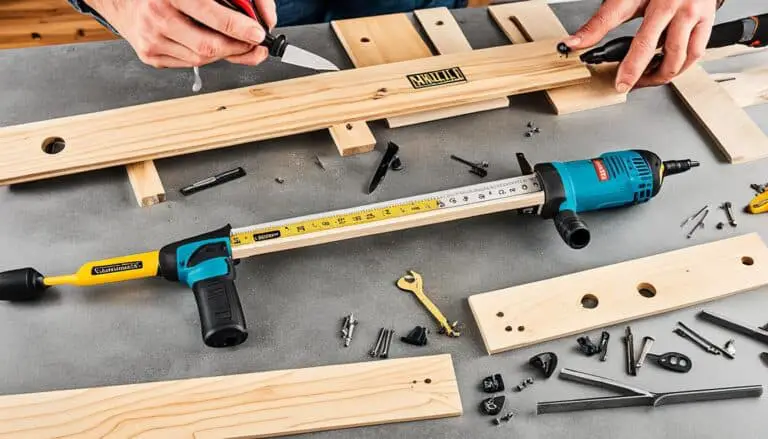
How to Build a Jewelry Box from Scratch
If you prefer to build your jewelry box from scratch, there are many woodworking plans available online. These plans provide detailed instructions, diagrams, and materials lists to help you construct a custom jewelry box. Whether you’re a beginner or an intermediate builder, these plans can guide you through the process and ensure a successful outcome.
Building a jewelry box from scratch allows you to create a truly unique piece that reflects your personal style and meets your specific storage needs. With the right plans and tools, you can craft a beautiful and functional jewelry box to showcase and protect your treasured pieces.
When searching for woodworking plans for your DIY jewelry box, look for plans that include building instructions, diagrams, materials lists, and cutting lists. These resources will provide you with a clear step-by-step process and ensure that you have all the necessary materials and tools to complete the project.
Many woodworking plans for jewelry boxes cater to different skill levels, so whether you’re a novice or an experienced woodworker, you’ll find plans that suit your capabilities. If you’re new to woodworking, look for plans specifically designed for beginners that offer detailed explanations and illustrations. These plans typically use basic woodworking techniques and tools, making the project accessible and achievable for beginners.
For more experienced woodworkers, there are intermediate and advanced woodworking plans available that incorporate more intricate joinery and design elements. These plans may involve techniques such as dovetail joints, mitered corners, or inlay work, allowing you to challenge your skills and create a truly stunning jewelry box.
It’s important to carefully read and understand the woodworking plans before you begin your project. Take the time to familiarize yourself with the instructions and study the diagrams to ensure that you have a clear understanding of each step. Additionally, make sure you have all the necessary tools and materials listed in the plans to avoid any delays or frustrations along the way.
Building a jewelry box from scratch not only provides you with a functional storage solution but also allows you to unleash your creativity and craftsmanship. With the right plans and a little effort, you can create a one-of-a-kind piece that will be cherished for years to come.

Building a jewelry box from scratch is a rewarding project for DIY enthusiasts. With the help of woodworking plans, building instructions, diagrams, materials lists, and cutting lists, you can confidently embark on this woodworking journey and create a custom jewelry box that reflects your personal style and meets your storage needs.
How to Create a Secret Compartment Jewelry Box
If you want to add an element of mystery and intrigue to your DIY jewelry box, consider creating a secret compartment. This unique design feature can bring a sense of excitement every time you open your jewelry box. By incorporating a mirror that sits atop drawers and hooks, you can create a hidden space to store your most treasured items. The mirror not only adds functionality but also adds an elegant touch to your jewelry box.
Building instructions and diagrams are available to guide you in constructing a secret compartment jewelry box. These instructions will help you understand the step-by-step process and ensure that your secret compartment is secure and seamless. With the right materials and attention to detail, you can create a stunning jewelry box with a hidden surprise.
Creating a secret compartment jewelry box is an opportunity to showcase your craftsmanship and creativity. You can customize the number of drawers, the size of the hooks, and even the design of the mirror. Let your imagination run wild and create a jewelry box that not only protects your valuables but also adds a touch of magic to your daily routine.
Upcycling Existing Boxes into Jewelry Boxes
If you have existing boxes that you’d like to repurpose into jewelry boxes, there are various techniques you can use. One creative option is to transform a plain box into a DIY jewelry box through a simple sewing project. Sewing allows you to add compartments and holders tailored to your jewelry collection, keeping everything organized and easily accessible.
“Repurposing an old fabric-lined gift box into a jewelry box is a fun and practical sewing project. By adding fabric dividers and a padded cushion for rings, you can customize the box to fit your specific needs.” – Sarah Thompson, DIY Enthusiast
Another way to give your existing box a personalized touch is through a photo transfer technique. Use epoxy or mod podge to adhere a photo of your choice to the top of the box, creating a sentimental and unique design. This method allows you to showcase a cherished memory or a favorite image on the jewelry box, adding a personal and meaningful element to your DIY project.
If you prefer a more artistic approach, consider painting or staining the box to give it a fresh and unique look. This allows you to unleash your creativity and incorporate colors and patterns that match your style and home decor. Additionally, you can use stencils or freehand painting to add intricate designs and details to the box, making it a true one-of-a-kind piece.
Upcycling Techniques for Existing Boxes
| Technique | Description |
|---|---|
| Sewing Project | Add compartments and holders with fabric dividers for jewelry storage |
| Photo Transfer | Adhere a personal photo to the top of the box for a customized design |
| Painting | Transform the box’s appearance with vibrant colors and patterns |
Whether you choose to sew, transfer a photo, or paint, upcycling existing boxes into jewelry boxes allows you to create unique and personalized storage solutions while reducing waste. It’s a creative way to breathe new life into old boxes and showcase your DIY skills.

Additional DIY Jewelry Box Ideas
Beyond traditional jewelry boxes, there are other creative ideas for storing and displaying your jewelry. Explore these alternative DIY jewelry storage ideas to think outside the box and find unique solutions for your jewelry organization needs.
Create an Embroidery Box
If you enjoy embroidery, why not turn it into a functional jewelry storage solution? Craft an embroidery box with specialized storage spaces for embroidery needles and threads. Not only will you have a beautiful jewelry box, but also a convenient way to keep your embroidery supplies organized.
Build an Earring Stand
An earring stand made from wood boards and decorative aluminum sheets can provide a modern and functional way to organize your earrings. By displaying your earrings on a stand, you’ll have easy access to your collection and prevent them from tangling or getting lost. Plus, it adds a stylish touch to your vanity or dresser.
More Jewelry Storage Ideas
If you’re looking for even more innovative ideas, consider the following options:
- Repurpose a vintage suitcase or trunk into a jewelry storage case. Line the interior with fabric and add compartments to keep your jewelry organized.
- Create a hanging jewelry organizer by attaching hooks or knobs to a decorative frame. Hang it on your wall or the inside of a closet door for easy access.
- Transform a simple spice rack into a wall-mounted jewelry holder. Paint it in your favorite color and add hooks or wire mesh to hang your necklaces, bracelets, and earrings.
- Make a jewelry display using a picture frame and chicken wire. Secure the wire to the back of the frame and hang your jewelry for a unique and artistic presentation.
These creative DIY jewelry storage ideas allow you to showcase your accessories while keeping them organized and easily accessible. Choose the idea that best fits your style and needs, and have fun creating your own unique jewelry storage solution.
Conclusion
In conclusion, crafting your own DIY jewelry box is a creative and rewarding craft project that allows you to create a personalized organizer tailored to your style and storage needs. Whether you choose to repurpose existing boxes or build one from scratch, there are endless possibilities for customization. By incorporating techniques such as painting, decoupage, or embellishments, you can transform a plain box into a beautiful and functional piece that showcases and protects your cherished jewelry items.
The DIY jewelry box offers a unique opportunity to unleash your creativity and showcase your personal style. You can experiment with different colors, patterns, and designs to create a one-of-a-kind piece. Not only does it serve as a functional storage solution, but it also adds a touch of personality and charm to your dressing area or bedroom.
Whether you prefer a rustic, shabby chic, or modern aesthetic, the DIY jewelry box allows you to express your creativity while providing a practical storage solution for your jewelry collection. By investing time and effort into making your own jewelry box, you can create a personalized organizer that reflects your style and keeps your precious pieces organized and accessible. So, unleash your creativity and start crafting your own DIY jewelry box today!
FAQ
Where can I buy jewelry boxes to DIY?
You can find suitable boxes for repurposing or transforming at thrift stores, garage sales, flea markets, antique shops, pop up shops, craft stores, and online platforms like Etsy.
How do you paint a jewelry box?
To paint a jewelry box, consider using chalk-type paints, such as DecoArt Chalky Finish Paint, Fusion Mineral Paint, or CeCe Caldwell’s Chalk and Mineral Paint. These paints require minimal preparation and offer easy distressing techniques. Sealing finishes like wax or varnish are often necessary for durability.
How do you decoupage a wood jewelry box?
To decoupage a wood jewelry box, first ensure the wood is clean and prepped. Then, use decoupage techniques like Mod Podge to adhere tissue paper or other materials to the box, allowing for endless creativity and unique designs.
Can you provide examples of DIY jewelry box projects?
Some examples of DIY jewelry box projects include painted jewelry box makeovers, stenciled jewelry box makeovers, decoupaged jewelry box makeovers, embellished jewelry box makeovers, and upcycled jewelry box ideas.
What tips can you provide for choosing materials and finishes for a DIY jewelry box?
When choosing materials and finishes for a DIY jewelry box, consider factors such as durability, aesthetics, and functionality. Velvet fabric can provide a luxurious and protective lining, while cotton batting or foam rolls can be used to create compartments and holders. Hot glue or fabric glue is often used for securing materials, and varnish can be used for a finished look.
How can I build a jewelry box from scratch?
If you prefer to build a jewelry box from scratch, you can find woodworking plans online that provide detailed instructions, diagrams, and materials lists to guide you through the process.
How can I create a secret compartment jewelry box?
To create a secret compartment jewelry box, you can incorporate a mirror that sits atop drawers and hooks. Building instructions and diagrams are available to guide you in constructing this unique jewelry box design.
Can I upcycle existing boxes into jewelry boxes?
Yes, you can upcycle existing boxes into jewelry boxes. For example, you can add compartments and holders through a simple sewing project or use epoxy or Mod Podge to adhere a personalized photo to the top of the box. Painting or staining the box can also give it a fresh and unique look.
What are some additional DIY jewelry box ideas?
Beyond traditional jewelry boxes, you can explore other creative ideas such as creating an embroidery box with storage spaces for embroidery needles and threads or making an earring stand from wood boards and decorative aluminum sheets.
How can crafting a DIY jewelry box benefit me?
Crafting your own DIY jewelry box allows you to create a personalized organizer that fits your style and storage needs. It provides a rewarding and practical craft project that showcases and protects your cherished jewelry items.