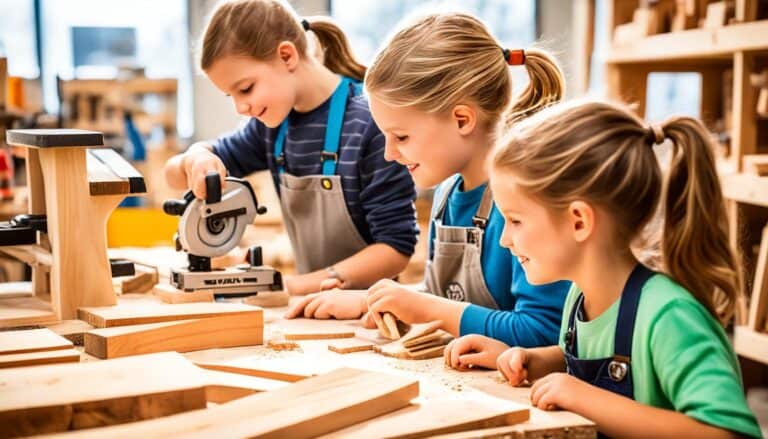
Are you tired of searching for the perfect table that matches your style and fits your needs? What if you could build your own DIY table, customized to your preferences and budget? From woodworking projects to handmade furniture, discover how you can create a beautiful and functional table with this easy step-by-step guide.
Key Takeaways:
- Building your own DIY table allows you to create custom furniture that suits your style and needs.
- A DIY table can be a cost-effective alternative to purchasing pre-made furniture.
- By building your own table, you can experience the satisfaction of creating something with your own hands.
- Customizing your DIY table allows you to add personal touches and unique features.
- Embark on a DIY table building journey today and enjoy the benefits of handmade furniture in your home.
Choosing the Right Design for Your DIY Table
Before you start building your DIY table, it’s important to choose the right design that suits your style and needs. Take some time to research different table designs and consider factors such as the furniture style, table size, and dimensions.
When selecting a table design, think about the overall aesthetic you want to achieve in your space. Consider whether you prefer a modern, contemporary, rustic, or traditional style. The design of your table should complement the existing decor and furniture in the room.
Additionally, think about the size and dimensions of the table. Measure the available space where you intend to place the table and consider how many people you want the table to accommodate. A dining table, for example, should have enough seating capacity for your family or guests.
Explore different table designs:
- Rectangular tables: These classic tables are versatile and commonly used for dining rooms and offices. They provide ample surface area and can seat multiple people.
- Square tables: Square tables are a great option for smaller spaces or as an alternative to rectangular tables. They create a cozy and intimate atmosphere.
- Round tables: Round tables are popular for their ability to foster conversation and create a more inviting atmosphere. They work well in both formal and casual settings.
Once you have an idea of the table design you prefer, look for inspiration in furniture stores, online catalogs, and woodworking magazines. Take note of the materials used, unique features, and finishing techniques to help guide your own DIY table project.
Choosing the right design for your DIY table is crucial in creating a piece of furniture that not only looks beautiful but also meets your functional needs. Take your time to explore different designs and find inspiration that aligns with your personal style and space requirements.
Gathering the Necessary Materials and Tools
To build your DIY table, you’ll need a range of materials and tools. The specific materials will depend on the size and design of your table, but some common items include:
- Lumber
- Wood glue
- Screws
- Drill
- Saw
- Sander
These essential materials will provide a solid foundation for your table construction. Additionally, you’ll require several tools to ensure a seamless building process. Make sure you have the following tools on hand:
- Drill: For making holes and attaching screws
- Saw: To cut the lumber into the desired sizes
- Sander: For smoothing and refining the surfaces
- Clamps: To hold pieces together during assembly
By gathering all the necessary materials and tools in advance, you’ll be well-prepared to embark on your DIY table project.
“Having the right materials and tools is crucial to the success of your DIY table project. With lumber, wood glue, screws, a drill, saw, sander, and clamps, you’ll have everything you need to bring your vision to life.” – Woodworking Enthusiast
| Materials | Tools |
|---|---|
| Lumber | Drill |
| Wood glue | Saw |
| Screws | Sander |
| Clamps |
Planning and Preparing for Your DIY Table
Before you embark on the construction of your DIY table, it’s crucial to have a well-thought-out plan and gather the necessary materials. By creating a detailed table plan and gathering the right tools and supplies, you can ensure a smooth and successful building process.
Creating a Rough Sketch
Start by creating a rough sketch of your table design on paper. Include detailed dimensions and measurements, taking into account the desired size, shape, and overall aesthetic. This sketch will serve as your blueprint and guide throughout the construction process.
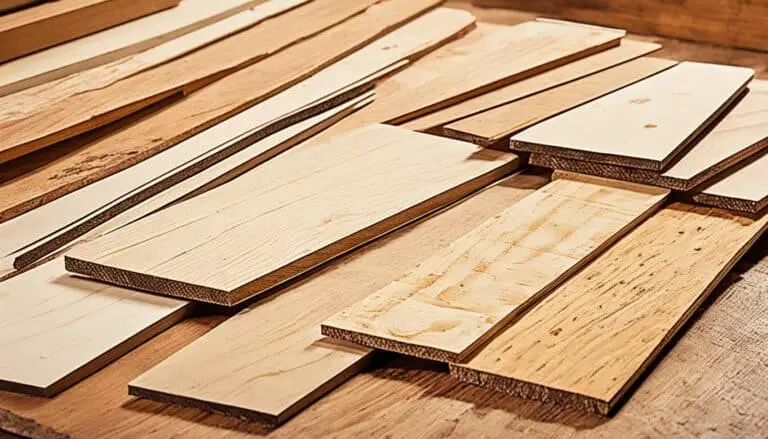
Choosing the Right Lumber
Next, carefully consider the lumber selection for your DIY table. Take into account factors such as cost, availability, and durability. Common options for table construction include hardwoods like oak, maple, or walnut, as well as softwoods like pine or cedar. Choose lumber that aligns with your budget and desired aesthetic while also considering its ability to withstand regular use and environmental conditions.
Creating a Lumber List
Compile a comprehensive list of the lumber sizes and quantities required for your table construction. This list will help you ensure that you have all the necessary materials on hand before you begin building. Include the dimensions and quantities of the tabletop, legs, and any additional components, such as aprons or supports.
Table 4: Sample Lumber List
| Lumber | Dimensions | Quantity |
|---|---|---|
| Hardwood | 1″ x 6″ x 8′ | 4 |
| Pine | 2″ x 4″ x 8′ | 4 |
| Walnut | 1″ x 2″ x 6′ | 2 |
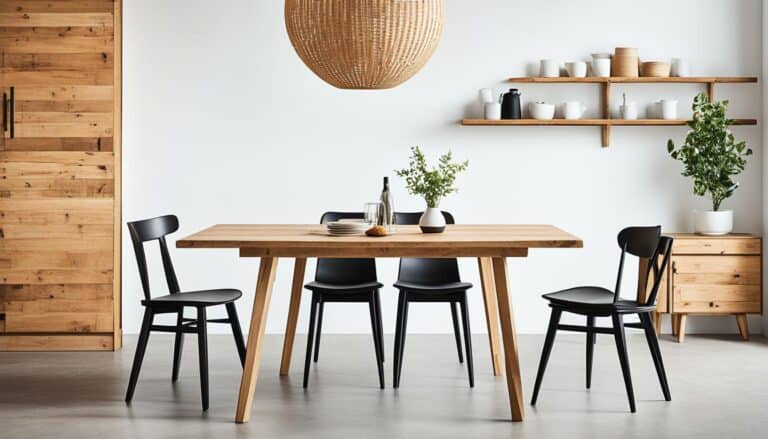
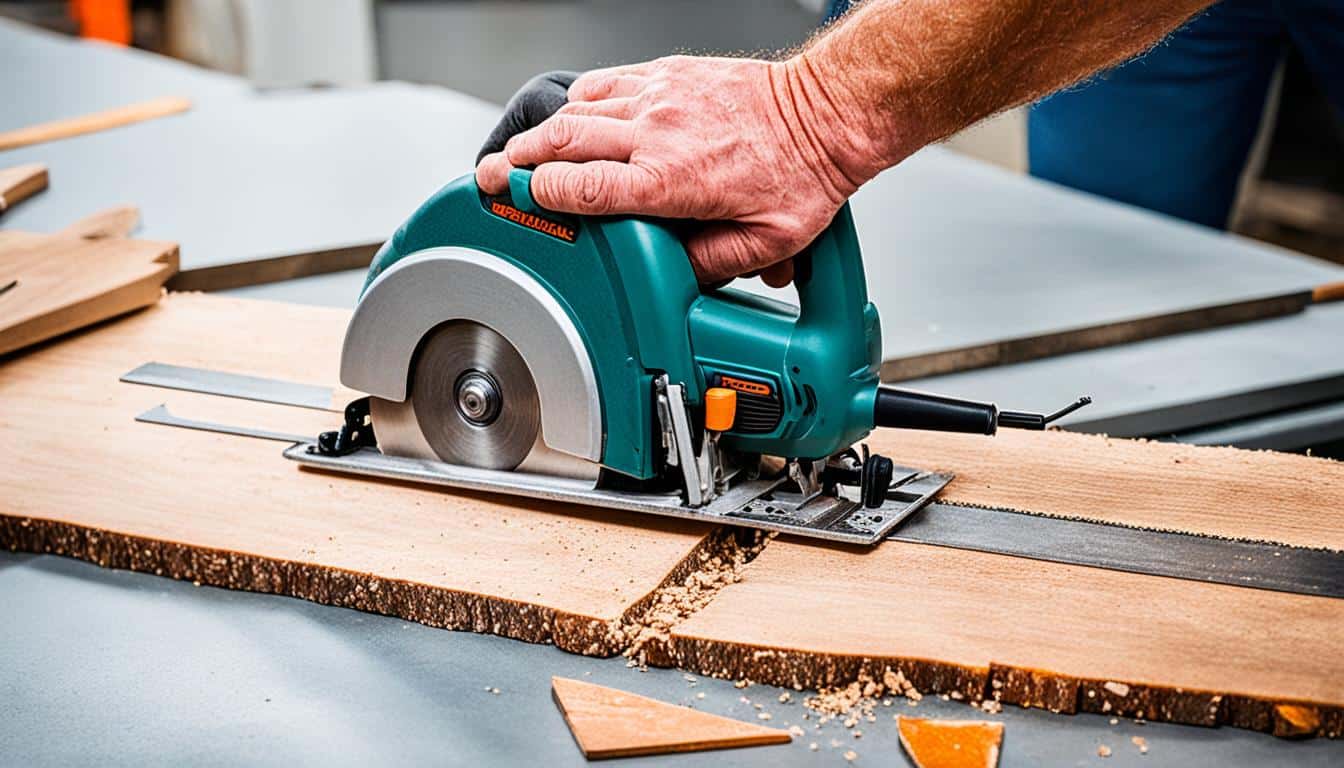
Building the Table Top
The tabletop is an essential component of your DIY table. It not only provides a stable surface for various activities but also adds aesthetic value to your furniture piece. When constructing the tabletop, there are a few key considerations to keep in mind for a successful project.
Design and Lumber Arrangement
Begin by laying out the lumber boards according to your design. Ensure that the boards are arranged in the desired pattern, taking into account factors such as wood grain direction and the overall look you want to achieve. Take your time to arrange the boards in a way that creates an appealing visual display on the tabletop.
Joinery Techniques for Stability
Next, use appropriate joinery techniques to securely attach the lumber boards together. Popular options include pocket holes, dowels, or traditional tongue and groove joints. These techniques help to maintain the structural integrity of the tabletop, ensuring that it remains sturdy and durable over time.
Pro Tip: For added stability, consider using biscuits or splines to reinforce the joints between the boards.
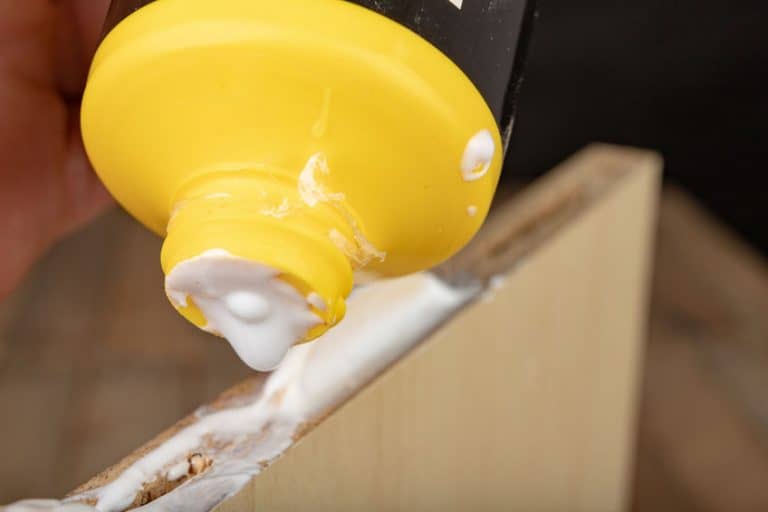
Applying Wood Glue and Clamping
Before joining the boards, apply a generous amount of wood glue to the edges that will come into contact with each other. Wood glue creates a strong bond and helps prevent any gaps between the boards. Once the glue is applied, use clamps to firmly hold the boards together while the glue dries.
Make sure to position the clamps strategically, applying pressure evenly across the entire tabletop surface. This will help ensure a flat and level tabletop and minimize the risk of warping or unevenness.

Once the wood glue has fully cured, you can remove the clamps and proceed with the next steps of your DIY table project.
Building the table top is a crucial stage in the construction process. It requires careful attention to detail in terms of design, lumber arrangement, joinery techniques, and proper use of wood glue and clamps. By following these steps, you can create a strong, visually appealing tabletop that will be the centerpiece of your DIY table.
Constructing the Table Legs
The table legs play a crucial role in providing stability and support to your DIY table. To ensure a well-built and balanced piece of furniture, it is important to pay attention to leg measurements, leg assembly, leg attachment, and the use of corner braces.
Cutting the Legs to Size
Begin by measuring and marking the desired length for your table legs. It is essential to cut all the legs to the same length for a level tabletop. Using a measuring tape or ruler, carefully mark the measurements on each leg.
Assembling the Legs
There are different techniques you can use to assemble the table legs. One effective method is gluing and doweling. Apply wood glue to the ends of the legs and insert dowels into the corresponding holes on the connecting pieces. Allow the glue to dry and cure before moving on to the next step.
Alternatively, you can use screws and corner braces for leg assembly. Pre-drill holes on the connecting pieces and secure the legs in place using screws and corner braces. This method provides added stability and reinforcement.
Attaching the Legs to the Tabletop
Once the legs are assembled, it’s time to attach them to the tabletop. Position the legs at the corners of the tabletop, ensuring they are evenly spaced. Use clamps to hold the legs in place while you secure them to the tabletop.
Using Corner Braces for Additional Support
To further strengthen the leg attachment and ensure long-lasting stability, consider using corner braces. These metal brackets provide additional support and prevent wobbling or shifting of the legs. Attach the corner braces to the inside corners of the legs and secure them to the tabletop using screws.
By following proper leg measurements, utilizing effective leg assembly techniques, ensuring secure leg attachment, and incorporating corner braces, you can construct sturdy and durable table legs for your DIY table.
Smoothing and Finishing Your DIY Table
Once the main structure of your DIY table is complete, it’s time to give it a smooth and beautiful finish. This step is crucial to enhance the appearance of the wood and protect it from wear and tear. Follow these easy steps to achieve a stunning finish for your DIY table:
Sanding the Surface
Start by sanding the entire surface of the table using sandpaper or a sander. This will help remove any rough patches, splinters, or imperfections, giving your table a smooth and even feel. Start with a coarse-grit sandpaper for initial sanding and gradually switch to finer-grit sandpaper for a more polished finish. Sand in the direction of the wood grain to achieve the best results.
Applying a Stain
If you want to add color and depth to your DIY table, consider applying a wood stain. Choose a stain that complements the overall aesthetic of your space. Before applying the stain, make sure the surface is clean and free from any dust or debris. Use a brush or a soft cloth to apply an even coat of stain, following the instructions on the product. Allow the stain to dry fully before moving on to the next step.
Protective Finish
To ensure the longevity of your DIY table, it’s vital to apply a protective finish. A protective finish helps seal the wood, preventing moisture damage, and adds a layer of durability to the surface. One popular option is polyurethane, which provides excellent protection against scratches and stains. Apply the protective finish carefully with a brush or a soft cloth, following the manufacturer’s instructions. Allow the finish to dry fully before using the table.
Table Finishing Tips:
- Work in a well-ventilated area to avoid inhaling any fumes from the stain or protective finish.
- When sanding, start with a coarse-grit sandpaper and progressively move to finer-grit sandpaper for a smooth and polished finish.
- Test the stain and protective finish on a small, inconspicuous area of the table to ensure you achieve the desired color and finish.
- Apply multiple coats of protective finish for added durability, allowing each coat to dry fully before applying the next.
By following these steps and taking your time with the finishing process, you’ll be able to transform your DIY table into a stunning centerpiece for your home. With a smooth, stained, and protected surface, your table will not only look beautiful but also stand the test of time.
Adding Personalized Touches to Your DIY Table
Make your DIY table truly unique by adding personalized touches and additional features. With table customization, you have the opportunity to showcase your creativity and make a statement in your home. Let your imagination take the lead and transform your DIY table into a one-of-a-kind piece.
One way to add visual interest to your table is by incorporating decorative elements. Consider carved details or inlays that reflect your personal style or complement the aesthetic of your space. These intricate designs can elevate the overall look of your table and make it a standout piece in your home.
To further customize your DIY table, you can include additional features that enhance its functionality. Think about incorporating drawers or shelves for extra storage, allowing you to keep essentials within reach while maintaining a clutter-free surface. If you often host gatherings or need extra space, consider adding extensions to your table to accommodate more guests.
Remember, the possibilities for customization are endless. Choose finishes and colors that align with your personal taste and complement your existing decor. Experiment with different materials or mix and match elements to create a unique and eye-catching design.
Personalizing your DIY table not only adds a touch of your own style but also makes it a reflection of your lifestyle and needs. Embrace the opportunity to create a piece that is not only functional but also an expression of your creativity.
With table customization, you have the freedom to bring your vision to life and create a table that is truly tailored to your preferences. Don’t hesitate to explore different options and let your DIY skills shine through.
Examples of Personalized DIY Tables
Take inspiration from these examples of personalized DIY tables to spark your creativity:
- A farmhouse-inspired dining table with a distressed finish and hand-painted floral details
- A modern coffee table with a built-in succulent planter and hidden storage compartments
- An industrial-style console table with reclaimed wood and metal pipe accents
- A rustic outdoor table with a built-in cooler and space for barbecuing essentials
These examples demonstrate the endless possibilities for adding unique features and decorative elements to your DIY table. Let your personal style and functional needs guide your design choices.
Safety Tips for DIY Table Building
When building your DIY table, it’s important to prioritize woodworking safety to ensure a safe and enjoyable woodworking experience. By taking proper precautions and wearing the right protective gear, you can protect yourself from potential hazards and accidents.
Follow these safety tips to stay safe while building your DIY table:
- Wear Safety Goggles: Always wear safety goggles or protective eyewear to shield your eyes from flying debris, wood chips, and dust. Safety goggles provide essential protection and prevent eye injuries.
- Use a Dust Mask: Protect your respiratory system by wearing a dust mask or a respirator while woodworking. Sawdust and fine wood particles can be harmful when inhaled, so it’s crucial to wear a mask to filter out airborne particles and avoid respiratory issues.
- Secure Workpieces Properly: When using power tools, always make sure to securely fasten your workpiece to prevent it from moving or slipping during the woodworking process. This will help avoid accidents and ensure accurate cuts.
- Avoid Loose Clothing and Jewelry: Remove any loose clothing, jewelry, or accessories that could get caught in the power tools or machinery. Opt for fitted clothing and avoid wearing anything that might pose a risk while operating woodworking equipment.
- Keep Fingers Away from Blades and Drill Bits: Exercise caution when using power tools with sharp blades or spinning drill bits. Keep your fingers and hands at a safe distance from these moving parts to avoid accidental injuries.
- Take Regular Breaks: Building a DIY table can be physically demanding. Remember to take regular breaks to rest and prevent fatigue, which can lead to accidents or mistakes. Listen to your body and avoid overexertion.
- Work in a Well-Ventilated Area: Ensure good ventilation in your workspace when working with wood and using finishes or adhesives. Proper airflow helps minimize the inhalation of fumes or potentially hazardous substances.
- Read and Follow Tool Manuals: Familiarize yourself with the instruction manuals of the power tools you’re using. Follow the manufacturer’s guidelines and safety instructions to operate the tools correctly and safely.
By adhering to these safety tips and using the appropriate safety measures, you can enjoy a safe and successful DIY table building project.
Tips for DIY Table Building Success
Building a DIY table requires attention to detail and careful craftsmanship. By following these tips, you can ensure a successful project from start to finish.
- Accurate Measurements: Take precise measurements to ensure your cuts and fittings are perfect. Use a tape measure and level to make sure everything is aligned correctly.
- Test Cuts: Before you start working on the actual table, make test cuts on scrap pieces of wood. This will help you practice the right techniques and ensure a proper fit for your components.
- Attention to Detail: Pay close attention to the details of your table construction. Thoroughly sand the surface to remove any rough spots or imperfections. Check for any gaps or unevenness in the joints and make adjustments as needed.
By implementing these table building tips, you can create a durable and beautifully crafted DIY table that you can be proud of.
Attention to detail and precise measurements are key to a successful DIY table building project. Don’t rush the process, take your time to ensure everything is done accurately.
Troubleshooting Common DIY Table Building Issues
Despite careful planning and execution, issues may arise during the DIY table building process. Here are some common problems you may encounter and tips on how to solve them:
1. Wobbly Table
If you notice that your table is wobbly, the first thing to check is the levelness of the legs. Use a level tool to ensure that all legs are balanced. If there are any discrepancies, you can make adjustments by adding shims under the legs or adjusting the leg attachments.
2. Uneven Surface
An uneven surface can be a common issue when building a DIY table. To resolve this, consider sanding down the surface to make it smooth. Use a sander or sandpaper to remove any bumps or imperfections. If the unevenness persists, adding shims under the legs can also help stabilize the table and create a level surface.
3. Joint Gaps
When joining different components of the table, such as the tabletop or legs, you may encounter gaps in the joints. To solve this problem, you can apply wood filler to fill the gaps and create a seamless appearance. Alternatively, you can make adjustments to the joints to ensure a snug fit. Proper measuring and cutting techniques are essential to avoid joint gaps in the first place.
Remember, troubleshooting these common table building issues requires attention to detail and problem-solving skills. With the right adjustments and techniques, you can overcome these challenges and create a sturdy and beautiful DIY table for your home.

Table 11. Common DIY Table Building Issues and Solutions
| Issue | Solution |
|---|---|
| Wobbly Table | Check the levelness of the legs and make adjustments if necessary. Consider adding shims or adjusting leg attachments. |
| Uneven Surface | Sand down the surface to create a smooth and level tabletop. Use shims under the legs if needed. |
| Joint Gaps | Apply wood filler to fill the gaps or make adjustments to the joints for a snug fit. |
Maintenance and Care for Your DIY Table
To prolong the lifespan of your DIY table, proper maintenance and care are essential. Here are some tips to help you keep your table looking its best:
- Regular Cleaning: Clean the table surface regularly using a gentle cleanser or wood cleaner. This will help remove dirt, dust, and stains, keeping your table looking fresh and beautiful.
- Refinishing as Needed: Over time, your DIY table may develop scratches or lose its original finish. When this happens, consider refinishing the table to restore its look and protect the wood. Sand down the surface to remove imperfections and apply a new coat of finish or stain to give it a fresh appearance.
- Protect from Moisture: Moisture can damage the wood of your table, causing it to warp or develop mold and mildew. To protect your table from moisture, use coasters or placemats for beverages and avoid placing hot or wet items directly on the surface.
By following these maintenance and care tips, you can ensure that your DIY table remains in excellent condition for years to come.
Image: Protecting your DIY table from moisture is crucial for its longevity.
Advantages of Building Your Own DIY Table
Building your own DIY table offers several advantages. It allows you to create custom furniture that fits your style and needs. DIY tables are often more cost-effective than purchasing pre-made furniture. Building your own table also provides a sense of personal satisfaction and the opportunity to develop woodworking skills. Additionally, it allows for customization and creativity in the design process.
When you build your own DIY table, you have the freedom to create a piece of furniture that perfectly complements your personal style and meets your specific requirements. Whether you prefer a rustic farmhouse table or a sleek modern design, DIY furniture gives you the flexibility to customize every detail to your liking.
Not only does building your own table provide a creative outlet, but it can also lead to significant cost savings. By sourcing your own materials and putting in the time and effort to construct the table yourself, you can avoid the markup and expenses associated with store-bought furniture. Plus, you have the opportunity to choose high-quality materials that fit within your budget.
The process of building your DIY table can be incredibly rewarding. From the initial planning and measuring to the final finishing touches, each step allows you to hone your woodworking skills and see your creation come to life. The sense of accomplishment and personal satisfaction that comes with successfully building your own table is unparalleled.
Furthermore, building your own DIY table gives you the freedom to customize every aspect of the design. You can choose the perfect dimensions, colors, and finishes to match your existing decor or create a statement piece. Add unique features such as built-in storage, intricate detailing, or even incorporate reclaimed materials for a truly one-of-a-kind table.
Overall, the advantages of building your own DIY table extend beyond just furniture. It’s an opportunity for creativity, cost savings, and personal fulfillment. So why settle for mass-produced pieces when you can create a centerpiece that reflects your unique taste and style?
Inspiration for Your DIY Table Building Projects
If you’re looking for inspiration for your DIY table building projects, there are plenty of online resources available. Browse through woodworking websites, blogs, and social media platforms to find creative ideas and designs. Explore different woodworking techniques and discover new ways to create unique and functional tables. Let your imagination run wild and take inspiration from the woodworking community.
Woodworking websites:
- Woodworkers Journal – Provides a wide range of DIY table plans and tutorials.
- Popular Woodworking – Offers a collection of woodworking projects, including DIY table ideas.
- Woodcraft – Features articles and videos on table building and woodworking inspiration.
Woodworking blogs:
- Woodworking for Mere Mortals – Provides easy-to-follow DIY table plans and step-by-step tutorials.
- The Wood Whisperer – Offers a variety of woodworking projects and inspiration for table building.
- Sawdust Girl – Features DIY table projects and tips for creating custom furniture.
Social media platforms:
- Instagram – Follow woodworking enthusiasts and search for hashtags like #diytable, #woodworkingprojects, and #handmadefurniture for inspiration.
- Pinterest – Create boards dedicated to DIY table ideas and explore pins from other woodworking enthusiasts.
- YouTube – Watch woodworking channels and tutorials for practical tips and inspiration.
By exploring these online resources, you’ll find a wealth of DIY table ideas and woodworking inspiration to fuel your creativity. Remember to adapt and modify designs to suit your personal style and the specific needs of your space. Happy table building!
Conclusion
Building your own DIY table is a rewarding and fulfilling project that allows you to create custom furniture for your home. With the right tools, materials, and techniques, you can build a table that suits your style and meets your needs. Whether it’s a dining table, coffee table, or end table, the process of building a DIY table enhances your woodworking skills and brings a sense of personal satisfaction.
By embarking on your DIY table building journey, you have the opportunity to showcase your creativity and craftsmanship. You can choose from a wide range of table designs and customize every aspect to match your taste and preferences. Building your own table also allows you to save money compared to purchasing pre-made furniture, and it adds a unique touch to your home.
So why wait? Start your DIY table building project today and enjoy the benefits of handmade furniture in your home. Whether you’re a seasoned woodworker or a beginner, there are plenty of resources available online to guide you through the process. Explore woodworking projects, gather your materials, and let your creativity flow as you build a table that will become a centerpiece in your home.
FAQ
Why should I build my own DIY table?
Building your own DIY table allows you to create custom furniture that fits your style and needs. It is often more cost-effective than purchasing pre-made furniture and provides a sense of personal satisfaction and the opportunity to develop woodworking skills.
How do I choose the right design for my DIY table?
Take some time to research different table designs and consider factors such as the furniture style, table size, and dimensions. Look for inspiration in furniture stores, online catalogs, and woodworking magazines to find a design that you like.
What materials and tools do I need for building a DIY table?
The materials may vary depending on the size and design of your table, but typically include lumber, wood glue, screws, and other hardware. Tools required for the project include a drill, saw, sander, and clamps.
How do I plan and prepare for building a DIY table?
Create a rough sketch of your table design on paper, including the dimensions and measurements. Select the type of lumber you want to use and make a list of the lumber sizes and quantities needed.
How do I build the tabletop for my DIY table?
Lay out the lumber boards for the tabletop according to your design, ensuring a flat and even surface. Use joinery techniques, such as pocket holes or dowels, to securely attach the boards together. Apply wood glue to the joints and use clamps to hold the boards in place while the glue dries.
How do I construct the legs for my DIY table?
Cut the legs to the desired length, ensuring they are all equal in size. Assemble the legs using techniques such as gluing and doweling or using screws and corner braces. Attach the legs to the tabletop, ensuring they are securely fastened.
How do I smooth and finish my DIY table?
Use sandpaper or a sander to remove any rough patches and create a smooth finish. Consider applying a stain or finish to enhance the appearance of the wood and protect it from wear and tear. Apply a protective finish, such as polyurethane, to seal the wood and make it more durable.
Can I add personalized touches to my DIY table?
Yes, you can make your DIY table truly unique by adding decorative elements such as carved details or inlays. You can also customize the table to suit your needs by incorporating features like drawers, shelves, or extensions.
What safety precautions should I take when building a DIY table?
Always wear safety goggles to protect your eyes from flying debris and a dust mask to prevent inhaling sawdust. Follow proper precautions when using power tools, such as securing workpieces firmly and keeping your fingers away from moving blades or drill bits.
What tips can you provide for DIY table building success?
Take accurate measurements to ensure precise cuts and proper fitting of components. Make test cuts on scrap pieces of wood before working on the actual table to ensure the right technique and fit. Pay attention to details such as sanding the surface thoroughly and checking for any gaps or unevenness in joints.
What can I do if I encounter issues during the DIY table building process?
If you encounter a wobbly table, check the levelness of the legs and make adjustments if necessary. If the surface is uneven, consider sanding it down or adding shims under the legs. For joint gaps, apply wood filler or make adjustments to ensure a snug fit.
How do I maintain and care for my DIY table?
Regularly clean the table surface with a gentle cleanser or wood cleaner. Refinish the table as needed to remove scratches or restore the finish. Protect the table from moisture by using coasters or placemats and avoid placing hot or wet items directly on the surface.
What are the advantages of building my own DIY table?
Building your own DIY table allows you to create custom furniture that fits your style and needs. It is often more cost-effective than purchasing pre-made furniture. It also provides a sense of personal satisfaction and the opportunity to develop woodworking skills. Additionally, it allows for customization and creativity in the design process.
Where can I find inspiration for my DIY table building projects?
There are plenty of online resources available for inspiration. Browse through woodworking websites, blogs, and social media platforms to find creative ideas and designs. Explore different woodworking techniques and discover new ways to create unique and functional tables.